What happens when you combine acrylic, SVG & DXF drawing designs from Craft Genesis, and your Cricut or other digital cutting machine? You create a bit of magic, that's what! Whether you are looking for a new way to create keychains, coasters, or an enchanting light for your home decor, using your cutting machine's engraving tool is a unique and clever way to get the job done. Take a look below at our step-by-step tutorial -- it's full of helpful tips and tricks to ensure success when working with this medium!
Designs Used
Before purchasing any acrylic, make sure your cutting machine is capable of engraving on acrylic by referencing your company’s website or handbook. For example the Cricut Maker has the engraving tip, and the Silhouette Curio has the stippling engraving tool for this purpose. Other machines may not be able to engrave on acrylic.
Also, be wary of off-brand tools that are made for engraving on machines that are not meant for engraving. Most companies do not recommend using these tools, and if some damage occurs on your machine while using the off-brand tools, the company could refuse to honor your warranty.
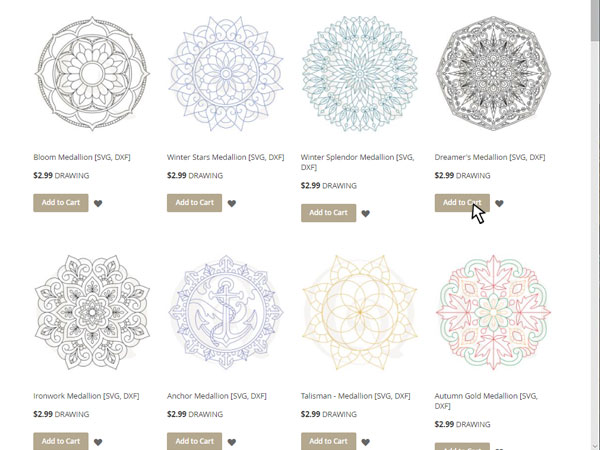
When picking a design to engrave on acrylic, you want to choose something that is made up entirely out of lines, and has no solid areas. Our website, Craft Genesis has many beautiful drawing files that are all entirely made up of lines. All of these designs will work on acrylic, leaving you with many lovely choices to pick from.
Also, keep in mind the size that you’d like the design to be, and how detailed it is. When the lines of the design are close together, they may blur into one line due to the width of the engraving tool. This means if the design has a lot of detail, it will work much better at a larger size. If you’d like to engrave a design at a smaller size, try to pick a design with less lines or a design with more space between the lines, so it engraves on the acrylic more cleanly.
The thickness of the acrylic is also very important. Most cutting machines that are meant to engrave on acrylic will have enough clearance to fit acrylic 1/8in (3.175mm) or thinner under the roller bar. Make sure to double check the clearance on your machine before buying any acrylic.
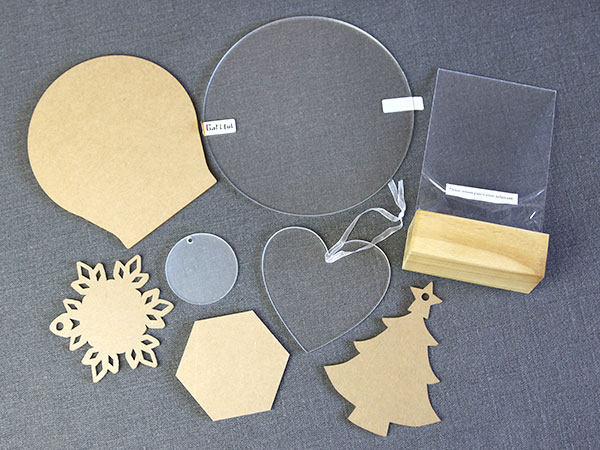
Pre-cut acrylic pieces can be found both online and in some craft stores. They come in many different shapes and sizes. Smaller acrylic shapes with holes in them can be used for ornaments, jewelry, or keychains. Some acrylic pieces even come as sets with light stands to make pretty decor, or other hardware to make earrings or keychains.
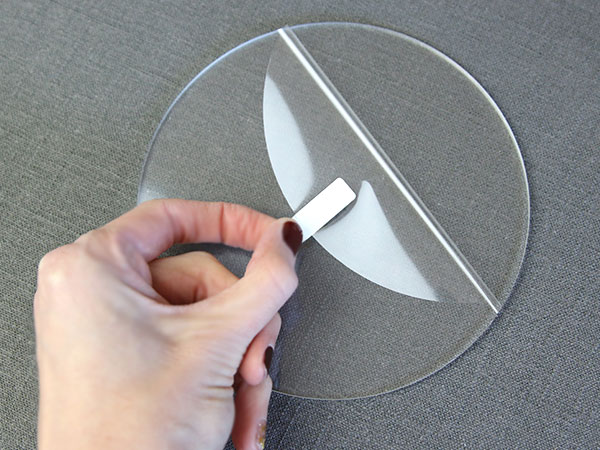
After selecting and purchasing your acrylic and design, it’s time to prepare the acrylic for engraving. Most acrylic will come with a protective film on both sides to protect it from dust and scratches.
First, remove the protective film from one side of the acrylic piece only. You will want to remove it from the side you are engraving on, but leave the film on the opposite side to protect the acrylic from the mat.
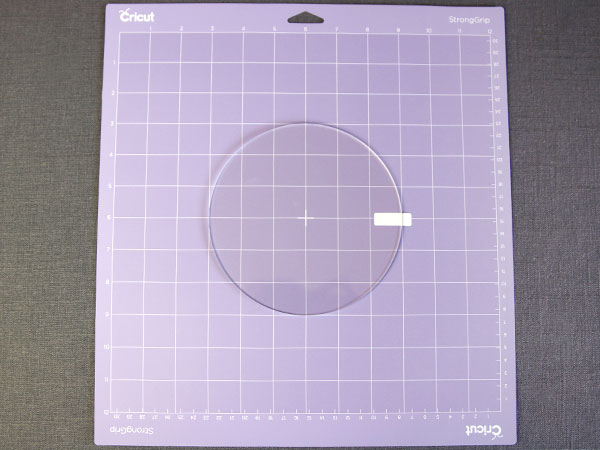
Using the grid, roughly center your acrylic piece on your cutting mat with the engraving side facing up. Paying attention to how the acrylic piece lines up on the grid is very important. This grid will be how we line up our design in the program to make sure it engraves in the correct place.
If your acrylic shape doesn’t perfectly match up with the lines like our circle when centered, instead, position the acrylic piece (still in the center area of the mat) so both the top and left edges of the acrylic match up perfectly with a line.
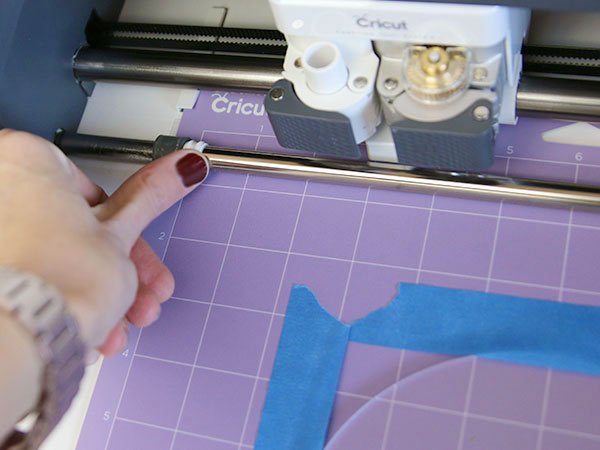
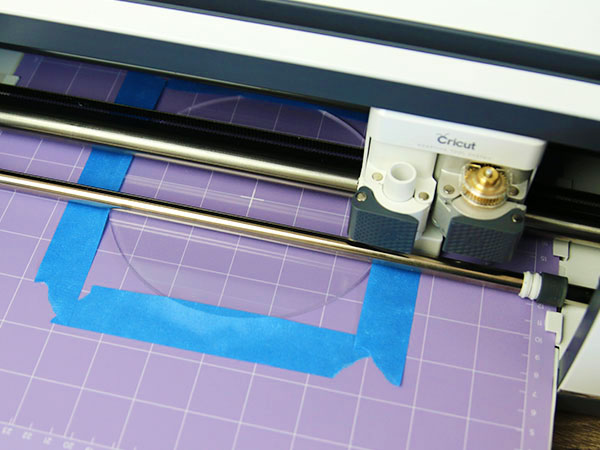
We are using Cricut’s Strong Grip Mat. Make sure to use a very strong and sticky mat, so the acrylic doesn't shift while engraving.
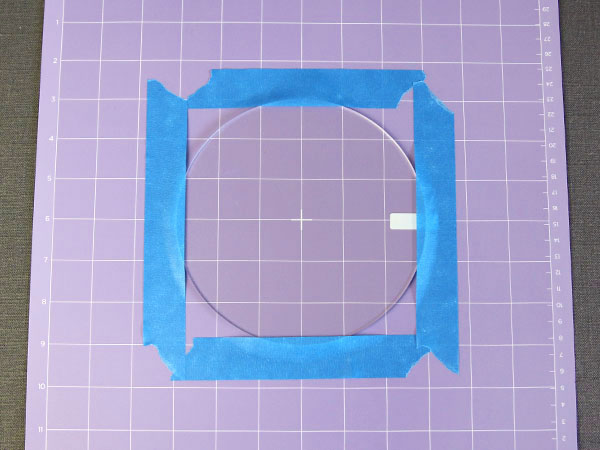
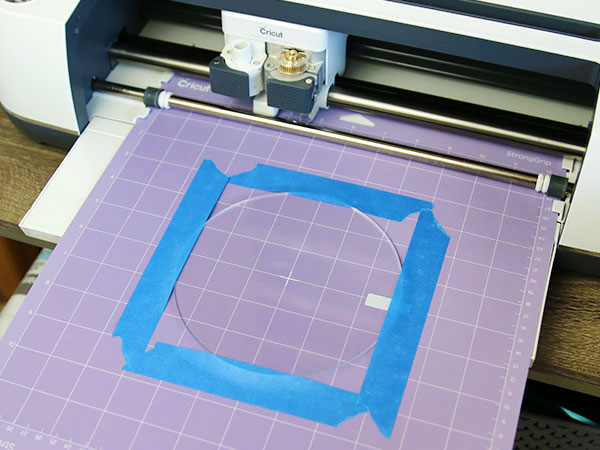
For best results, use painter’s tape to hold down the edges of the acrylic as well. This adds an extra layer of security to prevent the acrylic from shifting.
Make sure the tape is not where the engraving design will be. If the machine tries to engrave over the tape, it will not engrave into the acrylic well, and can ruin the whole design.
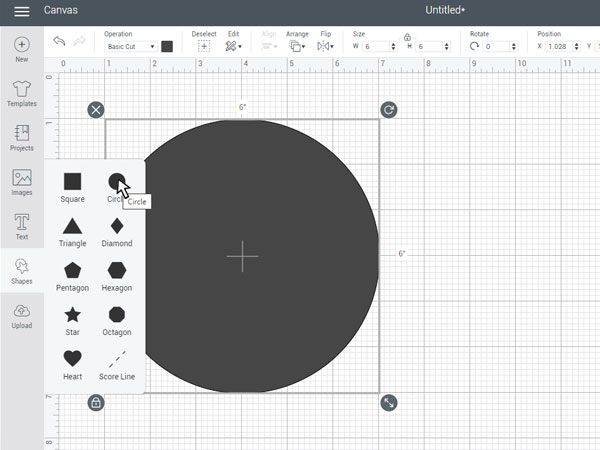
Set the mat aside on a flat surface while you prepare the file in your cutting software. To help line up the design in the software, we will first create the shape of the acrylic. Measure your acrylic, and make a shape as close to your acrylic piece as possible. For example ours is a circle with a 6in diameter.
For more complex shapes, you can create a shape that is close to your acrylic but simplified. For example, if your acrylic was in the shape of a mason jar, you could just make a rectangle that was the same height and width as the acrylic piece. Then just be careful the design doesn’t go over the edges of the mason jar by comparing the grid on the mat to the grid in the program.
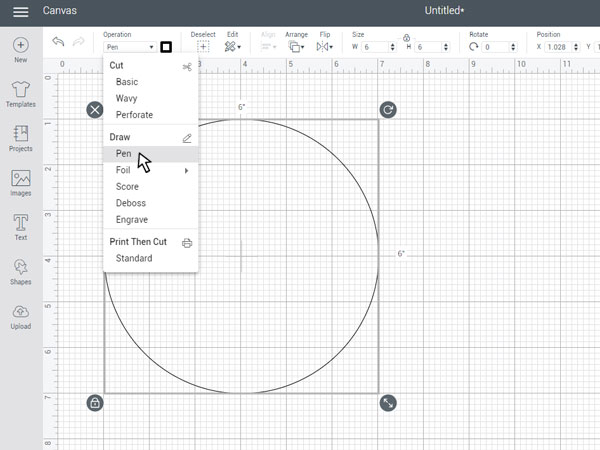
After your shape is made, set it as “draw pen” (or the equivalent on your machine’s brand) to keep it separate from the actual engraved design. When we run the actual design later, we will run it without a drawing tool in the machine. This way it will go through the motion, but not touch or write on the acrylic piece.
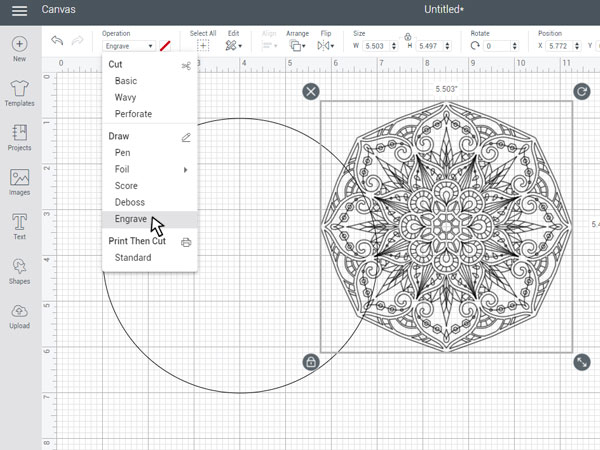
Next drop the design into the cutting program. Make sure to set it to the engraving setting in your cutting software. For our Cricut machine that option is called “engrave”.
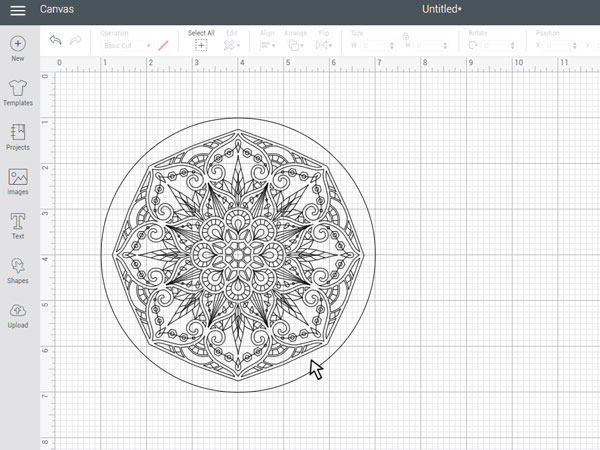
After both sections are set as the proper type, position the design inside of your shape as desired. You may need to adjust the size of your design to get it to fit nicely on your acrylic shape.
If your acrylic shape is more complex than the shape you made in the program (like the mason jar example we talked about earlier), line them up with the grid in the workspace, and use that as a reference. Be careful that the design will not fall over any of the edges of the acrylic piece.
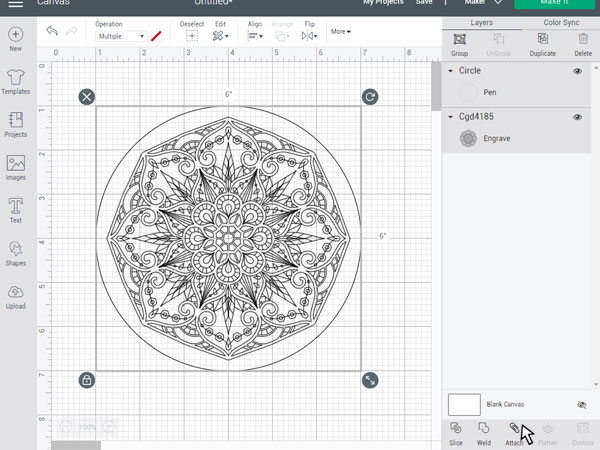
Then attach the shape and the design together in the program. When attached, you want the shape and the design to remain two different objects (1 drawing and the other engraving), but have them stuck together how you positioned them (so they do not reorganize and separate when the machine puts them on the mat to start crafting). In Cricut this is called “attach” but it may be called something else in different programs.
Move to the next part of your cutting software where you select the material settings, and see the design on the mat. If your design and shape separate (the design doesn’t stay on the shape how you positioned it), or if both the shape and the design are 1 step, go back to the workspace as they are not attached correctly.
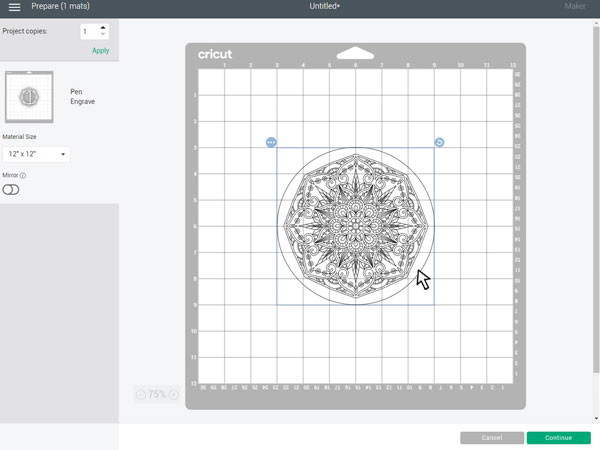
If they are two separate steps (1 drawing and 1 engraving) and positioned correctly still, grab your mat with the acrylic on it for reference. Look closely at how the edges of the acrylic match up with the mat’s grid, and move the shapes in the program so they match that exactly. Once both the acrylic in real life and the shape in the program look positioned on the mat the same, move onto the next step.
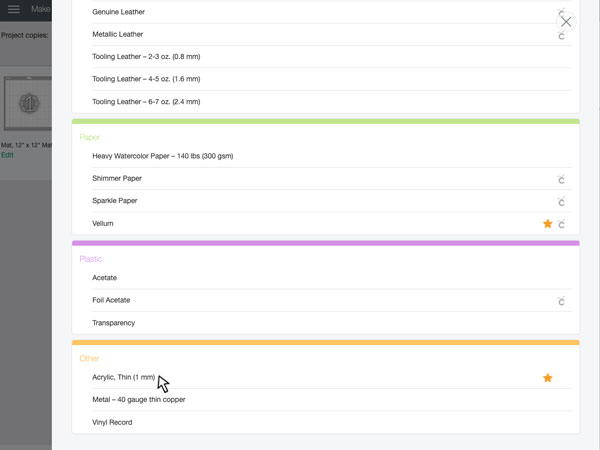
Select the appropriate settings for your cutting machine to engrave on acrylic. This may take some testing to find the perfect one for your machine and the acrylic you have purchased. For the Cricut Maker, we used the “Acrylic thin (1mm)” setting.
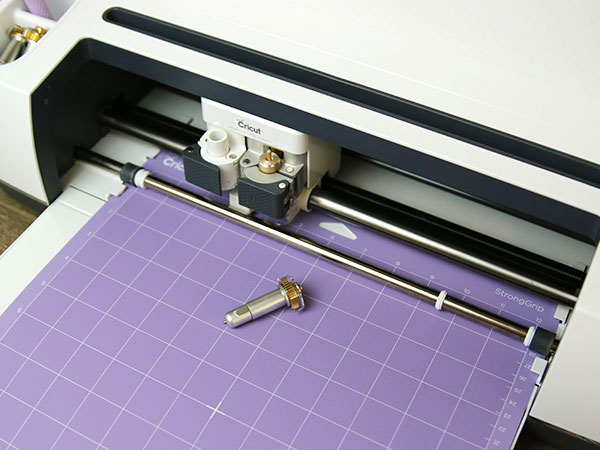
Most cutting machines have little wheels or feet on their roller bar to assist with pulling the mat in and out of the machine. These wheels can damage the acrylic or push it out of place.
Make sure to move the wheels, so they will not touch the acrylic piece at all before starting the design.
Once the acrylic is securely in place, the design is ready in the cutting program, and the wheels on the roller bar are moved out of place, load the mat into the machine.
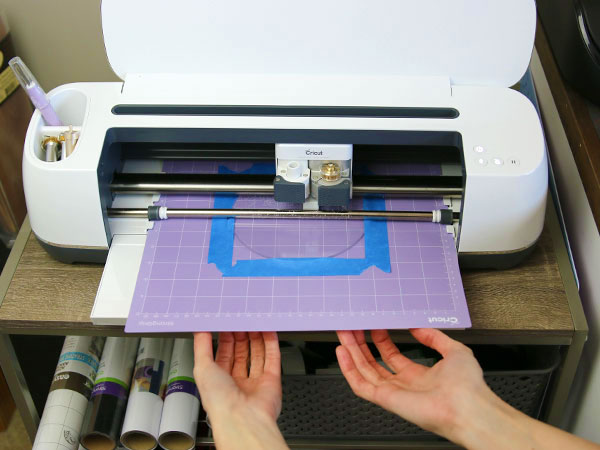
Acrylic is a lot stiffer than the mat, so it is very important to make sure the mat stays flat the entire time it is loaded into the machine and cutting.
You need to make sure the mat cannot bend or curl at all. If it bends, the acrylic can start to separate from the mat. For best results, simply support the mat by resting you hand gently under it while it’s in the machine. Do not hold onto the edges of the mat, instead allow it to glide over your hand so you don’t affect the motion of the machine at all.
Then start the design on your machine. For the section where it traces the outside of the acrylic piece, simply allow it to do this with no drawing tool in place. That way it will not touch the acrylic at all.
If this happens before engraving, it can also be helpful to watch it trace the acrylic shape. If it traces it perfectly then you know your design is lined up correctly in the program. If it doesn’t, you can cancel the cut on your machine and adjust it in the program as needed.
For the engraving section, simply allow your machine to engrave out the design, while gently supporting the mat.
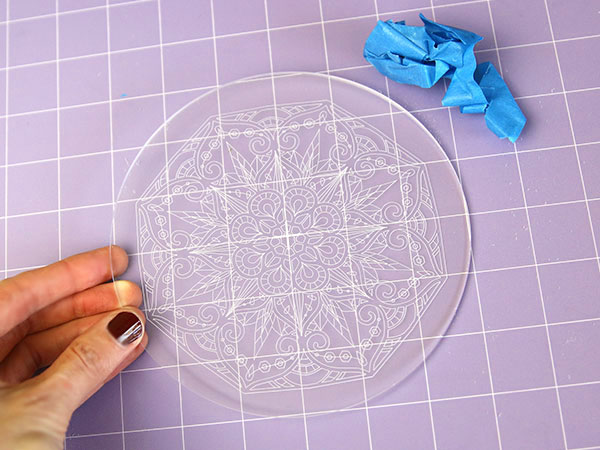
Once the engraving is complete, remove the tape and acrylic from the mat. Be careful not to get fingerprints not the acrylic if possible. Then also remove the protective film off of the back side of the acrylic piece.
You can use a canned air or really soft paint brush clean off any acrylic debris sticking to the design. You can also use a microfiber cloth to clean off any fingerprints.
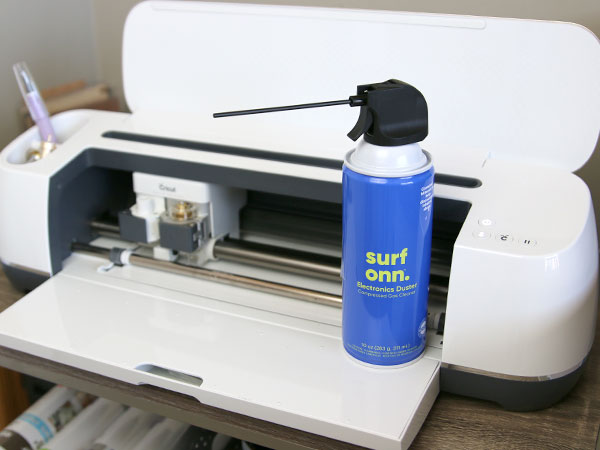
Canned air can also be used to remove the acrylic bits and debris from your cutting machine. Just be very careful what directly you're spraying the air. Don't spray the debris into the inner working of the machine. Instead, be sure to spray them out the front or back openings. Then, sweep up the acrylic pieces with a small broom.
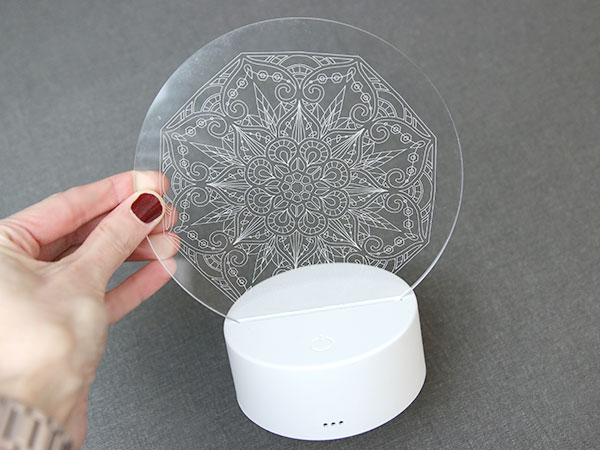
For this tutorial, we engraved onto an acrylic disc that fits into a light up stand. This makes a beautiful piece of home decor, or even a lovely gift. After inserting the acrylic into the stand, a microfiber cloth can be used again to remove any fingerprints you made.
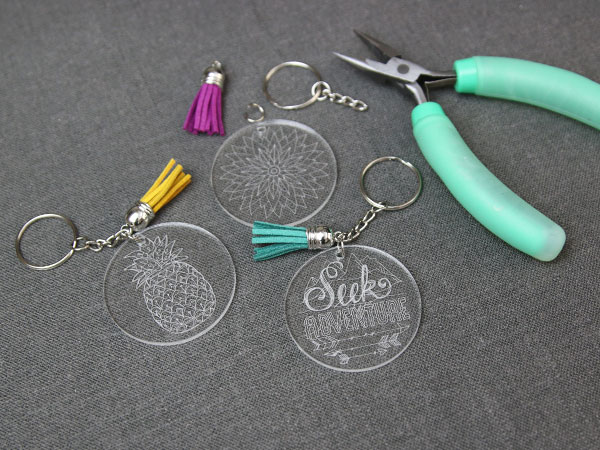
Engraved acrylic is incredibly versatile and can be made into many other unique projects by adding the correct accessories to it. Attaching hardware to it can make a key chain, bracelet, or earrings. Tying on a hanger makes it into a modern ornament. Sticking small rubber or felt feet on the bottom makes a pretty coaster. The acrylic could even be hung in a window like a sun catcher, and more.
Now that you've discovered engraving acrylic with your cutting machine, your crafting adventures are only just beginning! Explore beautiful and unique drawing files that will take you from sea to sky and back again. We have stunning nautical treasures, flourishing blooms, and even art inspired by vintage market signs. Take a look!


