Genuine and faux leathers are amazing, versatile materials to create with on your Cricut, Silhouette, or other cutting machines. They can turn a simple project into something durable and beautiful, but they can be intimidating and complex to cut. This guide will help you with the basic tips and tricks of working with these materials, while also sharing inspiration for fun projects, modern accessories, and beautiful gifts that you can create.
Test Cutting
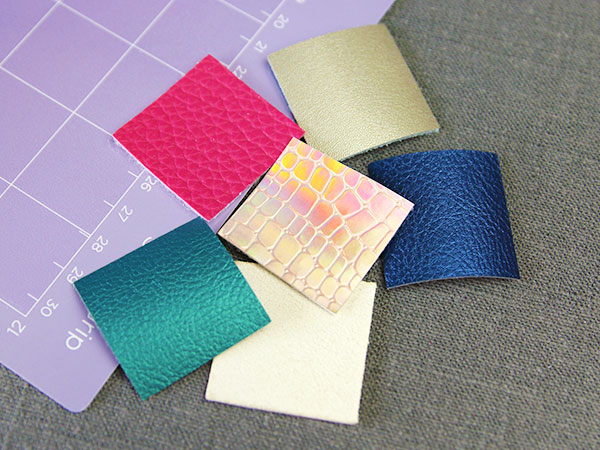
Always test cut the leather or faux leather before cutting out your design. This will prevent wasting material and a lot of frustration, and then when you find a material that works, write it down with the settings and materials you used, so you can always have that information.
Test cutting is by far the most important thing to remember when working with genuine or faux leathers. Both come in many different varieties and styles, and the thickness, finish, stiffness, texture, and even just how it’s made can all affect how well it cuts on a cutting machine. You might even find two different faux leathers that are both the same brand, but only one will cut on your machine due to some minor difference in how they feel or look.
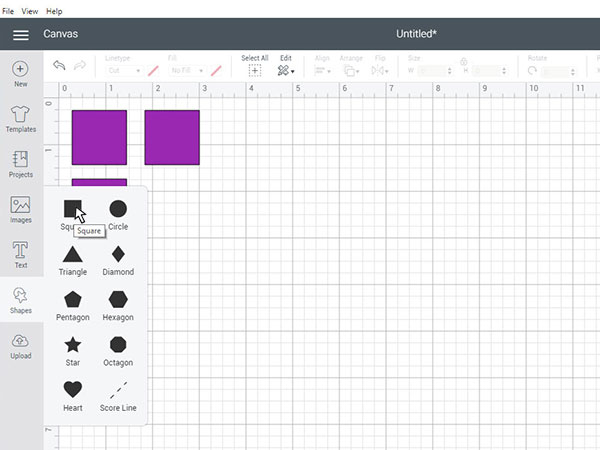
When test cutting, you don’t need to waste a lot of materials cutting out a whole design. You can just cut out small shapes. Even cutting a 1” - 2” circle or square works great to test all the variables, and ensure your design will cut out nicely when you start on your actual project.
To test cut, you will simply follow the cutting steps below to cut out a small shape rather than a design.
If possible, buy a small piece of the leather or faux leather that you have chosen first. By buying only a small piece, it allows you to go home, and test cut to make sure the material will work with your machine before you commit to a larger purchase. This can be especially helpful due to the higher cost of leather and faux leather, but especially for genuine leather, buying a small piece (or sample) might not be an option.
Materials
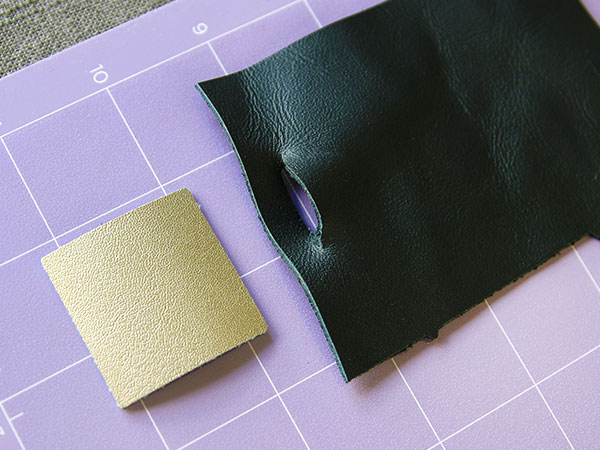
When testing a material, you want to ask yourself a few different questions. Is the material too thick for your machine? Is it stretchy? How dense or stiff does it feel? Does it shed little pieces of itself that will wreck your mat? Does it cut better with the right side facing up or down? Does transfer tape help it cut better? And most importantly, what setting and blade will cut this material most successfully?
This guide will go over all these questions in depth, and help you to be an informed buyer, tester, and creator when using leather or faux leather for your cutting machine projects. It is best to read this whole guide before cutting anything.
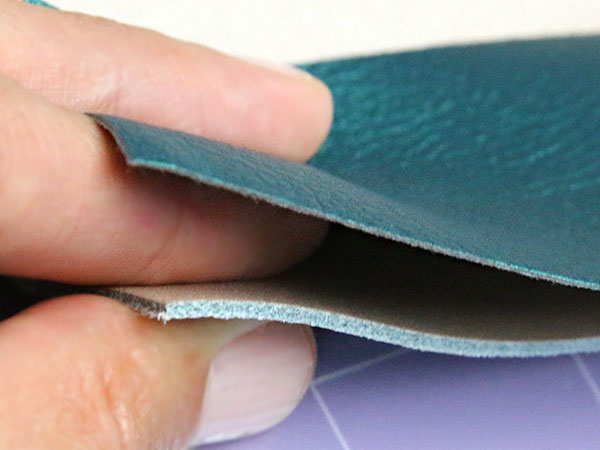
One of the most important things to keep in mind when cutting genuine or faux leather on a cutting machine is how thick is the leather. All machines have a max thickness they can cut. This depends on the blades available to use on your machine (which we will talk about in depth later), and the height of the roller bar that rotates to pull the mat in and out of your machine. The roller bars height (or clearance) differs by brand and model, so you will simply have to look it up. Most machines allow for either a 1mm or 2mm clearance under the bar.
For faux and genuine leather, its thickness is usually measured in mm or ounces. This means most machines will either cut up to 1mm (3 oz) or up to 2mm (4-5oz) leather. It just depends on the roller bar height and blades available.
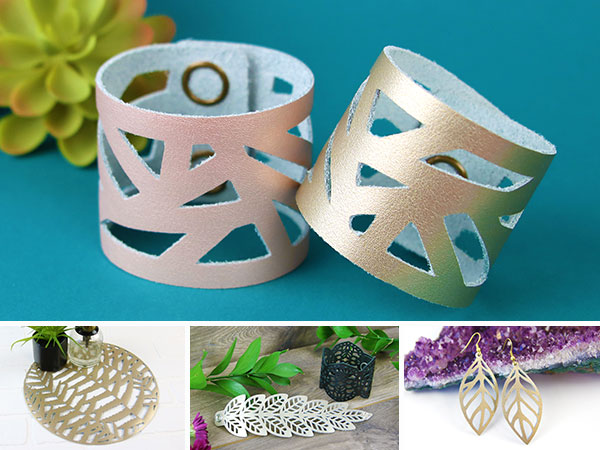
Genuine leather is a material made out of the hides of various animals. When shopping for genuine leather, you will find it in many varieties. It can be made dyed or un-dyed, thick or thin, stiff or soft, and can even have different finishes. Genuine leather generally comes in two forms, vegetable tanned (which is un-dyed) or pre-dyed leather.
Genuine leathers can typically be found in leather shops, some fabric stores, and online. It is important to remember that some leathers may just not cut well on your machine. This can be for a variety of reasons, and is not always predictable.
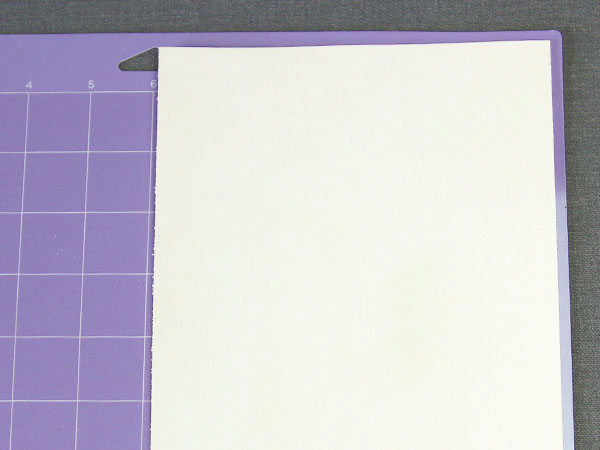
The most common un-dyed leather is called “tooling leather” or “veg tanned/tan” (short for “vegetable tanned”). Veg tanned leather is a naturally tanned leather. This tanning process makes it a very versatile material. This means it takes paint and dye very well. You can even leave this leather its natural color, and it will darken and age over time, giving it a warm brown or red color. Veg tanned can also be tooled using stamping tools and a mallet, and if soaked in water (until no more bubbles rise up) this leather can be molded into any shape that it will hold once it completely dries.
It comes in almost every thickness, and it is usually very stiff. Stiff leathers usually cut a little easier on cutting machines than soft, stretchy leathers as long as a sticky mat and a sharp blade are used. The most important thing for cutting veg tan is to make sure it is not too thick for your machine, and that it cuts all the way through.
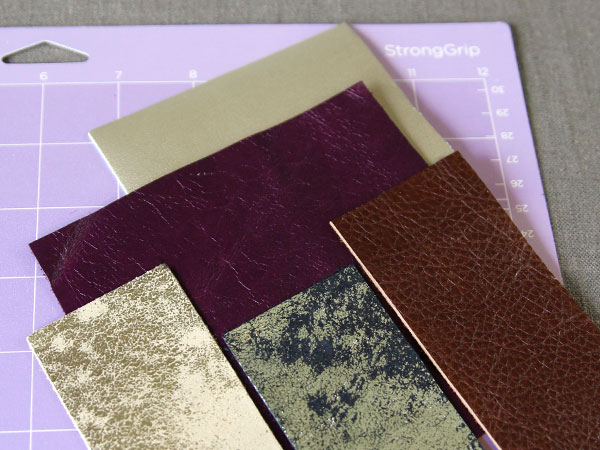
Pre-dyed leathers are made in every thickness and stiffness, and they come in many beautiful colors, textures, and finishes. You can even find this leather in metallic or a print. As they are usually tanned, dyed, and sealed with chemicals, they typically will not dye well, but you can paint them with acrylics.
A lot of dyed leather is soft and pliable, and can even have some stretch in it like a fabric. This is usually called “garment leather.” This can be a lovely material for cutting machine projects, but since it is soft and stretchy, make sure to have a very sticky mat, a sharp blade, and maybe even some transfer tape ready. These tools will help prevent the blade from pushing or stretching the leather while it cuts which can lead to shifting problems or even jam your machine.
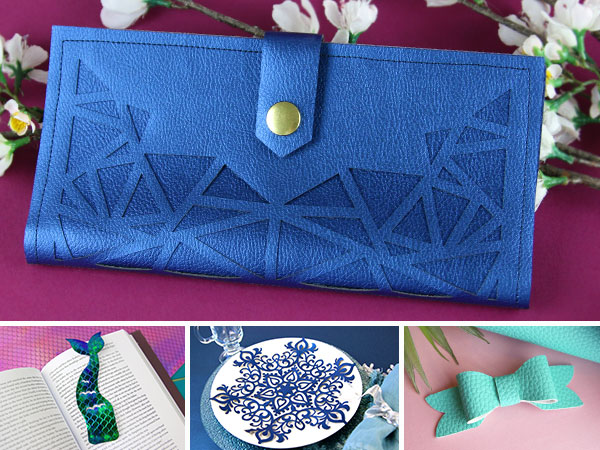
Faux leather is a material made to resemble genuine leather, but it not made from animals. It also comes in many stiffnesses, thicknesses, colors, finishes, and textures. There are thin faux leathers (which comes on rolls or in sheets) that are made specifically to cut on cutting machines, and faux leather fabrics (which comes by the yard, or as sheets and rolls).
Faux leathers can be found in most craft stores, fabric stores, and online. It is important to keep in mind that some faux leathers may just not cut well on your machine. This can be for a variety of reasons, and is not always predictable. Sometimes one color of a faux leather brand will cut fine, but another color or texture of the same brand will not. When possible, buy a small piece, and test cut it before committing to a big purchase.
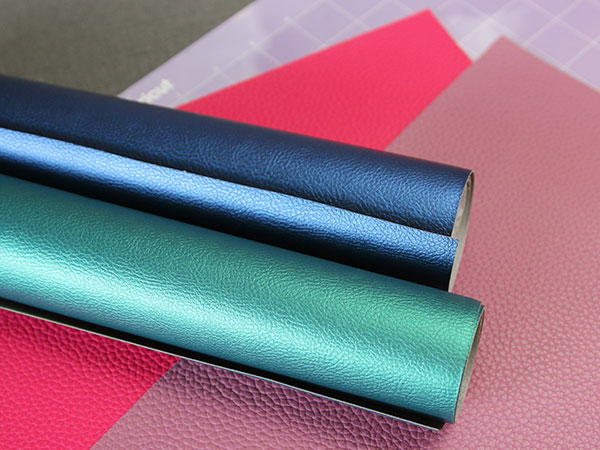
Some crafting and cutting companies have created a thin faux leather that is made to specifically cut on a cutting machine. This material is thin and usually has minimal stretch. With the right side down against the mat, it cuts great with the basic blade that comes with most cutting machines. Just make sure the mat is sticky enough to hold it in place. This thin faux leather usually is sold on a roll or in sheet form, and it can be found in many fun colors, patterns, and even textures.
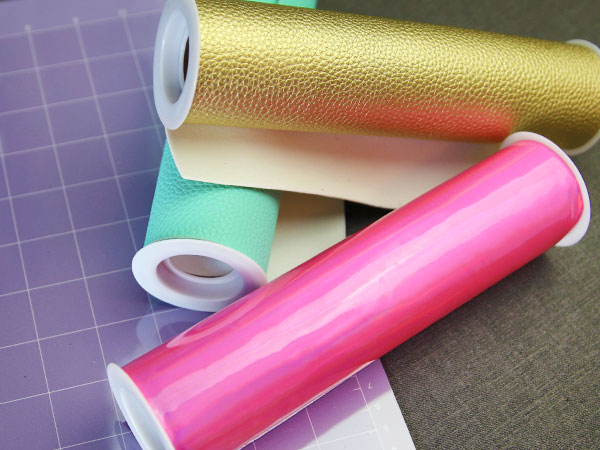
Faux leather fabric is a versatile material that comes in a variety of colors, patterns, textures, and styles. Most of these fabrics will have a fabric backing that can be anywhere from a felt to a synthetic mesh. Besides just “faux leather fabric,” this material can be found under a variety of names such as pleather, vinyl, leatherette, faux leather sheet, faux leather vinyl, faux leather ribbon, and more. When purchased by the yard faux leather is usually categorized with the upholstery fabric.
This fabric is generally very soft and pliable like fabric, but it only sometimes has a lot of stretch to it. For best results, make sure to have a sticky mat, sharp blade, and maybe even some transfer tape ready to help prevent shifting or jamming of the machine.
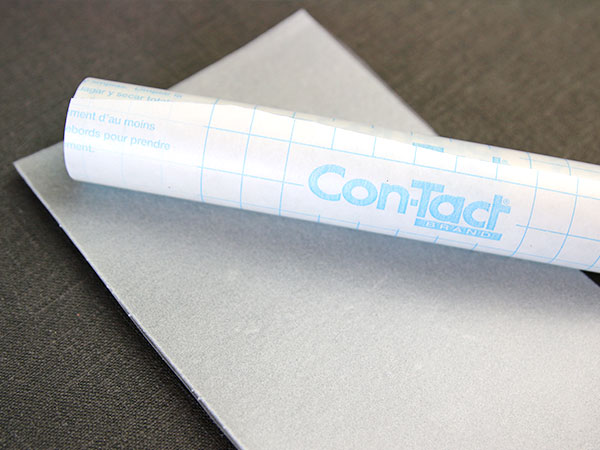
Transfer tape is a great tool for cutting genuine or faux leather on a cutting machine. Contact paper, which is pretty much just a slightly stickier version of transfer tape, can also be used the same way. Transfer tape helps a few different problems.
First, it can protect your mat if you are cutting a leather that sheds little bits or fuzzies. If you place a material like that directly on a mat, it will get covered in those fuzzies and can ruin the mat. To protect the mat, place transfer tape on the wrong side of the material and then smooth it, transfer tape side down, on the mat. This way the fuzzies end up on the tape and not the cutting mat.
Second, if your leather has stretch to it, or is very soft, adding transfer tape to one side can add some structure to the piece while cutting. This means the blade is less likely to push the leather around and cause problems with shifting and bunching up.
Third, if your leather doesn’t stick well to the mat, and the mat is new and sticky, adding transfer tape to the wrong side and smoothing the leather tape side down can sometimes help it stick better. If the problem is that the mat is not sticky enough, transfer tape will not help.
It is best to stick transfer tape to the wrong side of the leather as it usually sticks better, the tape can peel off special finishes, and some stickier tapes can leave behind a sticky residue.
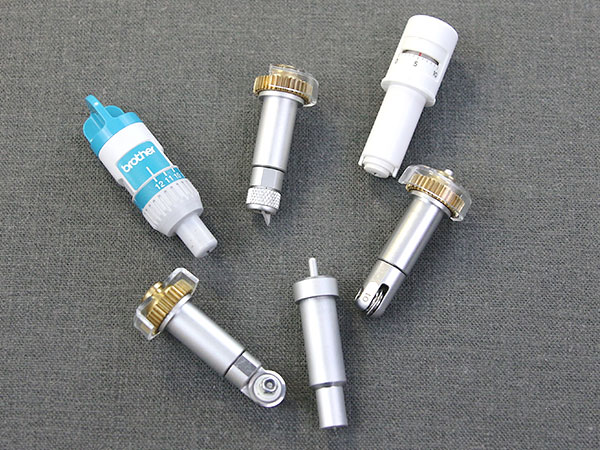
There are several different cutting blades available depending not only on what brand of machine you have, but what model you have purchased. Different blades allow you to cut different materials and thickness. Some newer models of cutting machines have updated features (like more pressure or cutting faster or cutting in less passes). This makes what blade and setting works best differ from machine to machine. This is why test cutting is so important.
No matter what blade you are using, it is very important to make sure it is nice and sharp when cutting genuine and faux leathers. Below are some of the most common blade options across the machines, and what types of designs and leathers they are best used for.
Standard blade, fine point blade, ratchet blade, or premium blade
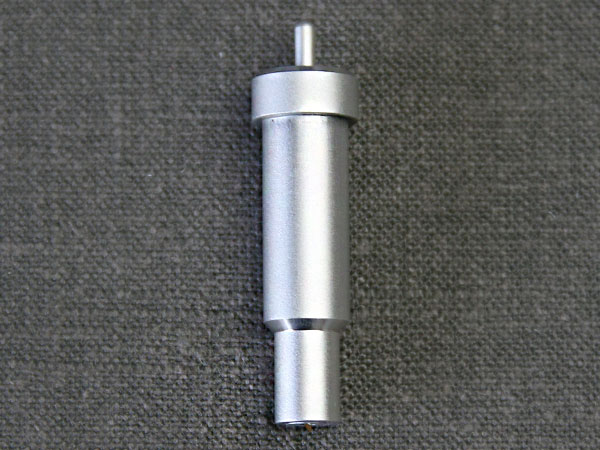
Think of this as the basic blade. It’s whatever comes standard with the machine, and is typically used to cut paper or HTV or vinyl. This blade can cut a high, intricate amount of detail due to the small angled blade. It typically can cut the super thin faux leathers that are made for cutting machines, and no other types of leather. Occasionally you may find another very thin genuine or faux leather that is thin and sturdy enough to cut with this blade, but it is unlikely.
Deep point blade or deep cut blade
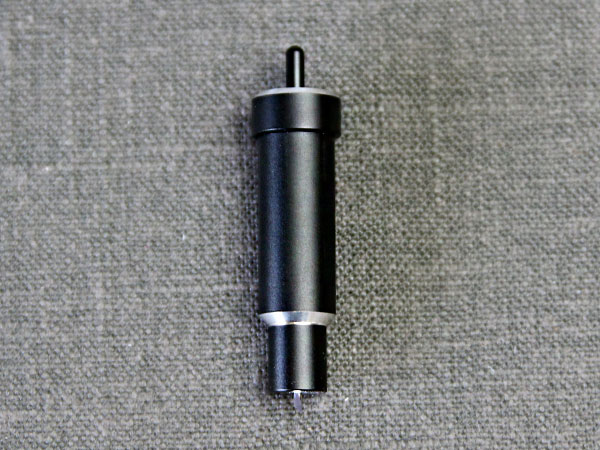
This blade is a step up from the basic blade. It has an angled larger blade, so it can cut deeper than the standard blade, but that also means it can cut less detail. This blade can still cut a decent amount of detail, but stay clear of anything very intricate. Material wise, this blade does well with stiff leathers up to 1mm (3oz) thick, but some machines can even cut up to 2mm (4-5oz) with this blade. For softer leathers, this blade will work great on most machines (sometimes needs transfer tape to work), but if your machine is newer (and has one of the next two blades), sometimes this blade will not work due to the increased pressure, and can cause jamming issues
Knife blade or Kraft blade
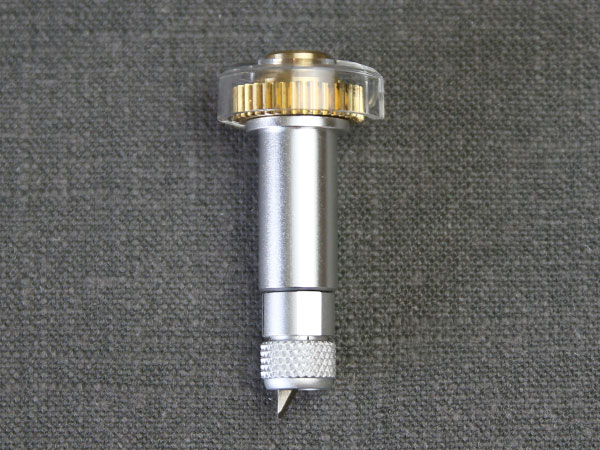
This blade is a step up from the deep point blade. It has an even larger angled blade. This means it can cut deeper materials, but it also means it can cut even less detail. Stick to designs with medium sized details or larger. For stiff genuine leather (like veg tan), this blade cuts amazingly well. Machines with this blade should be able to cut stiff, genuine leather up to 2mm (4-5oz). Soft genuine and faux leathers can be cut with this blade, but the cuts are not always as clean due to the stretch in the material. Transfer paper can also help this blade a lot when cutting stiff or soft materials.
Rotary blade
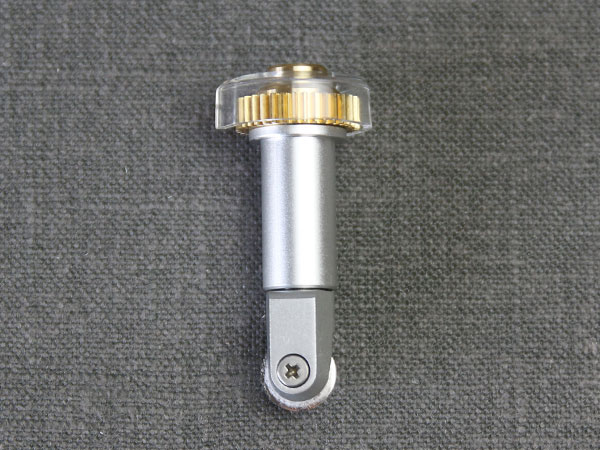
This blade cuts using a round wheel blade rather than the pointed, angled blade. This means the blade has a much wider cut than the others, meaning it cuts the least detail of all these blades. It can still handle most medium detail or larger, just be careful of any areas that could get too thin. Material wise, the rotary blade is made for soft fabrics like the softer faux and genuine leathers. Using transfer tape can still help with some of the stretchier leathers, however. Some rotary blades can cut up to 1mm (3oz), and others can cut up to 2mm (4-5oz). Do not cut stiff leathers with this blade.
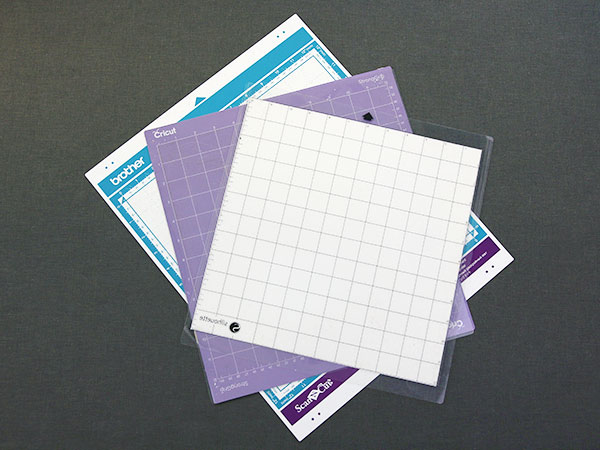
When cutting both genuine and faux leather the most important factor is how well the leather is adhered to the mat. If the leather is not secure enough, a lot of problems can occur. The leather can shift a little, causing the design to cut out warped. The leather can be pushed around by the blade or roller bar causing shifting and bunching that can jam up the machine. Even if you’re using the right setting, a bad mat can ruin the leather once it starts to move.
The strongest grip mat available for your cutting machine is best for genuine and faux leathers. It is very important that your mat is very sticky so the leather has the least chance of moving as possible. Transfer tape can protect mats, and also help leather stick securely to them as discussed earlier, but if the mat isn’t sticky enough, there will be problems.
Also be careful if your leather has a special finish on it (like metallic or glitter) as the mat can sometimes rip that finish off. If you are using a leather like this, test a scrap of the leather in one corner to see if after you peel it up, it leaves some of the finish behind. If the mat rips some of the finish off, cut the leather with the wrong side down against the mat.
Cutting Steps (for designs and test cuts)
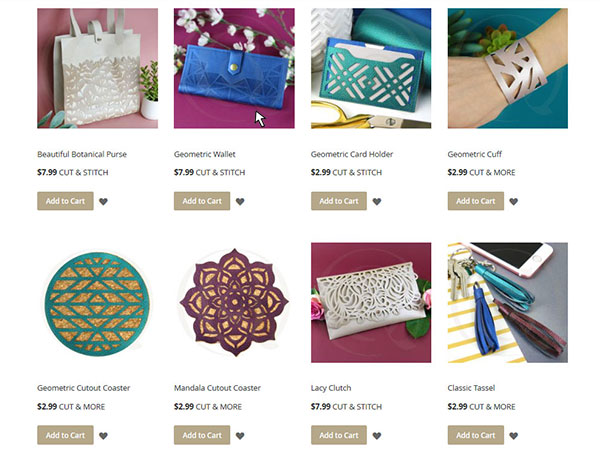
Now that you’ve read all about cutting genuine and faux leathers, it’s time to actually cut something out of your leather. To pick your design, think about the material you are cutting, what blade it cuts best with, and how much detail that blade can cut. There are many different things you can make out of leather like jewelry and bags, or even bookmarks and coasters. Choose something with a detail level that will work well with the blade you need to use.
For test cuts, simply pick a shape about 1”-2” wide to cut out, and continue. Most cutting software programs have tools in them that allow you to easily make and size shapes.
Our website Craft Genesis has tons of cutting files designed especially for genuine and faux leather. There’s tote bags, earrings, hair bows, charger plates, and even more to decorate with, wear, or give as gifts. All of these are original designs created by our own artists.
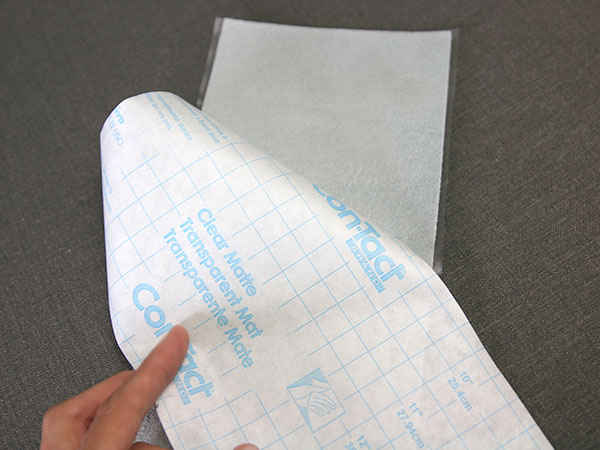
If using transfer tape (or contact paper), cut a piece a little larger than the leather, remove the sheet protecting the adhesive, and smooth the sticky side onto the wrong side of the leather before placing it onto the mat. It can be helpful to trim away any transfer paper that sticks out past the edges of the leather.
Transfer paper usually works best stuck onto the wrong side of the leather. This is because the transfer tape usually sticks better to the wrong side, it can peel off the special finishes, and it also sometimes leaves a sticky residue.
To decide if you are going to use transfer paper, remember the three reasons to use it that we talked about above. Does your leather shed small pieces that will wreck the mat? Is your leather stretchy? Does your leather not stick well to the mat?
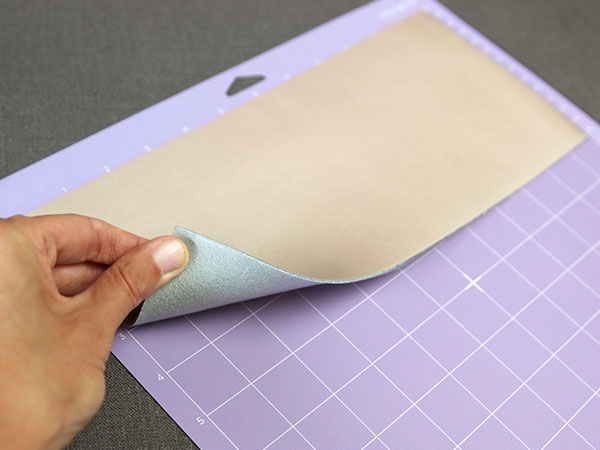
Genuine and faux leathers can be placed on the mat in two ways. Most cut best with the right side facing down onto the mat, but if the right side has a special finish that the mat will remove, does not stick well to the mat, or if the wrong side has transfer tape on it, you may need to place it wrong side down instead. If using transfer tape on either side always place the leather transfer tape down.
Which side down works best is simply another thing you will have to test for. Smooth the leather piece onto the mat with your chosen side facing down. Make sure to place the leather piece where the design (or test cut) will be cutting on the mat.
To save material, you can cut and use just a piece of the leather, rather than covering the whole mat. Simply open the design (or test cut) in your cutting software to find the size. Then cut the piece of leather about 1” wider and 1” taller than the design.
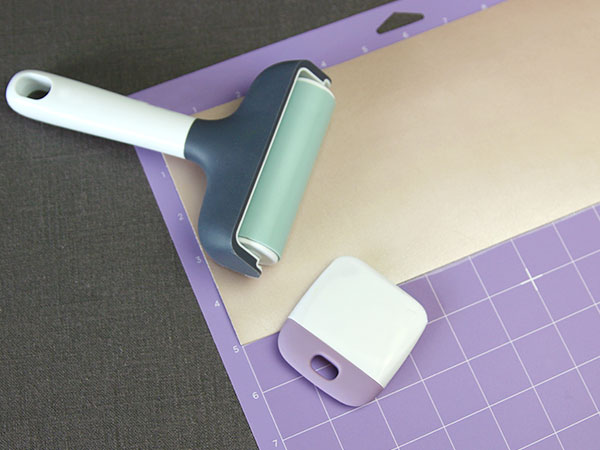
After smoothing your leather on the mat, rub or roll a tool over the leather. This makes the leather stick to the mat better which will help prevent it from shifting while cutting. A brayer tool is made especially for this, and works great. However, if you do not have a brayer tool, you can also use something flat and hard that you can rub firmly on the back of the leather.
Another quick tip for if just the edges of your leather are not sticking well. Take either masking or painters tape, and tape down the edges of the leather. Try to keep the tape away from where the blade will be cutting if possible as the tape can make it harder for the blade to cut all the way through the leather.
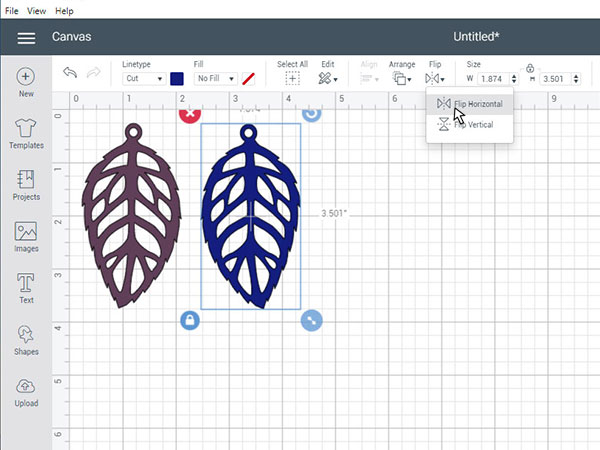
Depending on what side of the leather is down against the mat, you might need to mirror (or flip) your design in your design software.
If your faux or genuine leather is right side down on the mat, you need to mirror the design in the software. If you don’t, it will be backwards after it cuts out. If the wrong side is down on the mat, you do not need to mirror the design.
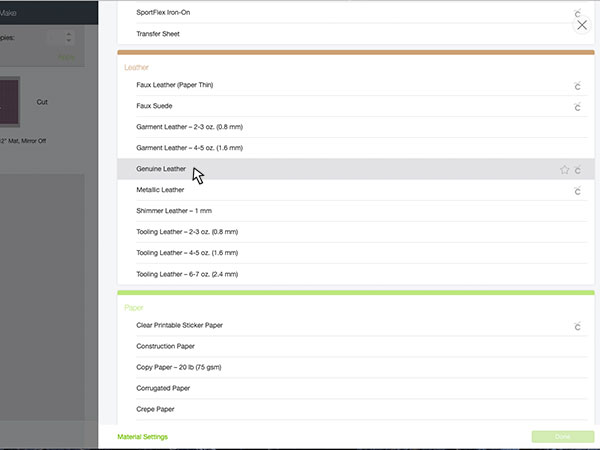
Finding the correct cut setting and blade for your genuine and faux leathers is probably what will take the most time. Every brand and machine will require you to cut your material a little differently. Cut settings have many variables. Make sure to look at what materials the setting is meant for, what blade it uses, how much pressure it is using, how many passes it will take to cut, and (for some machines) what the blade depth needs to be. Some machines even let you pick more, normal, or less pressure to adjust the preset settings slightly.
There are many resources and lists online of settings, their variables, and what materials they are meant for. Use your best judgment, and find the setting that works best for you. Test cut small pieces until you find what works best, and then write down the settings and the kind of leather, so you have it for next time.
When you are ready to cut your design, program in the settings that work for the faux or genuine leather you are using.
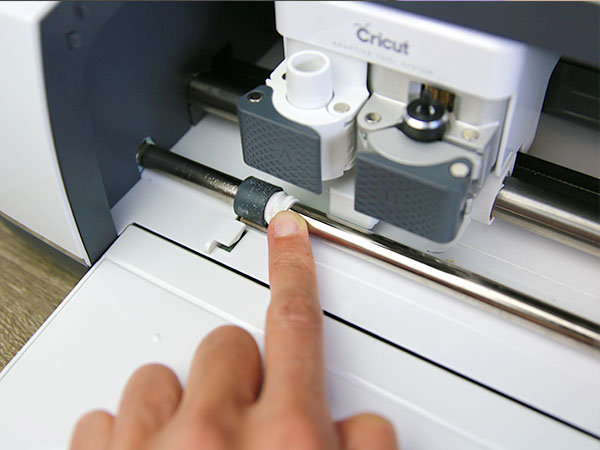
Most cutting machines have small, textured rings on their roller bars. These typically help the roller bar hold onto the mat and move it though the machine.
For faux and genuine leathers, however, these small rings can actually scratch, indent, or ruin your leather. To prevent this, follow the machine’s instructions, and slide these rings out of the way, so they do not touch the leather while it is cutting.
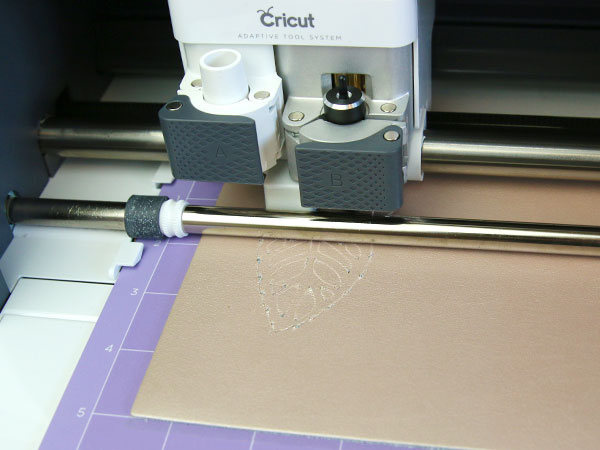
Load the mat and leather into the machine and cut out your design. When cutting faux or genuine leather, it is best to sit next to the machine and watch it cut. This way you can stop the machine if the leather starts to move, bunch up, or jam your machine.
Seeing how or where the problem is occurring can also help inform how you cut out the material differently next time -- whereas if you just see the result, it is not always clear what the problem was that caused it.
If there are multiple pieces or colors to your design, cut them one at a time for best results. Even if the pieces are meant to be the same color or material, cutting them one at a time decreases the likelihood of shifting and other problems. This means that if you cut all the pieces only one at a time, the cuts have a higher chance of being successful.
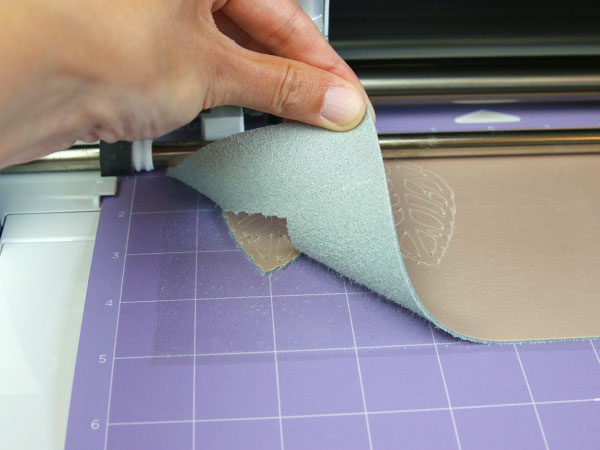
Before removing the faux or genuine leather from the mat, use a small tool to check if it has actually cut all the way though. For best results check in a couple places, and be careful not to shift or move the leather at all.
If it hasn’t cut all the way though, you can simply load the mat back into the machine and cut it again. It should cut right in the same place again since you did not move the leather piece. Make sure to cut with lighter pressure the 2nd time to prevent the blade from just cutting through the mat.
If it has cut all the way through, simply remove the leather from the mat.
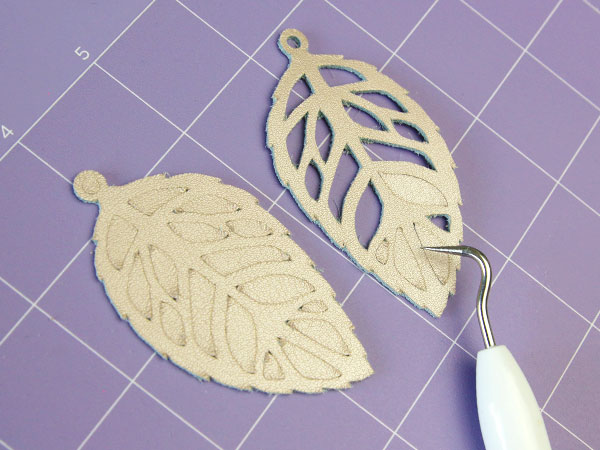
After it is completely cut out, it is time to weed your design. Weeding is where you remove both the excess leather from around the design, and the small pieces of leather from any internal detail.
Using small pointed tools or tweezers can make this process much easier. You can even hold the HTV up to a window or light box. The light shining through the cuts will help you find any small pieces that you might have missed that are not a part of the design.
If using transfer tape, the tape may stay attached to the leather, but it can also stay stuck on the mat. Make sure to remove it off of both the mat and the leather pieces. Using small tools to carefully lift a corner of the transfer tape can really help. Just be careful not to scratch the leather or mat.
Once all your pieces are cut out and weeded, you can finally celebrate and finish your project. Add any hardware you might need, and follow the instructions if there is assembly.
One of the beautiful things about working with SVG, and your digital cutting machine, is that nearly any design -- or part of a design -- can be cut out of leather and faux leather. By working through the above tips and tricks, and adding a little ingenuity, there really is no limit to the creativity that you can achieve when working with leather and faux leather.
Take a look at some of our favorite designs and projects for leather and faux leather and think of ways to make them your own!
Troubleshooting
Material is not sticking to mat
-
Try smoothing material on mat with opposite side facing down
-
Place transfer tape on wrong side, and smooth piece transfer tape side down on mat
- Switch to a stickier mat
Just the edges of material are not sticking to mat
-
Tape edges of material down with masking or painter’s tape
- Place transfer tape on wrong side, and smooth piece transfer tape side down on mat
- Switch to a stickier mat
Material’s right side finish is coming off on mat or transfer tape
- Place material with wrong side down on mat
- Smooth transfer tape onto wrong side, and smooth piece transfer tape side down on mat
Many bits of material come off easily on mat
-
Place transfer tape on wrong side, and smooth piece transfer tape side down on mat
- Try smoothing material on mat with opposite side facing down
Material shifting, bunching, or jamming machine (this usually means the material is not stuck to mat well enough)
- Switch to a stickier mat
- Place transfer tape on wrong side, and smooth piece transfer tape side down on mat
- Replace blade
- Tape edges of material down with masking or painter’s tape
- Try a different setting or blade (especially for stretchy materials)
Not cutting all the way though
- Replace blade
-
If close to cutting through and still on mat, and run though cutting one more time
- If close to cutting through and not on mat, cut again with a little added pressure or blade depth
- Cut using another setting or blade
Cuts are not clean
- Replace Blade
- Try cutting with the opposite side of material facing down on the mat
- Cut using another setting or blade


