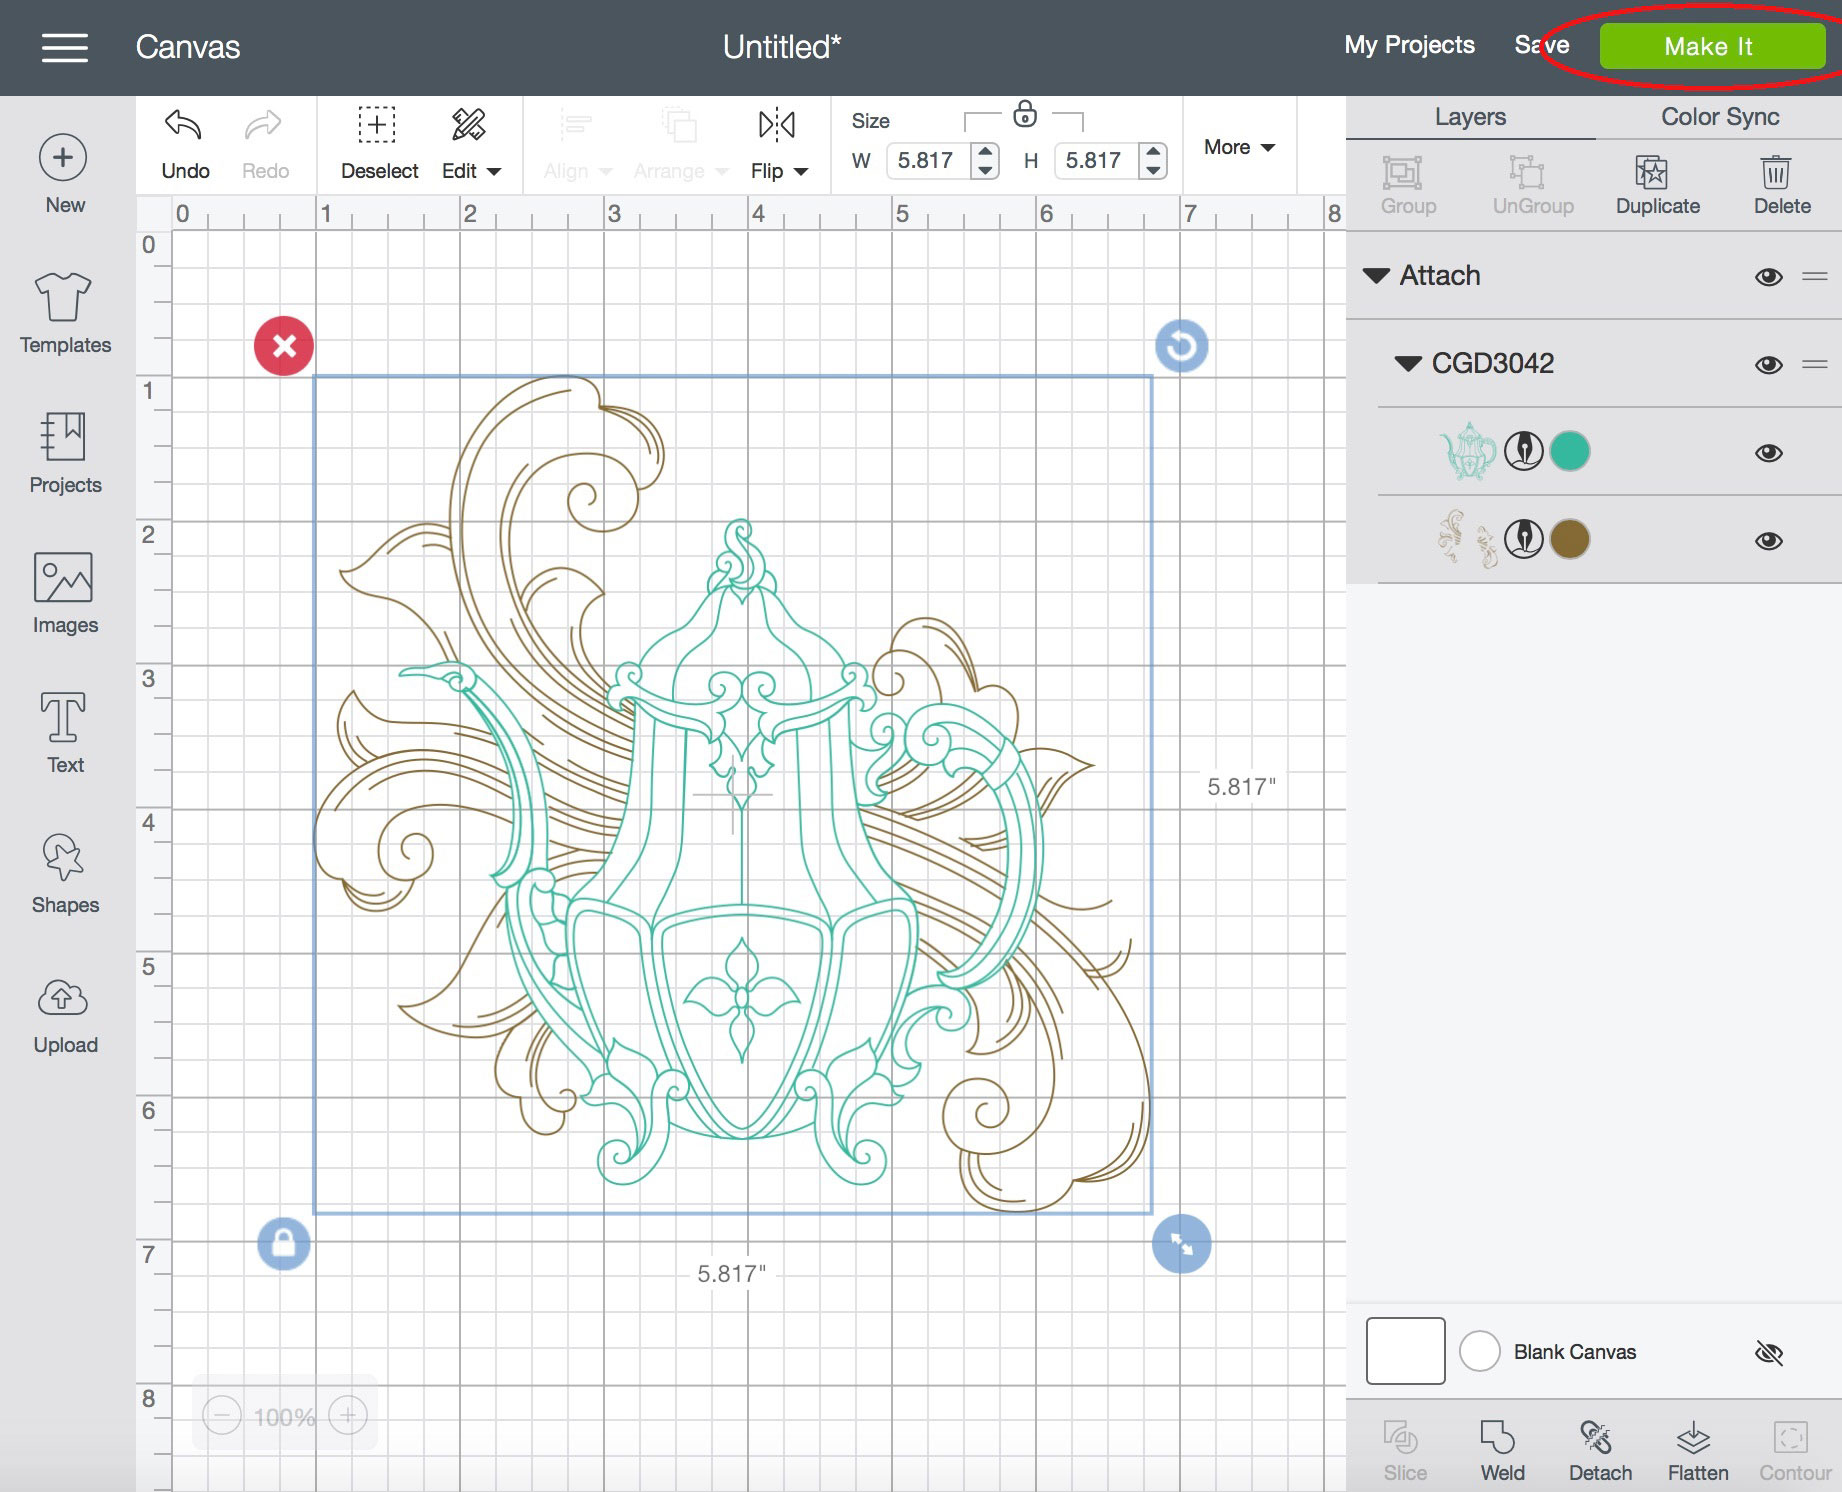
Loading Drawing Files into Cricut Design Space
When you load drawing files into Cricut design space, you may see some areas of the design filled in with color (like the blue areas in the teapot in this example). There is nothing wrong with the design – this is how it looks when it is initially loaded into the software, because the software is viewing the design in cutting mode.
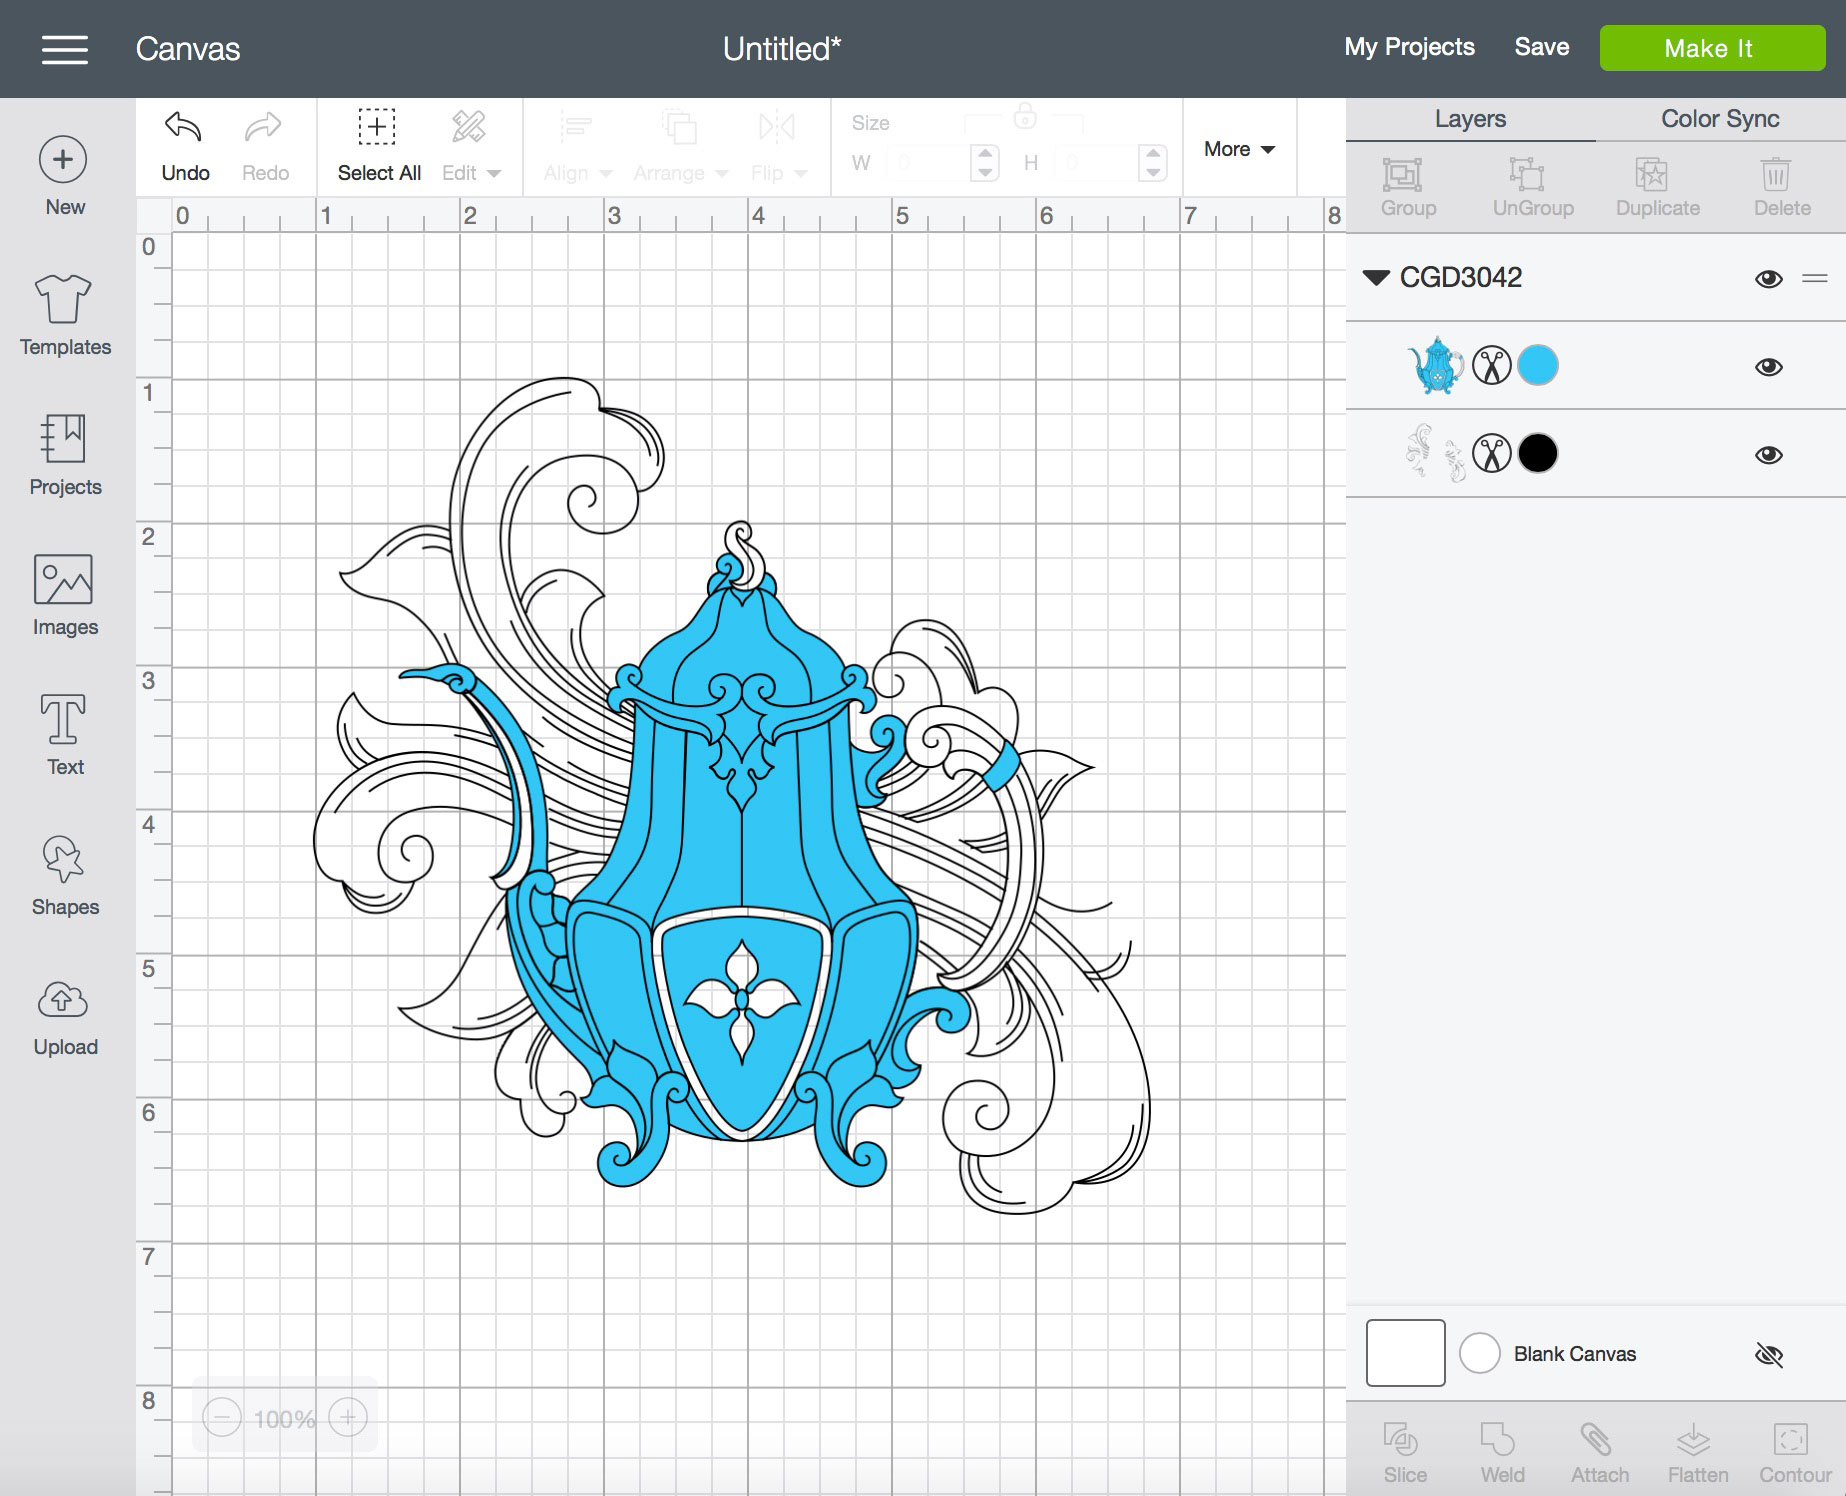
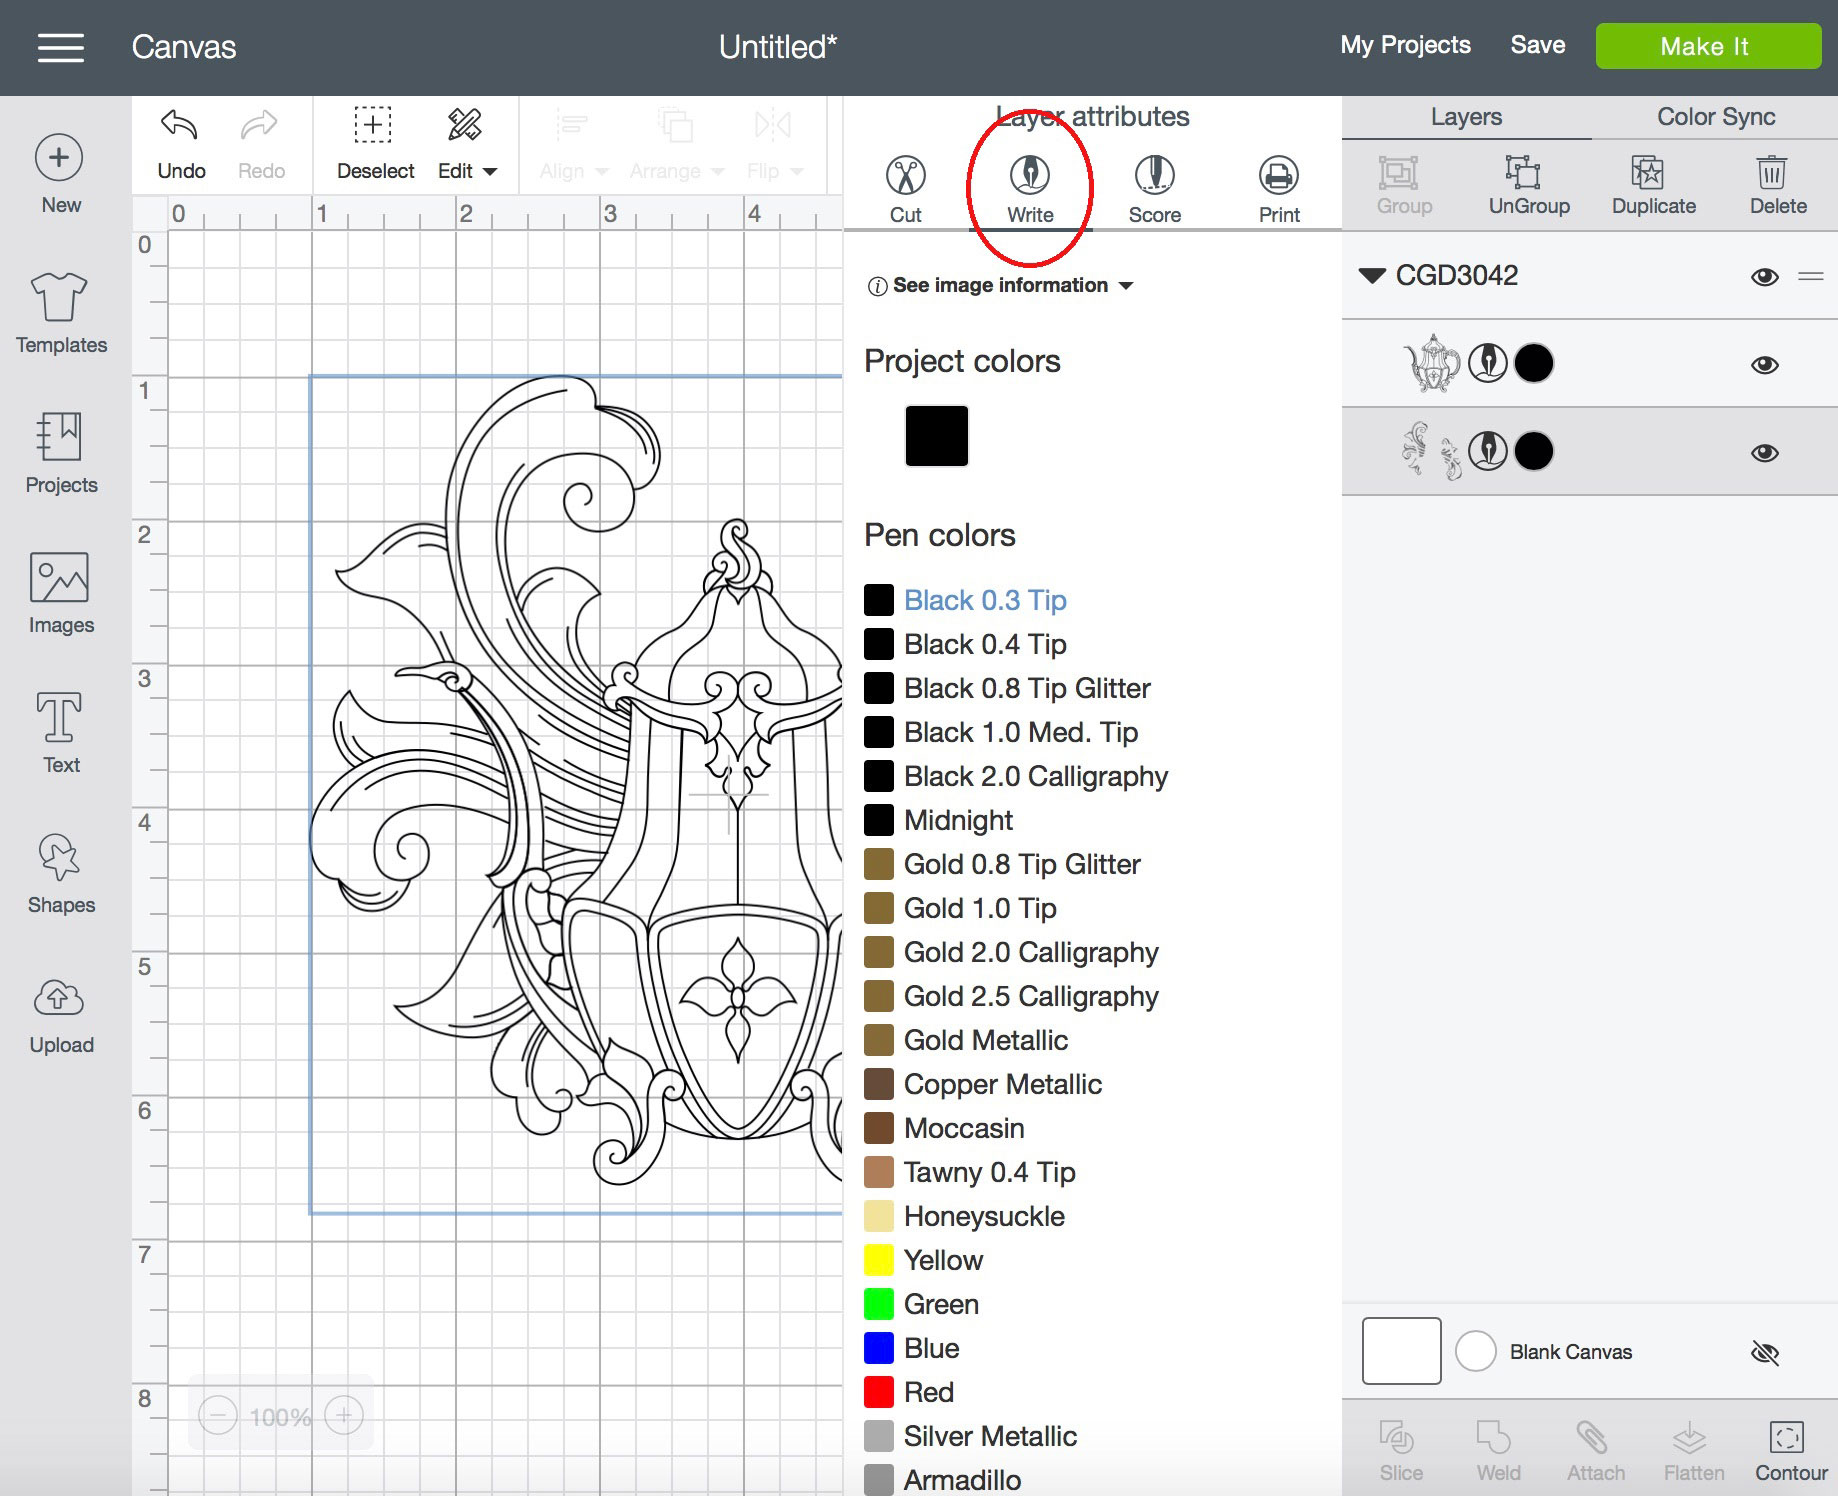
Click the scissor icon next to each color and then click "Write." This tells the machine to write instead of cut. You will see that the filled areas in the design will disappear and only the drawing lines will remain.
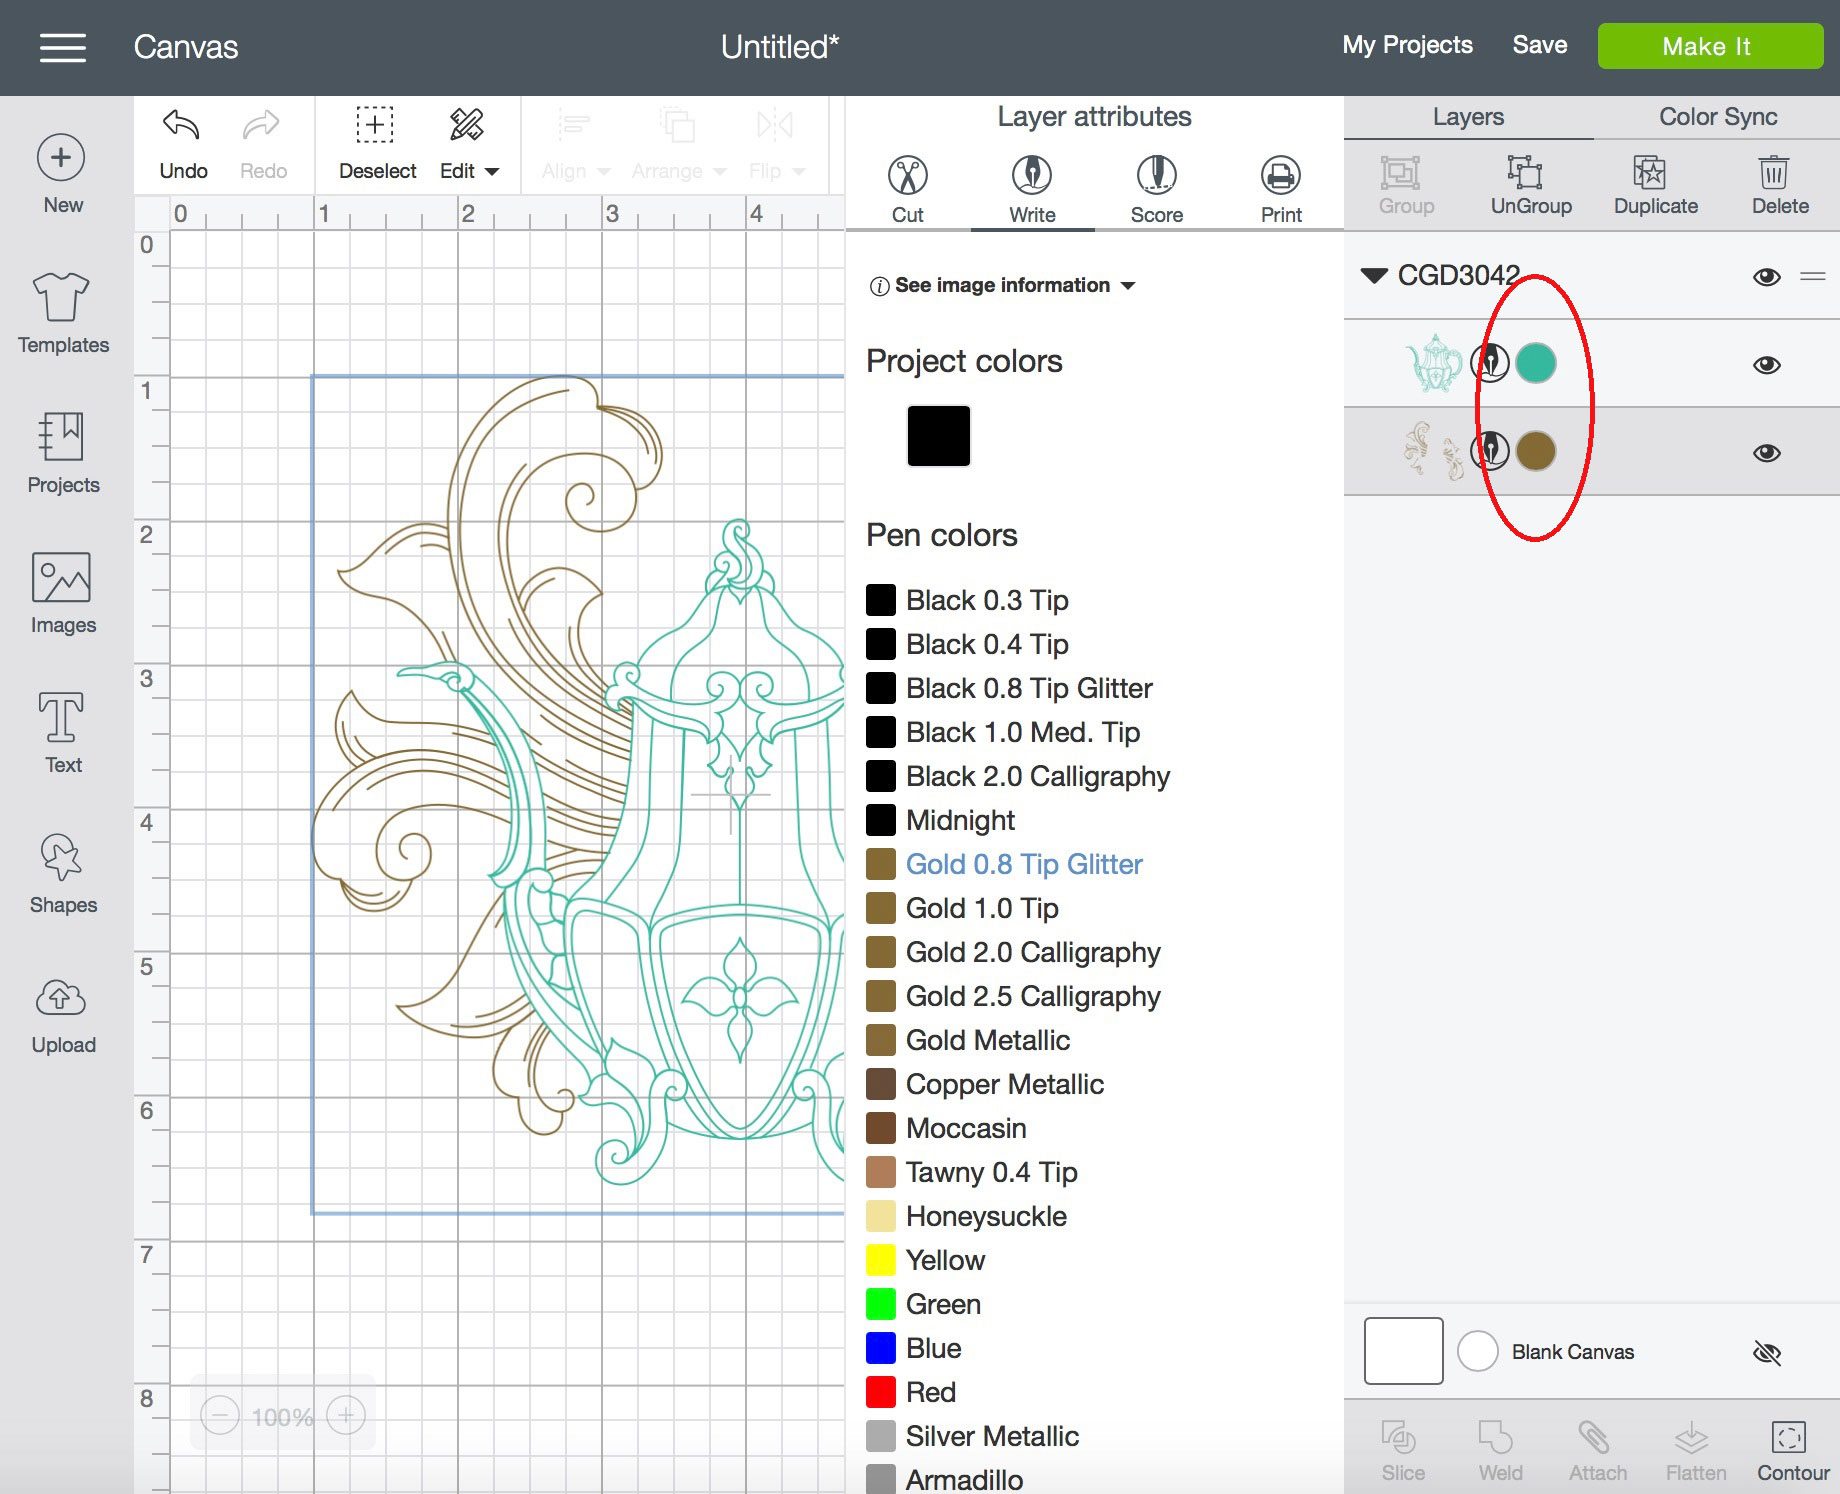
You can also change the color of the design on the screen by clicking the colored dots next to each color section of the design. Click the dot and then choose the color on the left. Then, select the entire design and click "Attach" at the bottom right of the screen. This will group all colors of the design together on one mat.
Once you have chosen your colors, the design is ready to draw! Click the "Make It" button in the upper right of the screen and continue.
