Layered SVG/DXF laser cut shadowbox scenes with an LED light insert are a simple way to add a touch of imagination to home decor and more. Whether you use this type of laser cutting design as a nightlight for kids' rooms, or want new inventory for your burgeoning boutique, this type of design is created using layers of 1/8" wood, frosted acrylic, and glue. Learn how to make your own with help from our step-by-step tutorial below.
Supplies
- 1/8” wood
- 1/8” frosted acrylic
- 1 package of LED strip lights
- Superglue or wood glue
Tools
- Glowforge or other laser cutting machine
- Scissors
Designs Used
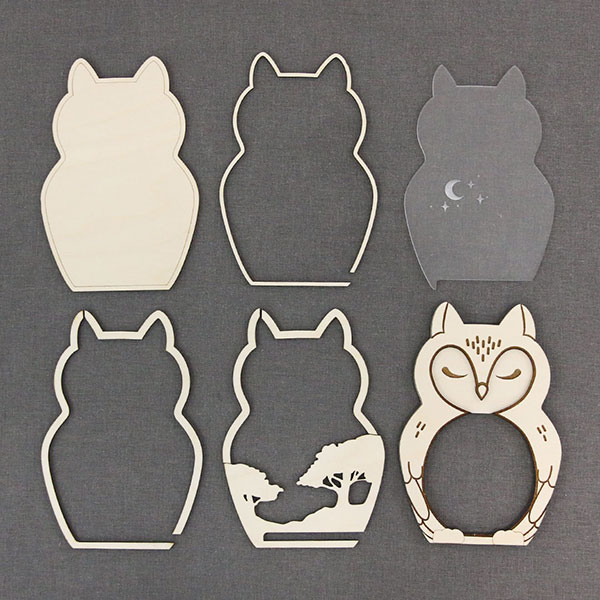
Shadowboxes consist of a few different types of layers: a solid back, a thin acrylic frame layer, the acrylic inset, spacing layers, shadowbox interior layers, and a front layer.
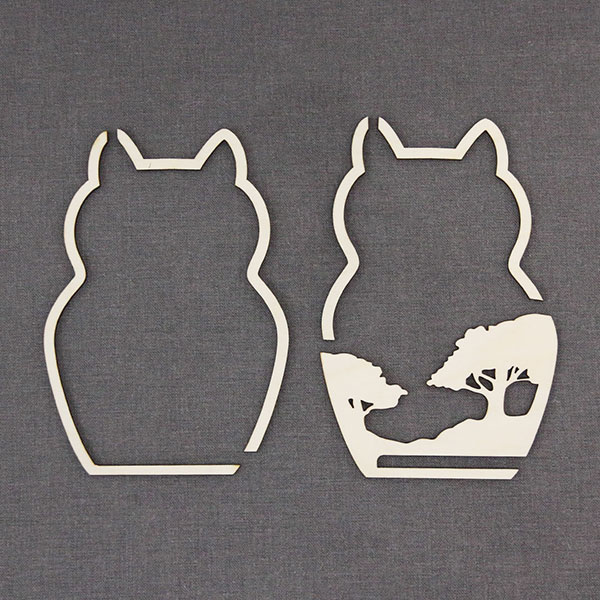
Some layers are split up to use fewer sheets of wood. The spacing layers are always constructed like this, but some main art layers of the shadowbox may be split as well depending on the design. When the shadowbox assembly is complete, the lines where these pieces join will be hidden.
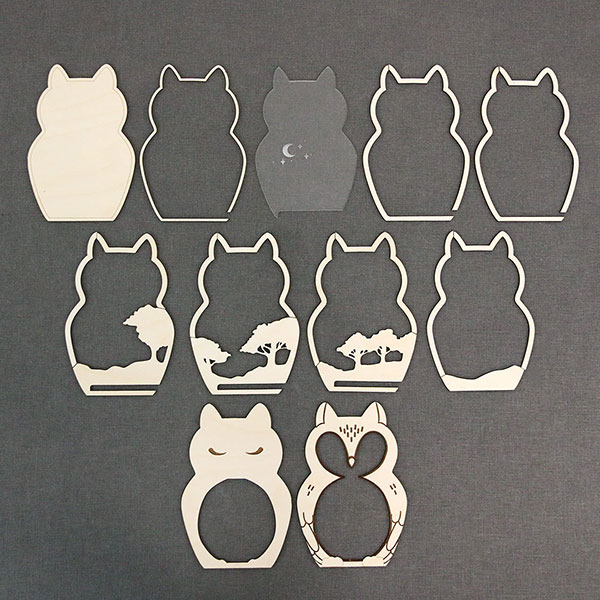
Before starting shadowbox assembly, it may be helpful to lay out all the layers in the order that you will be assembling them, including any pieces that were split.
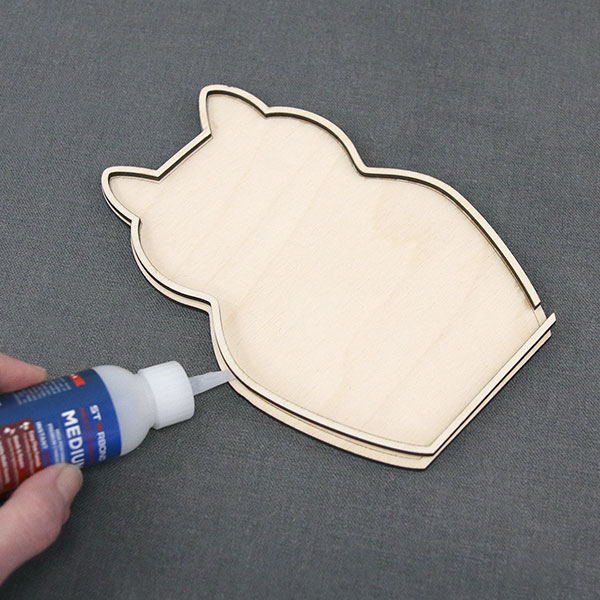
The wood frame layer that holds the acrylic layer in place may look similar to the spacing layers, but it will have a thinner edge and be in one piece. Glue this piece to the solid back layer of the shadowbox. This will hold the engraved acrylic layer in place and prevent light from escaping the sides of the shadowbox.
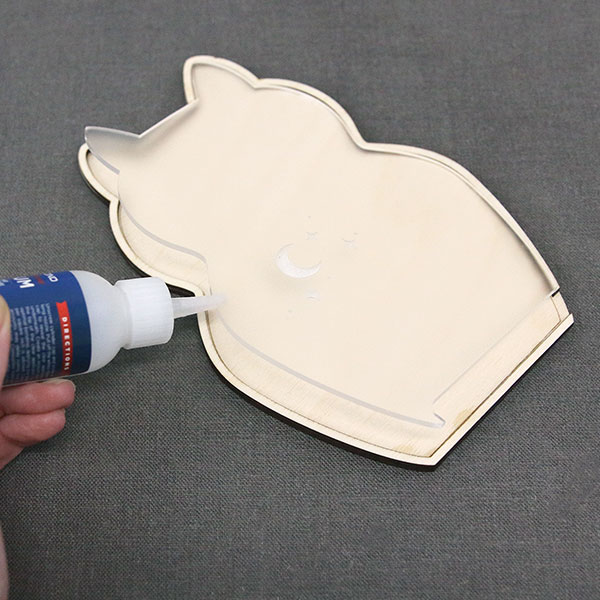
Glue the engraved acrylic layer to the solid back piece. You don’t need much glue for this step, just a few drops around the edges which will be hidden by later layers.
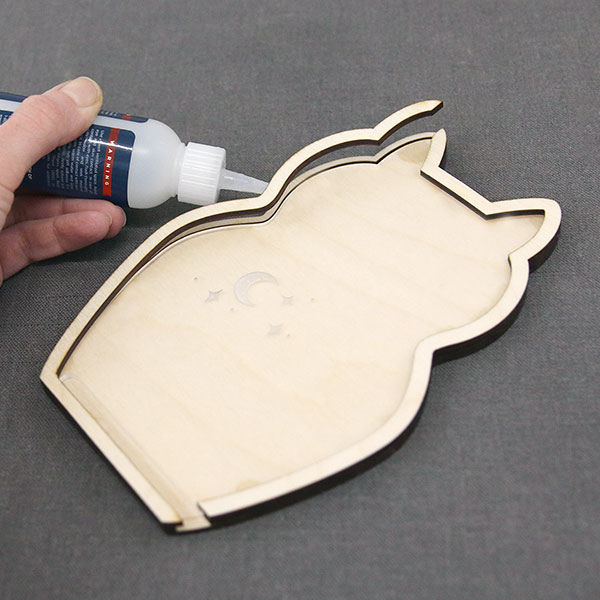
Take a set of spacing layer pieces and, matching the edges to the edges of the shadowbox, glue them down on top of the engraved acrylic layer.
Now take the first of the shadowbox interior layers and glue it on top of the first spacing layer. If the interior layer has parts that are split to conserve wood, make sure that you secure each piece with glue.
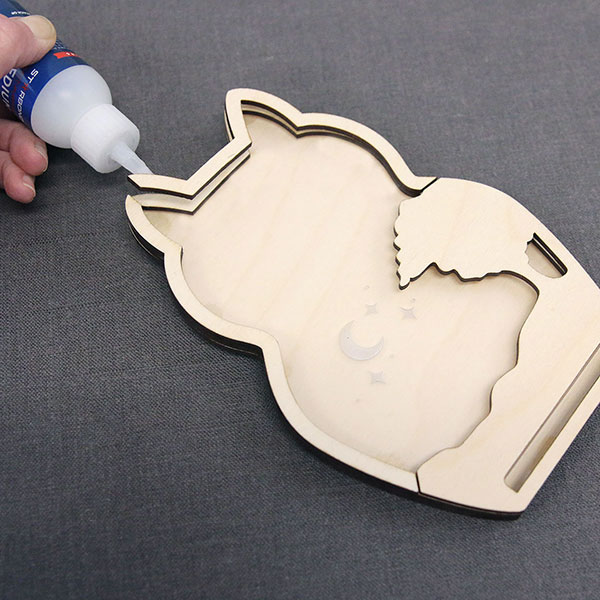
The number of interior layers and spacing layers may vary depending on the design. Repeat the previous two steps until all the interior layers with a gap at the base are glued to the body of the shadowbox. For best results, use a spacing layer between every layer or every other layer of the interior shadowbox pieces.

At the base of the interior layers of the shadowbox, there is an opening that forms the channel for the LED light strip to be placed. Once all the layers with the base gap have been assembled, take the LED strip light and place it in the bottom of the channel so that the lights will be shining up toward the top of the shadowbox.
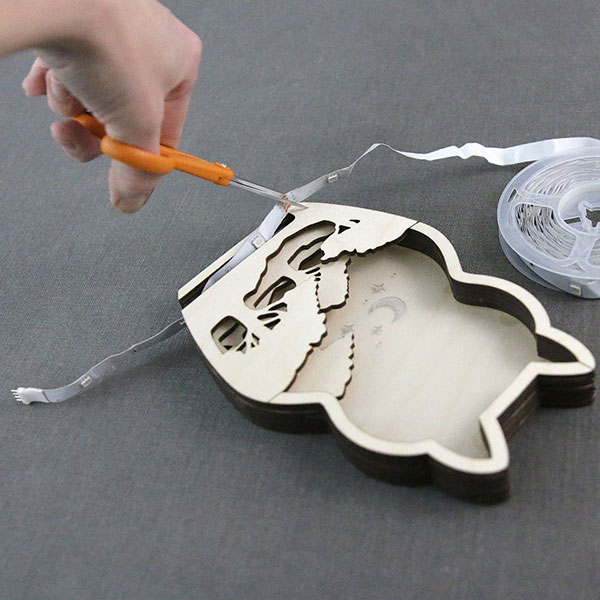
Using a sharp scissor, trim the LED light strip to the desired length, then press the light strip firmly to the wood so that the adhesive on the back of the light strip sticks to the shadowbox.

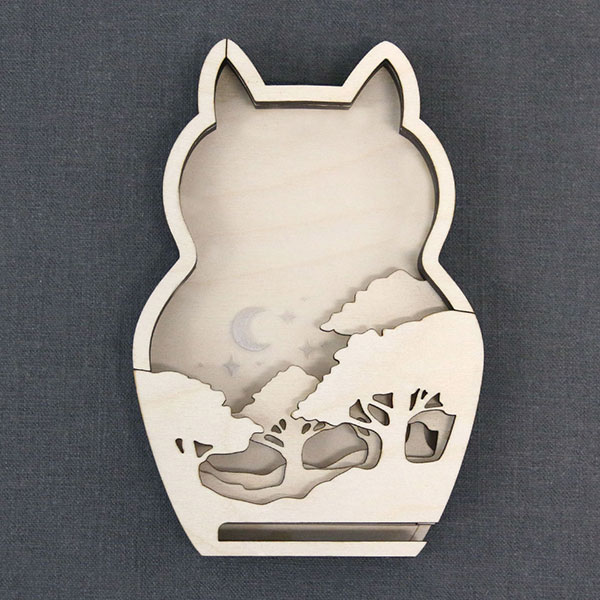
Glue the remaining interior layer to the rest of the shadowbox, hiding the LED light strip.
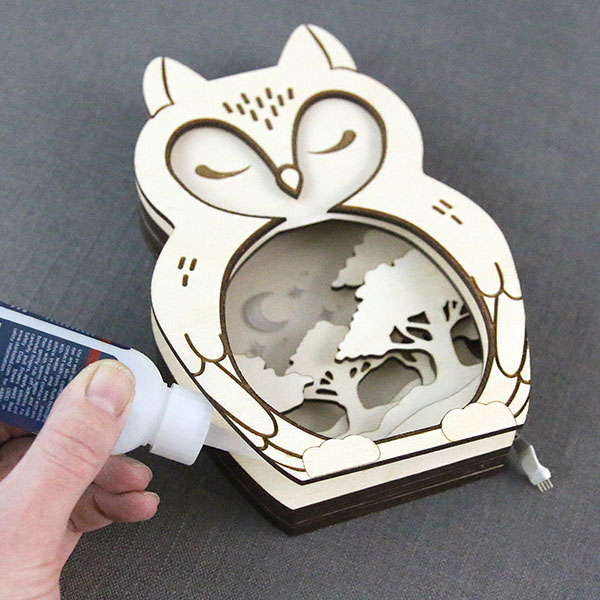
Glue the front shadowbox layer on top. Some designs may have two front layers to create an additional sense of depth.
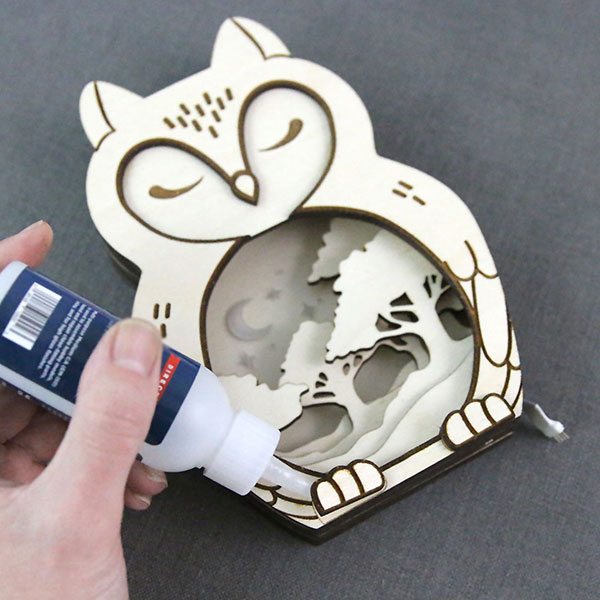
Glue any remaining decorative pieces to the front to complete the shadowbox.
Now that you've constructed your LED shadowbox scene, use it to decorate kids' rooms, make gifts for friends and family, or sell your finished projects at craft fairs and more. It's a modern and fun way to get creative with wood, acrylic, and your laser cutting machine. To make it even more your own, paint or stain the top layers to make each finished piece unique.


