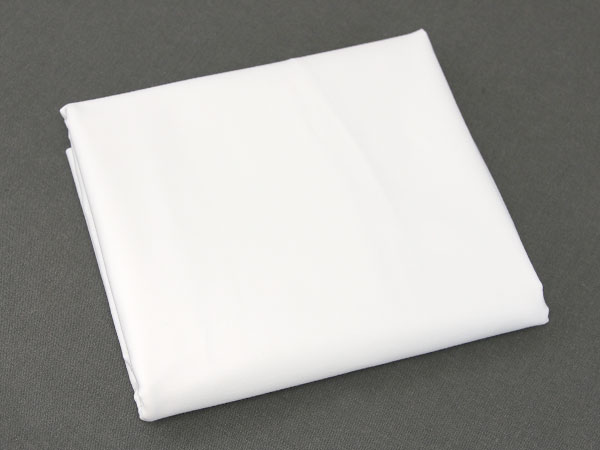
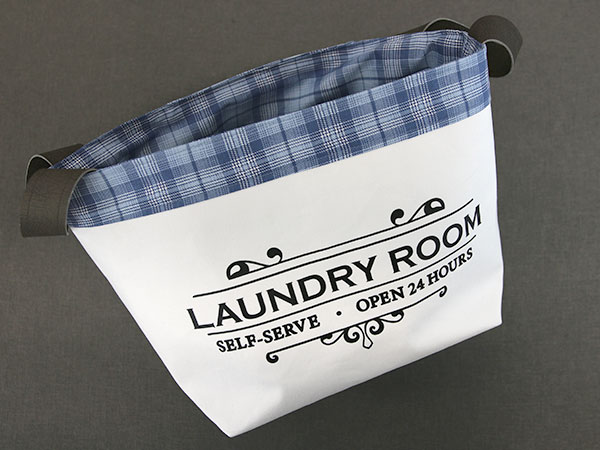
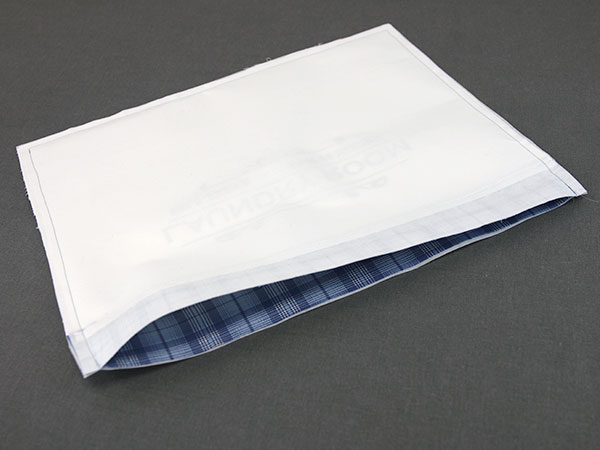
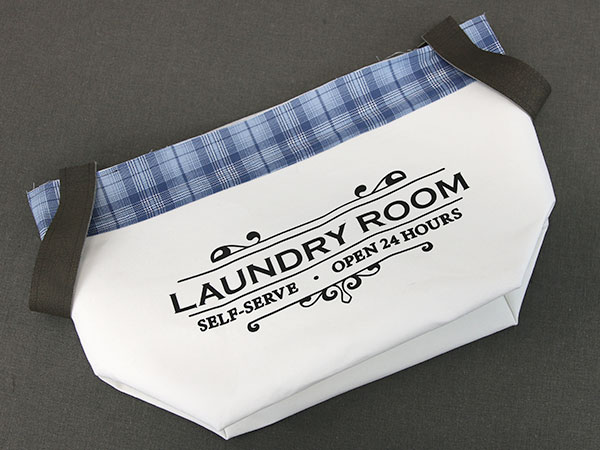
Baskets are a practical and beautiful way to bring organization into your home. Make your own collection of DIY baskets by following along with the step-by-step tutorial below. We'll show you how to cut out the pattern, embellish with SVG & DXF designs for your Cricut or another cutting machine, and assemble. Take a look below and explore the possibilities!
Supplies
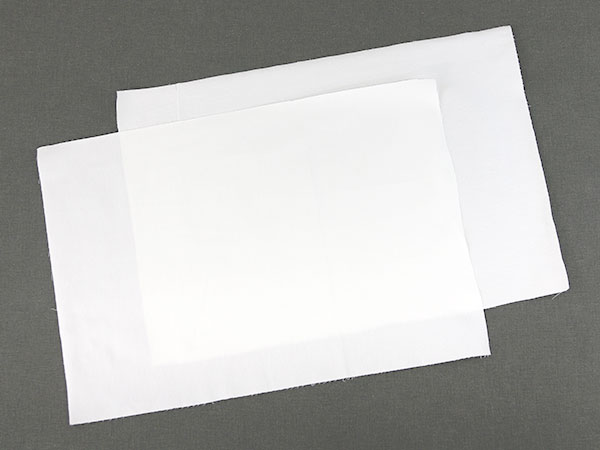
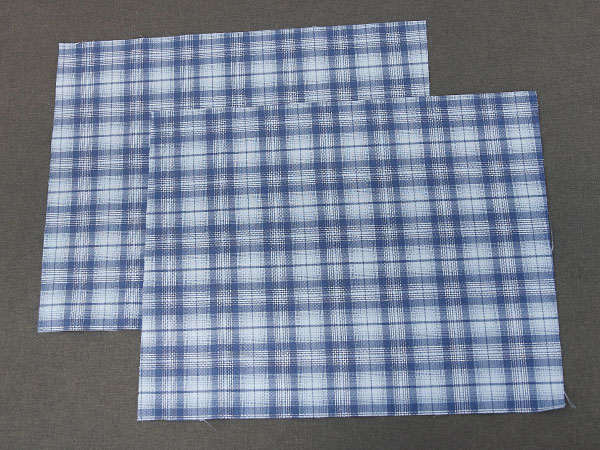
- 3/4 yard minimally textured, study fabric (outer fabric)
- 3/4 yard fabric (lining fabric)
- 3/4 yard medium weight, fusible interfacing
- 1/4 yard fabric (for band)
- 1/4 yard of faux leather, vinyl, pleather, leatherette, or soft, thin genuine leather (for straps)
- Heat transfer vinyl (for every color of the chosen design)
- Fabric marking pen or pencil
- Temporary spray adhesive (such as Gunold kk100)
- Cutting machine and tools
- Sewing machine and tools
- Universal sewing threads (matching the fabric colors)
- Ruler (quilting rulers work best)
- Scissors
Designs Used
1
When picking the outer fabric, two things need to be considered. First, the fabric needs to be sturdier than cotton to add some stability to the basket.
Second, the fabric needs to be smooth enough that heat transfer vinyl will adhere onto it. Some texture is okay, but some fabrics with too much texture might not allow for the vinyl to stick.
A light denim was used in this tutorial, but an upholstery fabric could also work well. For best result, buy a small piece of fabric and test the heat transfer vinyl on it before purchasing the 3/4 yards or starting to make this project.
2
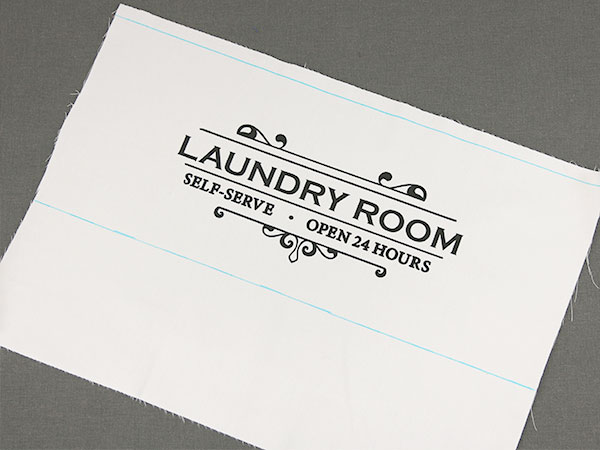
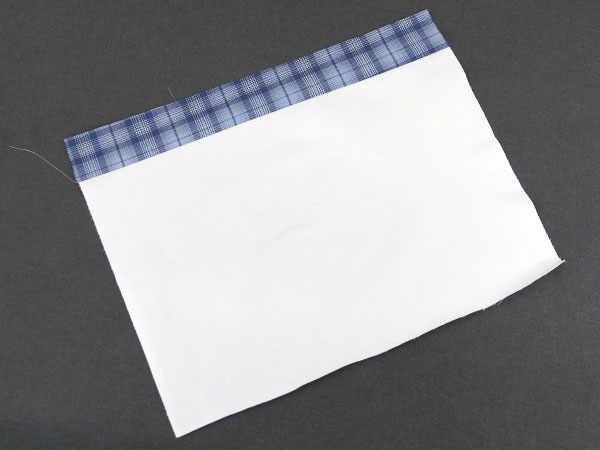
To begin, first cut out the front and back outer fabric pieces to 14” tall x 20 1/2” wide. To do this, draw a rectangle to that size on the wrong side of the fabric using a fabric marking pen and a ruler. Quilting rulers can help to make sure the corners are perfectly square.
Then cut out the drawn rectangle, and repeat for the back piece. Set the back piece aside for now.
3
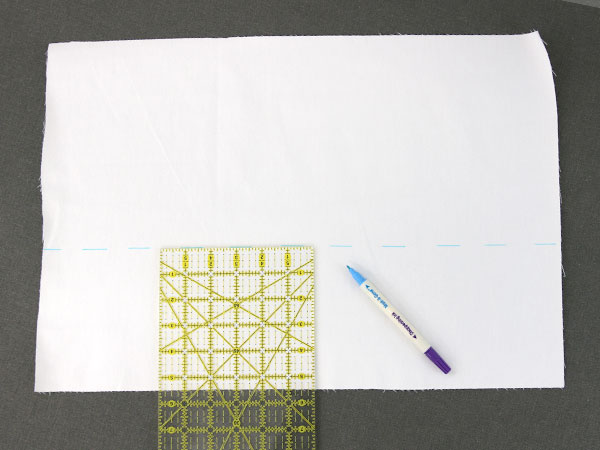
To help position the vinyl design on the front outer piece, we will first draw a line to show what part of the front piece will eventually be the bottom of the basket. To do this, measure up from the long, bottom edge 5 1/2”, and draw a dash using a marking pen. Draw a short dash along both the right and left short sides as well as one or two places in the center.
4
To help position the vinyl design on the front outer piece, we will first draw a line to show what part of the front piece will eventually be the bottom of the basket. To do this, measure up from the long, bottom edge 5 1/2”, and draw a dash using a marking pen. Draw a short dash along both the right and left short sides as well as one or two places in the center.
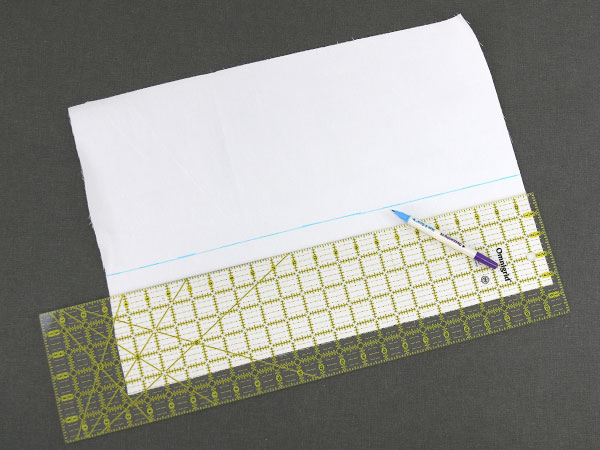
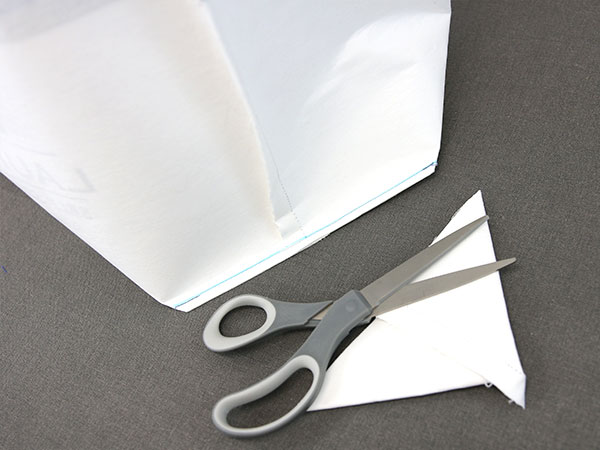
5

Then repeat to draw a line 1/2” from the top long edge. This shows the seam allowance for the top edge.
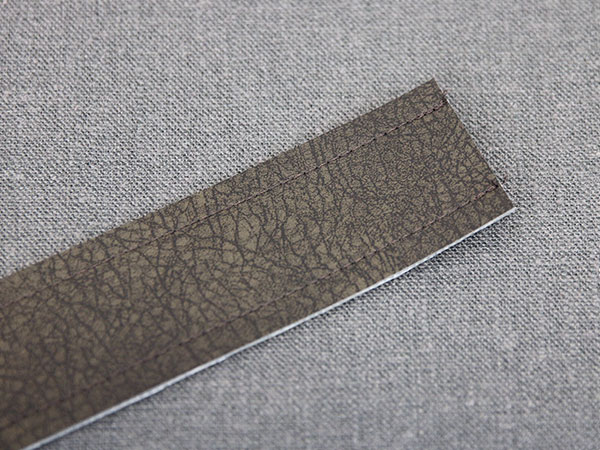
6
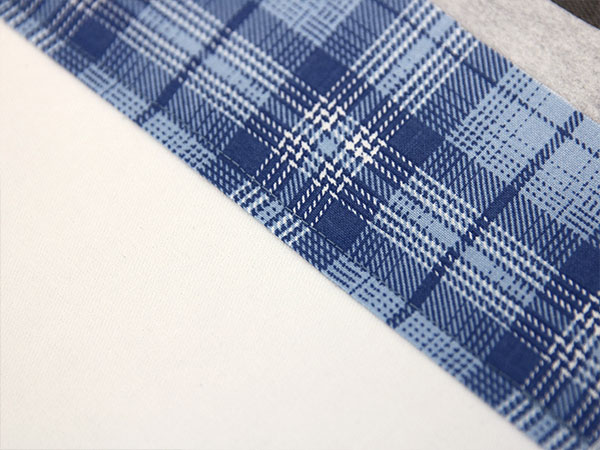
When picking a design to use on this fabric basket, designs that are wider than they are tall work best. After picking your design, you will need to scale it to the correct size in your cutting software.
Size your design to 6” tall x 11.5” wide (or smaller). This size allows the design to fit on the front of the basket while leaving a little bit of space around it so it doesn’t touch the top band, bottom, or sides.
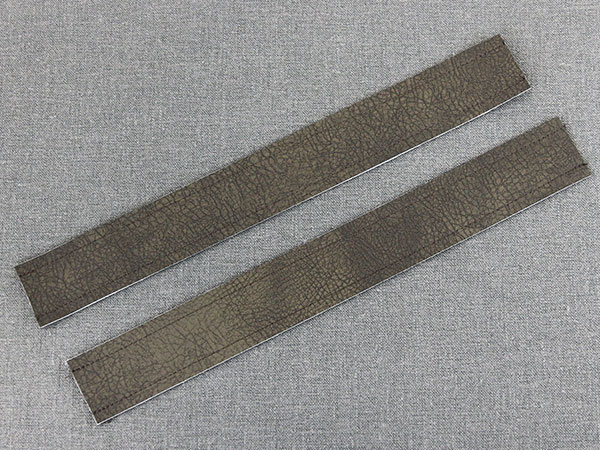
7
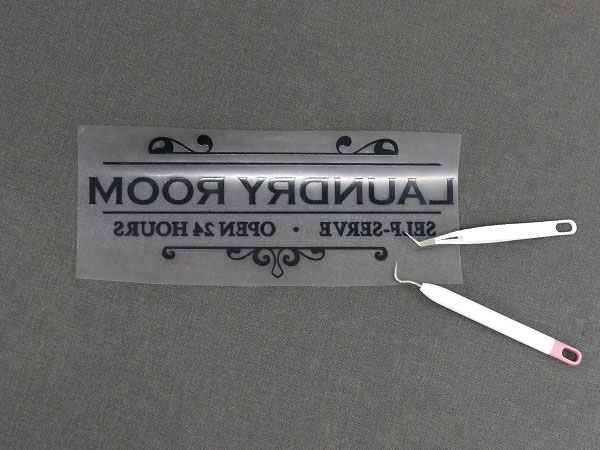
Don’t forget to mirror your design before cutting, or it will cut out backwards.
After the design is sized and mirrored properly, cut it out of heat transfer vinyl following your cutting machines instructions. If your design has multiple colors, also mirror those and cut them out. Once the design is cut out, weed the design. Weeding means to remove all the excess vinyl from the plastic sheet that is not a part of the design.
If you’re not familiar with how to cut, weed, or apply heat transfer vinyl, check out our guide here. This guide talks specifically about t-shirts, but the cutting, weeding, and application steps are the same for other fabrics as well.
8
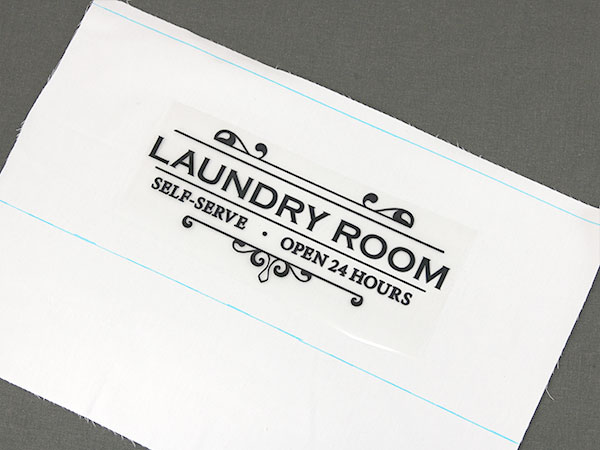
After the design is cut out and weeded, position it as desired on the front piece. For most designs, this means centering it between the two drawn lines above and below it, and also centering it between the right and left sides of the fabric. Using a ruler can help to make sure the design is perfectly centered.
9
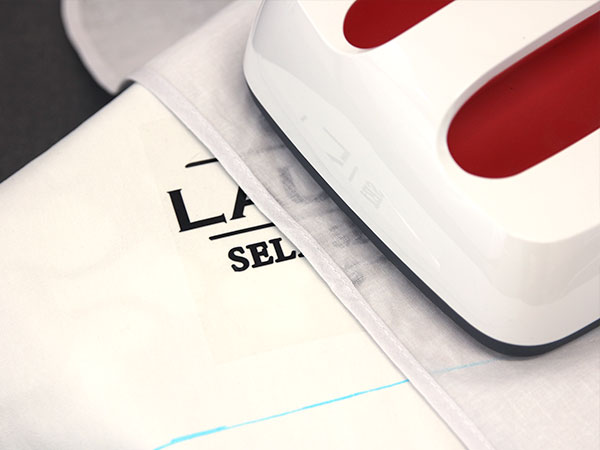
Then adhere the design using a pressing cloth, and a dry iron (with no steam) or heat press. Make sure to press the design in multiple short intervals at the correct temperature for the type of vinyl you are using.
Once it is adhered well. Remove the plastic sheet, and press it once more with the iron and pressing cloth to make sure it is adhered to the fabric well.
10
If the chosen design has multiple colors of vinyl being used in the design. Line them up with the first layer of vinyl, and adhere all the layers into place. For this tutorial, we are using a design with only one color of vinyl.
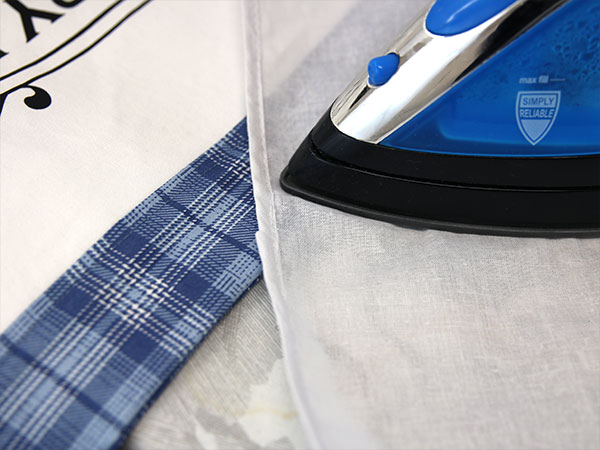
11

Before continuing, remove the two lines drawn on the front outer piece following your marking tool’s instructions. For example, we used a water-erasable marker as our marking tool. To remove the lines, we sprinkled water over the lines and gently rubbed it into the fabric until the lines disappeared. Then we allowed the fabric to dry.
Once the marks are removed, set the front piece aside for now.
12
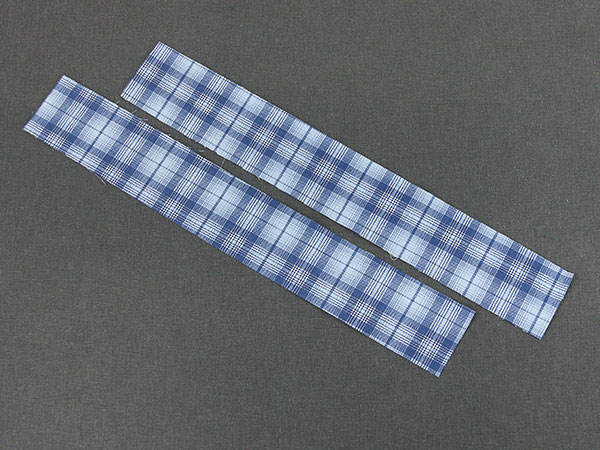
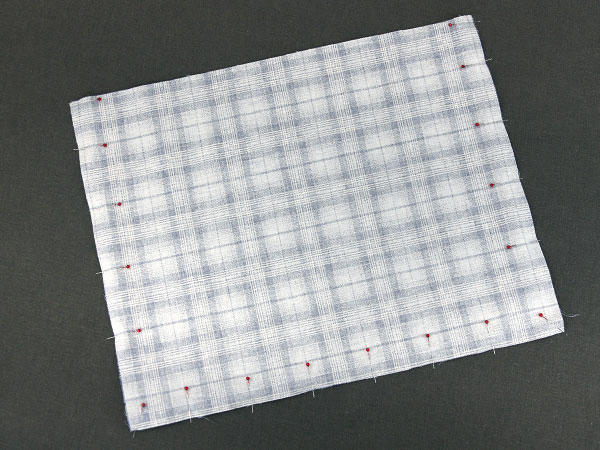
Cut out two bands to 3” tall x 20 1/2” wide. To do this, draw the rectangle on the wrong side of the fabric as we did earlier, and cut out the shapes. One of these bands will go along the top edge of the front outer piece, and the other will go along the top edge of the back outer piece.
13
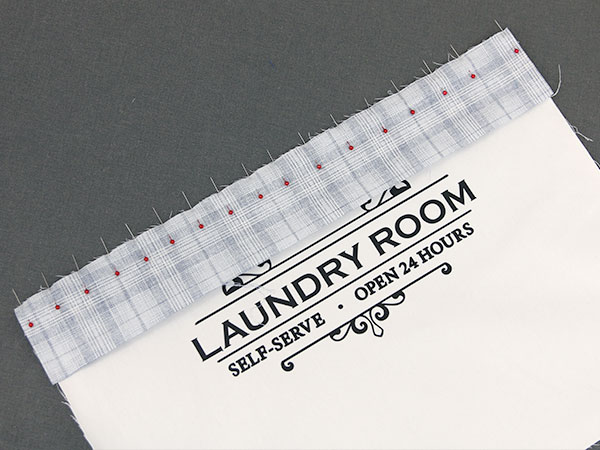
Line the first band up with the top edge of the front outer piece. Make sure right sides of both fabric are together. Then pin them along the long top edge.
14
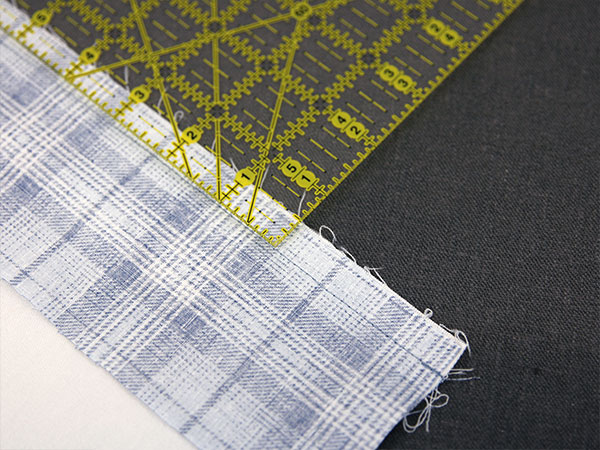
Sew along the pinned, top edge with a 1/2” seam allowance.
15
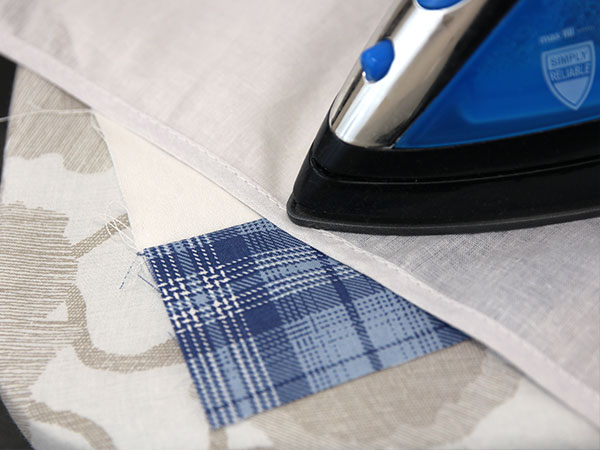
Then open up the band, and press the seam allowance upwards towards the top edge of the band. If the seam allowance is pressed up, it will get sewn down later which will make the fabric lay nice and flat.
Make sure to use a pressing cloth and a dry iron (with no steam), so you do not ruin or melt the heat transfer vinyl.
16
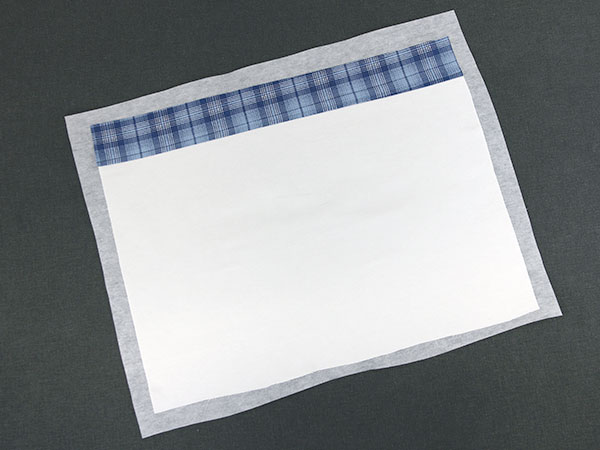
Cut a piece of medium-weight, fusible interfacing so it is a little larger than the whole front piece (the band and outer fabric together). Then lay the front piece on top of the fusible interfacing. Make sure the wrong side of the front piece is on the fusible side of the interfacing.
17
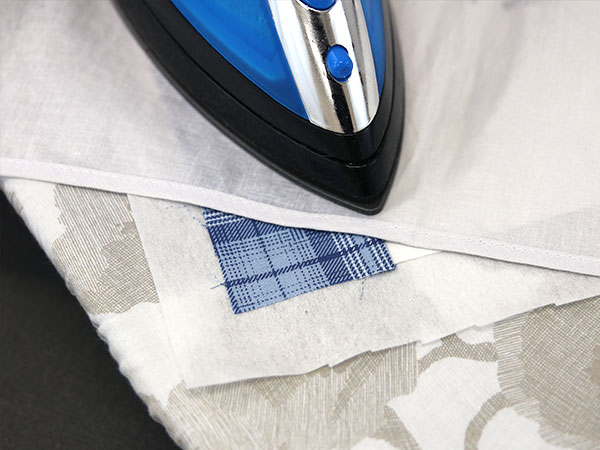
Follow the instructions for the fusible interfacing to fuse it onto the wrong side of the front piece. For ours, we ironed it onto the front piece using a dry iron (with no steam) and pressing cloth. Be careful of using any steam as it can damage the vinyl.
18
After the interfacing is adhered, topstitch 1/4” above the seam that connects the outer fabric to the band. This means you’ll be sewing on the band, so match the thread color to the band fabric for best results. This seam will also hold the seam allowance in place and reinforce the interfacing.
19
Select your back outer piece, and remaining band. Line them up along the long top edge with right side together. Pin and sew a 1/2” along the top edge, connecting the two pieces together. Then use an iron and pressing cloth to open up the seam, and press the seam allowance upwards.
20
Then cut a piece of the fusible interfacing larger than the back piece. Lay the back pice on top of it, so the wrong side is against the fusible side of the interfacing. Then fuse them together following the interfacing’s instructions.
After the interfacing is adhered, topstitch on the band, 1/4” above the seam, just like we did on the front piece.
21
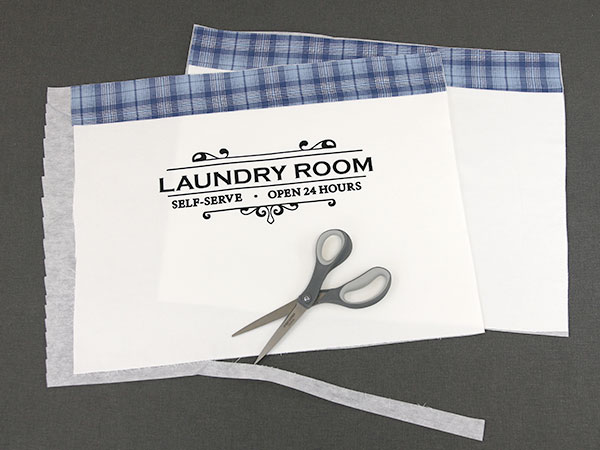
Take both the front and back outer pieces, and trim away the excess interfacing from around the fabric. For best results, trim it perfectly to the outer edges of the fabric. Do this for both the front and back outer pieces.
22
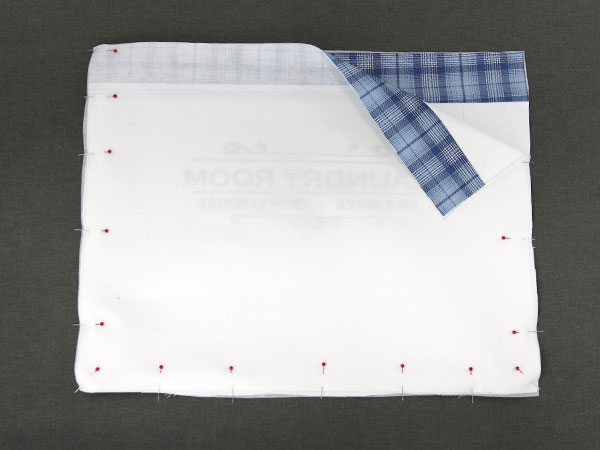
Then take the front and the back pieces and match them up with right sides together. Make sure the bands and seams line up as well. Pin the two pieces together along the two sides and bottom edge. Do not pin along the top edge as this needs to stay open and unsewn.
23
Then sew a seam along the three pinned edges using a 1/2” seam allowance. Make sure to leave the top edge open and unsewn.
24
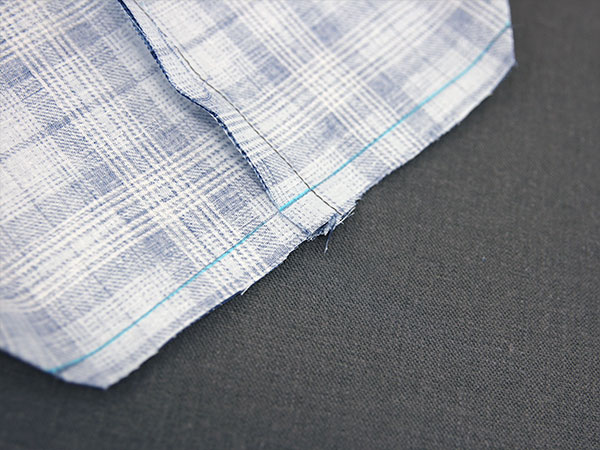
Now it is time to make the first corner. With the outer piece wrong side out, flatten one corner so the side seam and bottom seams match up with right sides together. It should make a triangle shape with the point being where the side and bottom seams meet. Pin on both sides of the seam to hold this in place.
25
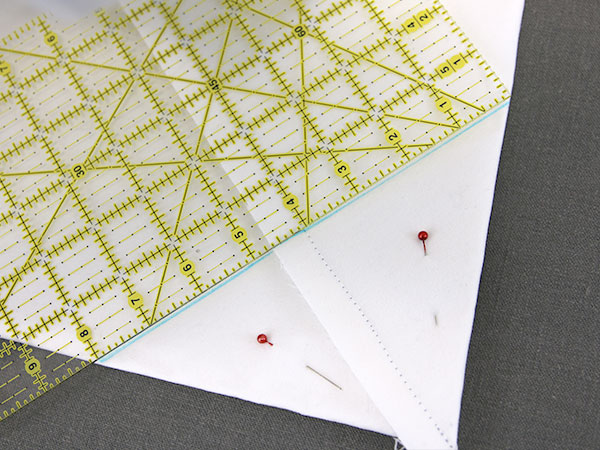
Line up your ruler so it is perpendicular to the seam. Then moving it up or down the seam, find where the flattened corner is 8” wide, and draw a line there with a fabric marking pen.
Using a quilting ruler works best for this step as you can line the grid up with the seam while measuring to make sure the line is drawn perpendicular to the seam. If using a normal ruler, you can use the corner of a piece of paper or book to also try and get a perpendicular line. Do this by lining the side edge of the paper up with the seam and the bottom edge up with the top edge of the ruler.
26
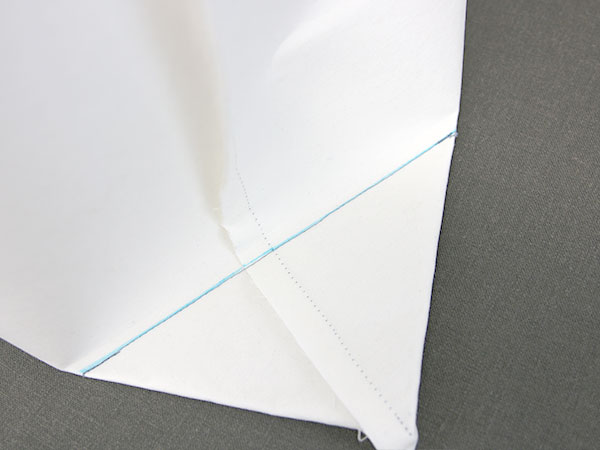
Then sew a seam directly on top of that 8” drawn line. After sewing, remove the pins.
27
Trim the point off the corner just below the seam (that was sewn over the drawn 8” line). For best results cut 1/4”-1/2” away from the seam.
28
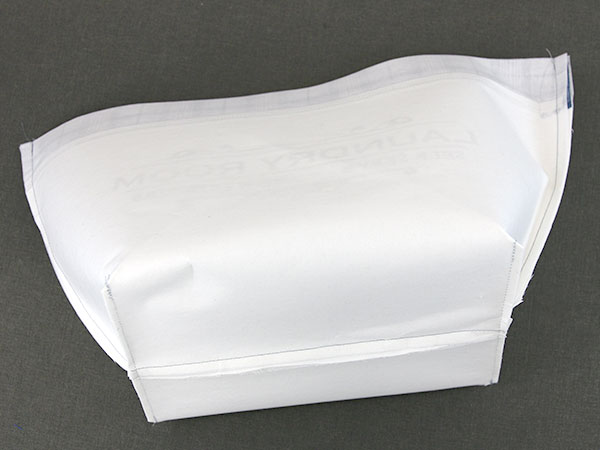
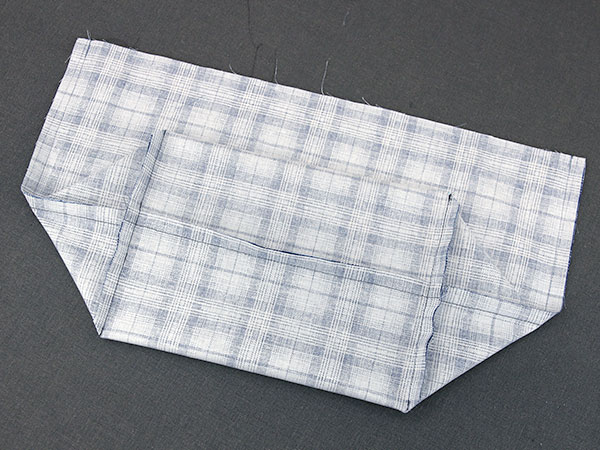
Then repeat the previous steps to create the opposite corner. Flatten it while matching up the seams, and pin it flat. Then measure. and draw the line where the corner is 8” wide. Sew on top of the drawn line, and trim off the corner.
29
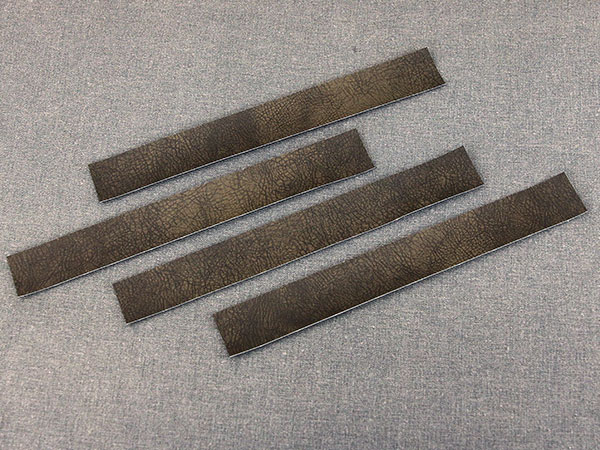
To make the handles, cut four rectangles of a non-fraying fabric to 1 1/2” tall x 12” wide. For these straps we used a fabric backed, upholstery vinyl made to look like leather. Like the fabric pieces earlier, simply draw the rectangle on the wrong side of the fabric, and then cut it out.
30
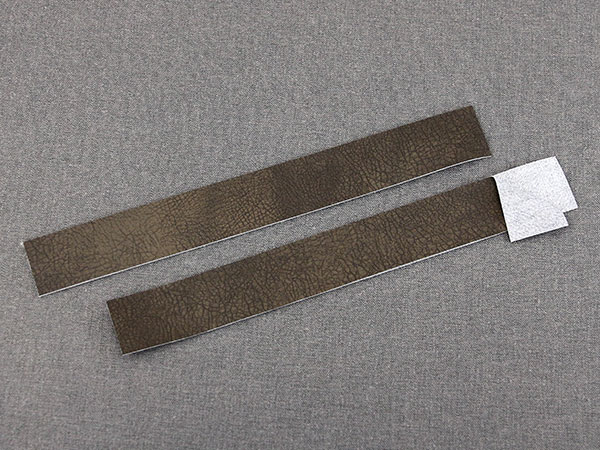
Match two handle pieces up with wrong sides together, and repeat to match the other two pieces up also with wrong sides together.
For some vinyls, using pins will leave permanent holes in the material. If using a material like this, use either sewing clips to hold the two pieces together, or spray temporary spray adhesive on the wrong side of the straps before matching them up (this glues them together instead). We used spray adhesive in this demonstration.
If your fabric does not leave permanent holes, you can also pin the pieces together along the two long sides.
31
Pick a thread color to match the fabric. Both sides of the handle will be seen, so make sure to wind a bobbin of the same thread color. Then sew a 1/4” seam along both long edges. The short edges do not need to be sewn.
32
Repeat to sew the second strap. In the end, you should have two straps that are 1 1/2” tall x 12” wide. The two straps should look nice on both sides.
33
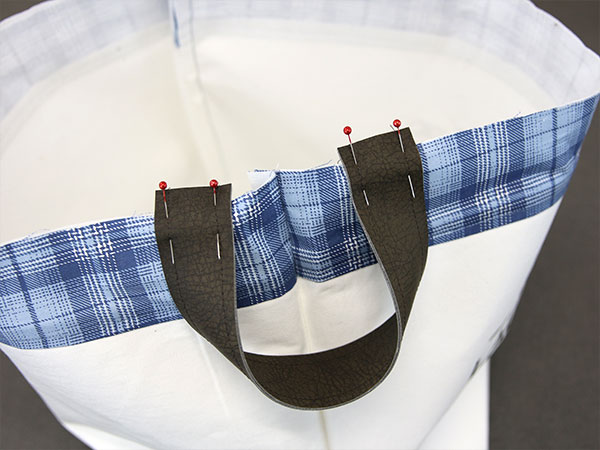
Take the outer piece, and turn it right side out. Then loop one of the handles into a half circle, and position it around either of the side seams. The inner edges of the strap ends should be about 1 1/4” away from the side seam on either side. The ends of the straps can extend past the top edge of the outer piece up to 1/2”.
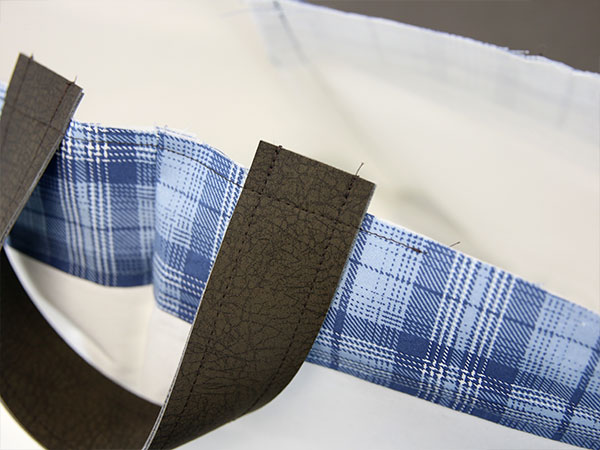
Pin or use sewing clips to hold both ends of the strap in place.
34
Then baste both ends of the strap into place 1/4” from the top edge of the outer fabric piece.
35
Repeat the previous steps to position, pin (or clip), and baste the second strap in place on the opposite side of the basket. This completes the outer section of the basket. Set it aside for now.
36
To make the lining, first cut out a front and a back lining fabric piece to 16” tall x 20 1/2” wide. To do this, draw the rectangle on the wrong side of the fabric using a fabric marking pen and a ruler. Then cut both a front and a back that are both the same size.
37
Match the front and the back lining pieces up with right sides together. Pin along to two short sides, and only one of the long sides. The side you are leaving unpinned will be the top.
38
Then sew a seam along the three pinned edges using a 1/2” seam allowance. Make sure to leave the top edge open and unsewn.
39
The corners of the lining are made exactly like the corners of the outer piece. Repeat the earlier steps to create the first corner. Flatten it, matching up the seams, and pin it in place. Then use the ruler to draw a line where it is 8” wide, and sew on top of the drawn line. Then trim off the point 1/4”-1/2” below the seam.
40
Then repeat again to create the second corner of the lining piece. This completes the lining section of the basket.
41
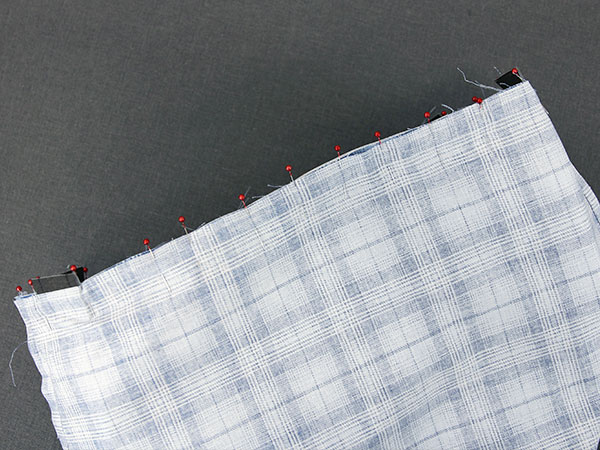
To sew the lining piece onto the outer piece, make sure the lining piece is wrong sides out, and the outer piece is right sides out. Place the outer fabric piece inside of the lining, so that right sides are together. Make sure the handles are down in between the two piece.
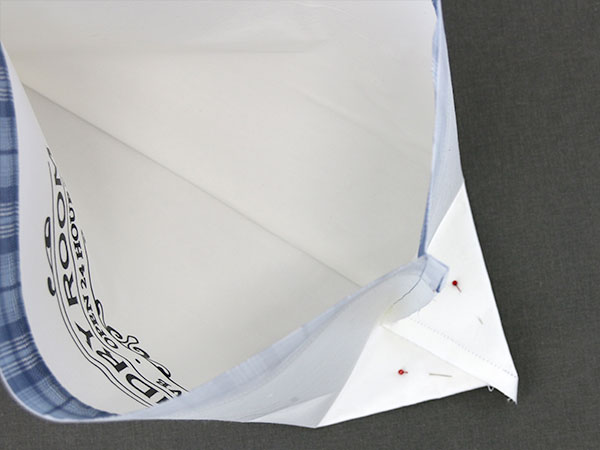
Rotate the lining until the side seams and bottom corners line up. Then pin the lining onto the outer piece all the way around the top, raw edge. To plan a opening for turning, locate the center back of the basket (the side without the vinyl). Remove pins at the center back until you have an opening that is about 8” wide.
42

Then sew a 1/2” seam along the pinned raw edge. Make sure to leave the 8” opening in the center back for turning.
43
Then turn the fabric basket right side out. Be careful not to crush or scrunch up the outer fabric too much while turning. This can create wrinkles in the interfacing that are hard to get out.
44
Be very careful not to melt the straps, or damage heat transfer vinyl design while pressing in this step. To prevent melting the straps turn the iron temperature down when ironing the seam below them, use a pressing cloth, and try to not place the iron on the strap as much as possible.
To create a pretty top edge, roll open the seam so the actual seam sits right at the top edge of the basket. Then press it with a pressing cloth on top. This way the top edge will be look crisp and uniform all the way around. Continue to do this around the edge until you get to the opening.
For the opening, fold the raw edges in 1/2” and press them.
45
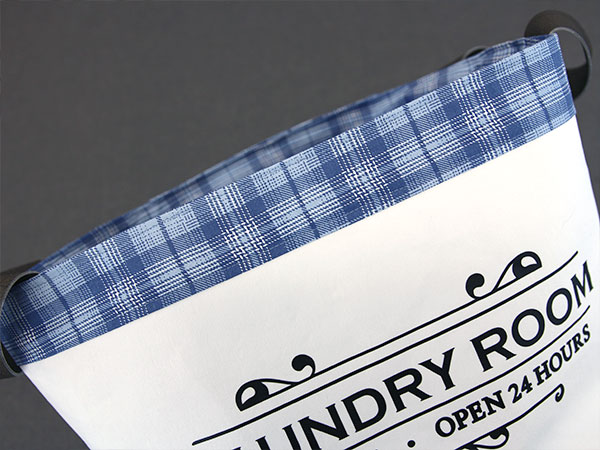
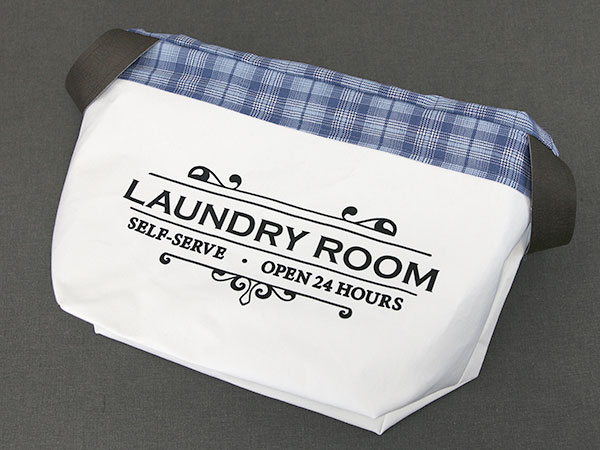
After the top edge is pressed, topstitch a 1/4” seam all the way around the top edge of the basket. This will close the opening, reinforce the straps, and also hold the nice pressed edge in place, finishing the basket.
Now that you've crafted your first DIY fabric basket, enjoy the creative process and make even more for your home! Choose different fabrics and materials for different looks in every room. Plus, these baskets work well for gifts and gift baskets, too!


