Supplies
- 4 sheets of 12”x12” cardstock
- 1/8” thick foam board
- Craft knife and cutting mat
- Metal ruler or metal edged ruler
- All-purpose glue
- 8”x 10” picture frame (optional)
- Light (optional - for backlighting)
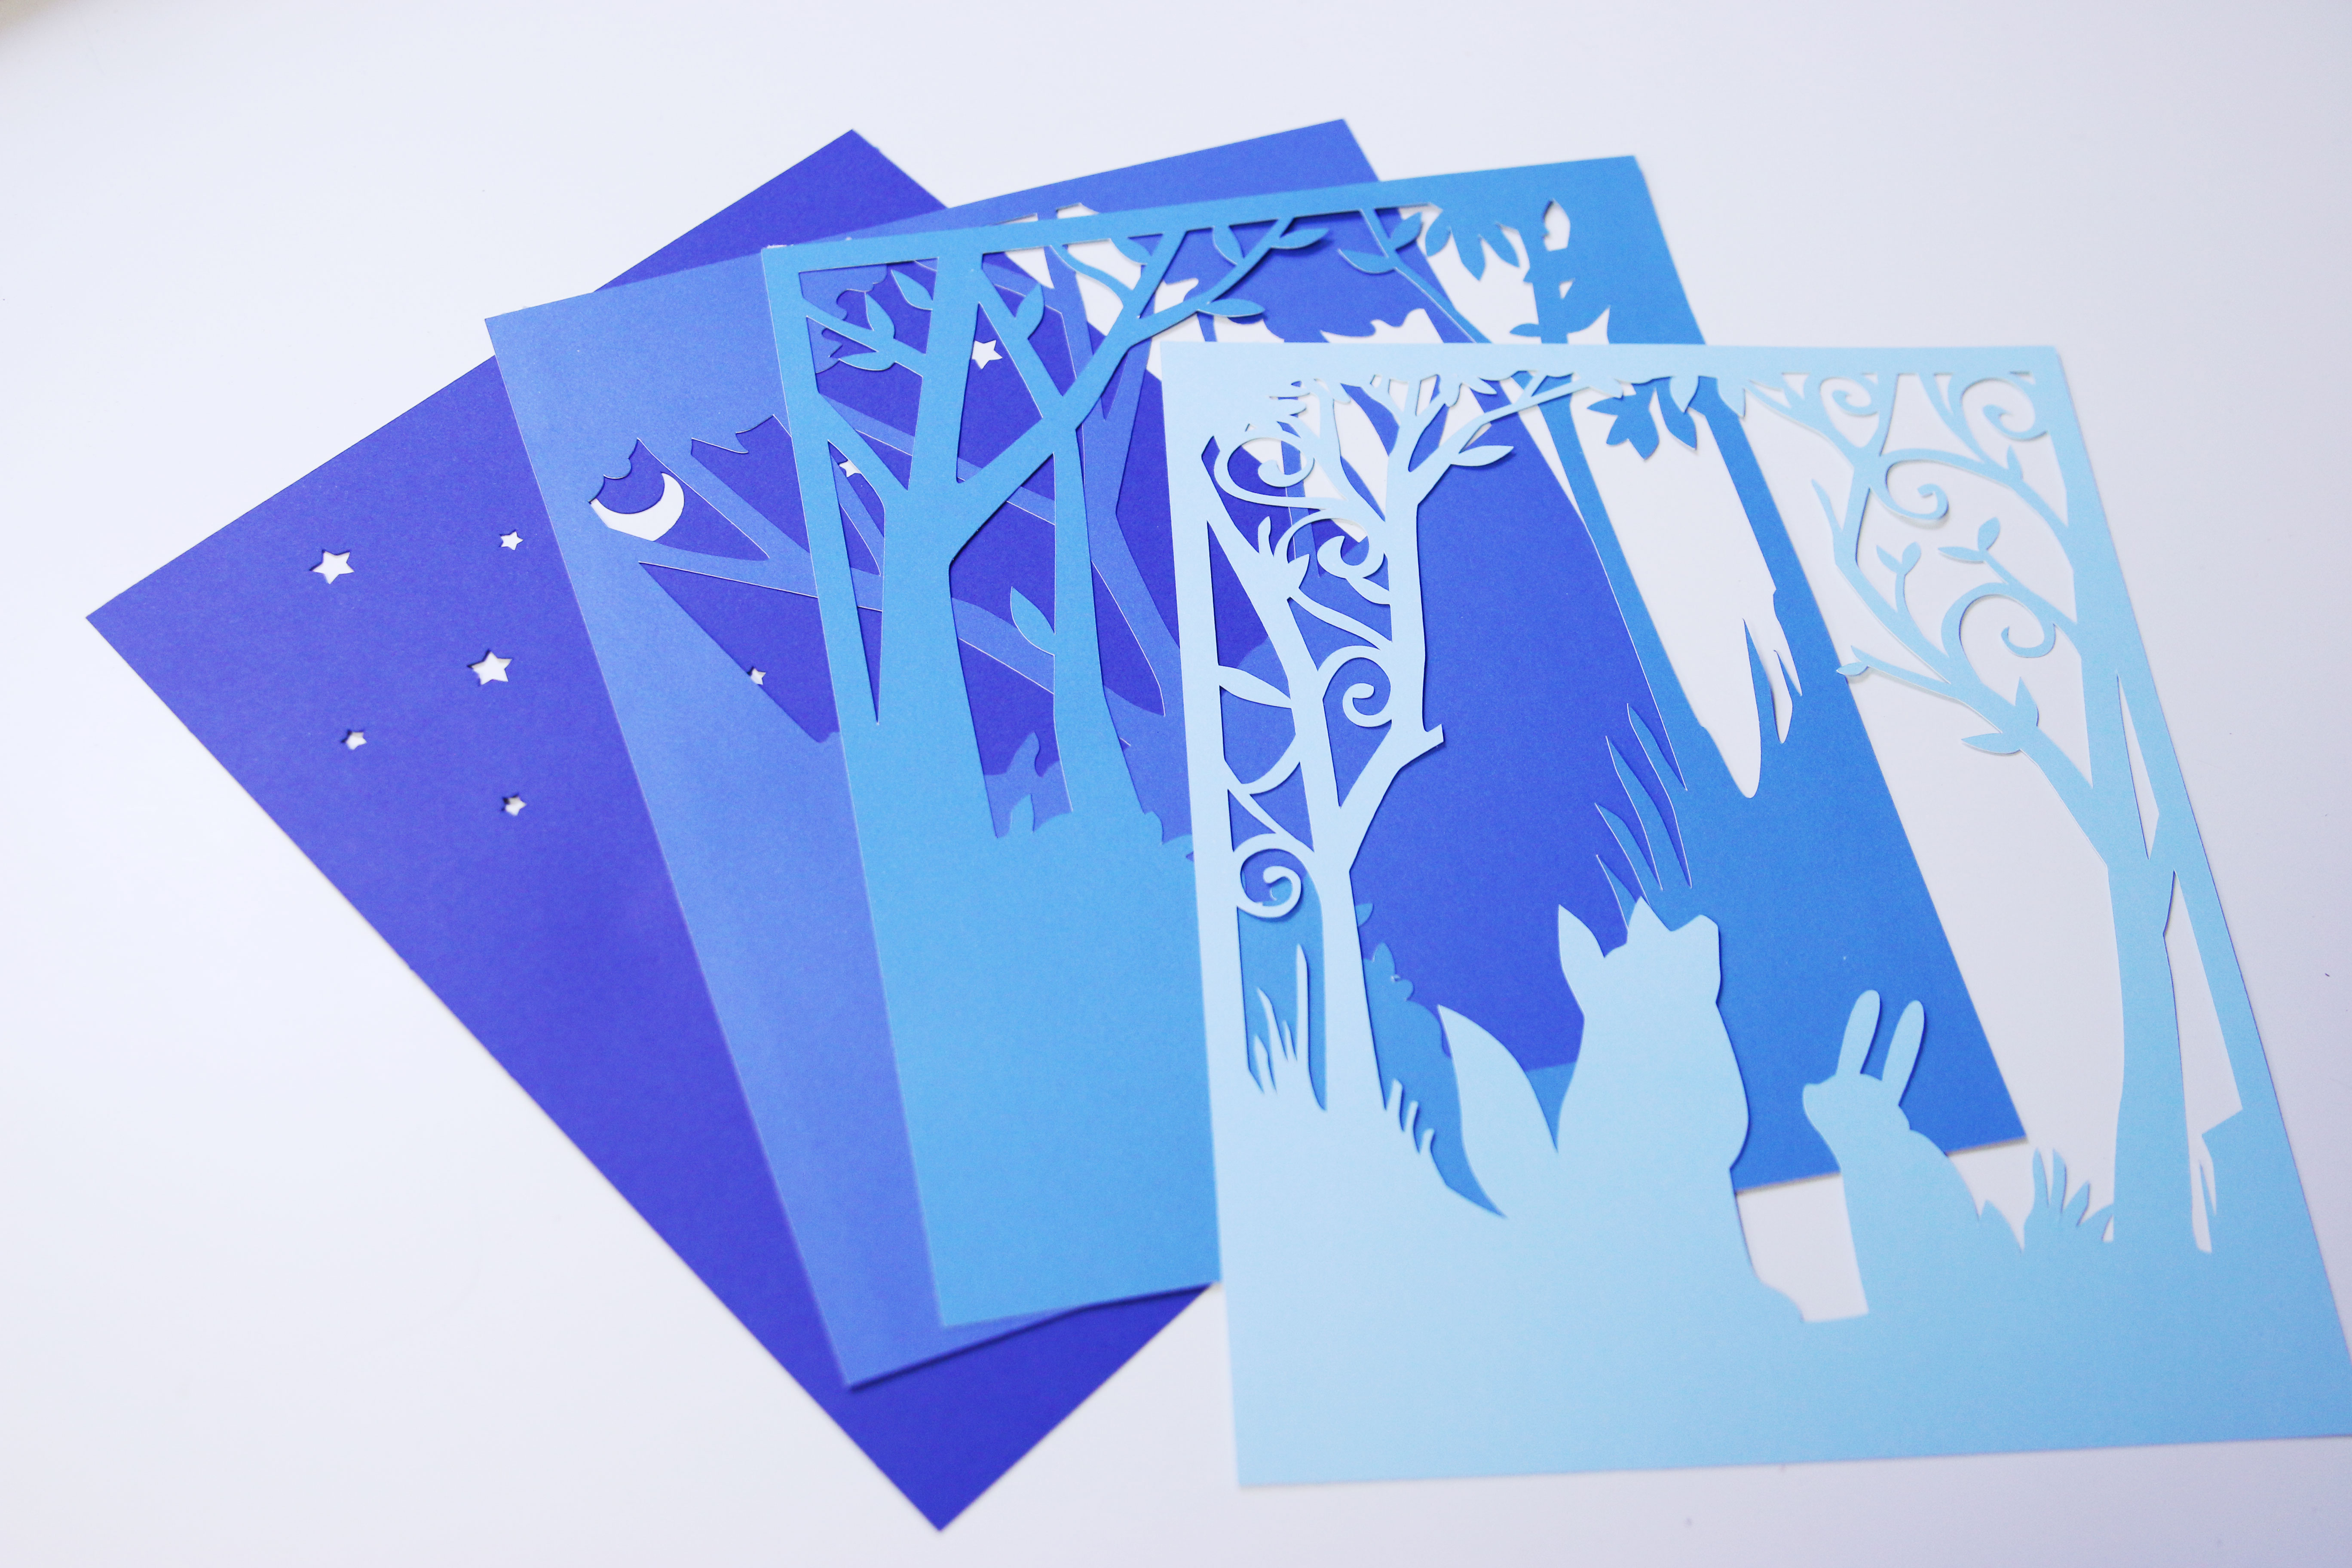
Designs Used
Cutting Instructions
1
Load the Evening Forest Shadowbox (Cut & More) file into your cutting machine’s software. This design has four separate cutting files, one for each layer. The design is proportioned to fit in an 8”x10” photo frame. Proceed in the design software until the first color selection appears, and is ready to be cut.
2
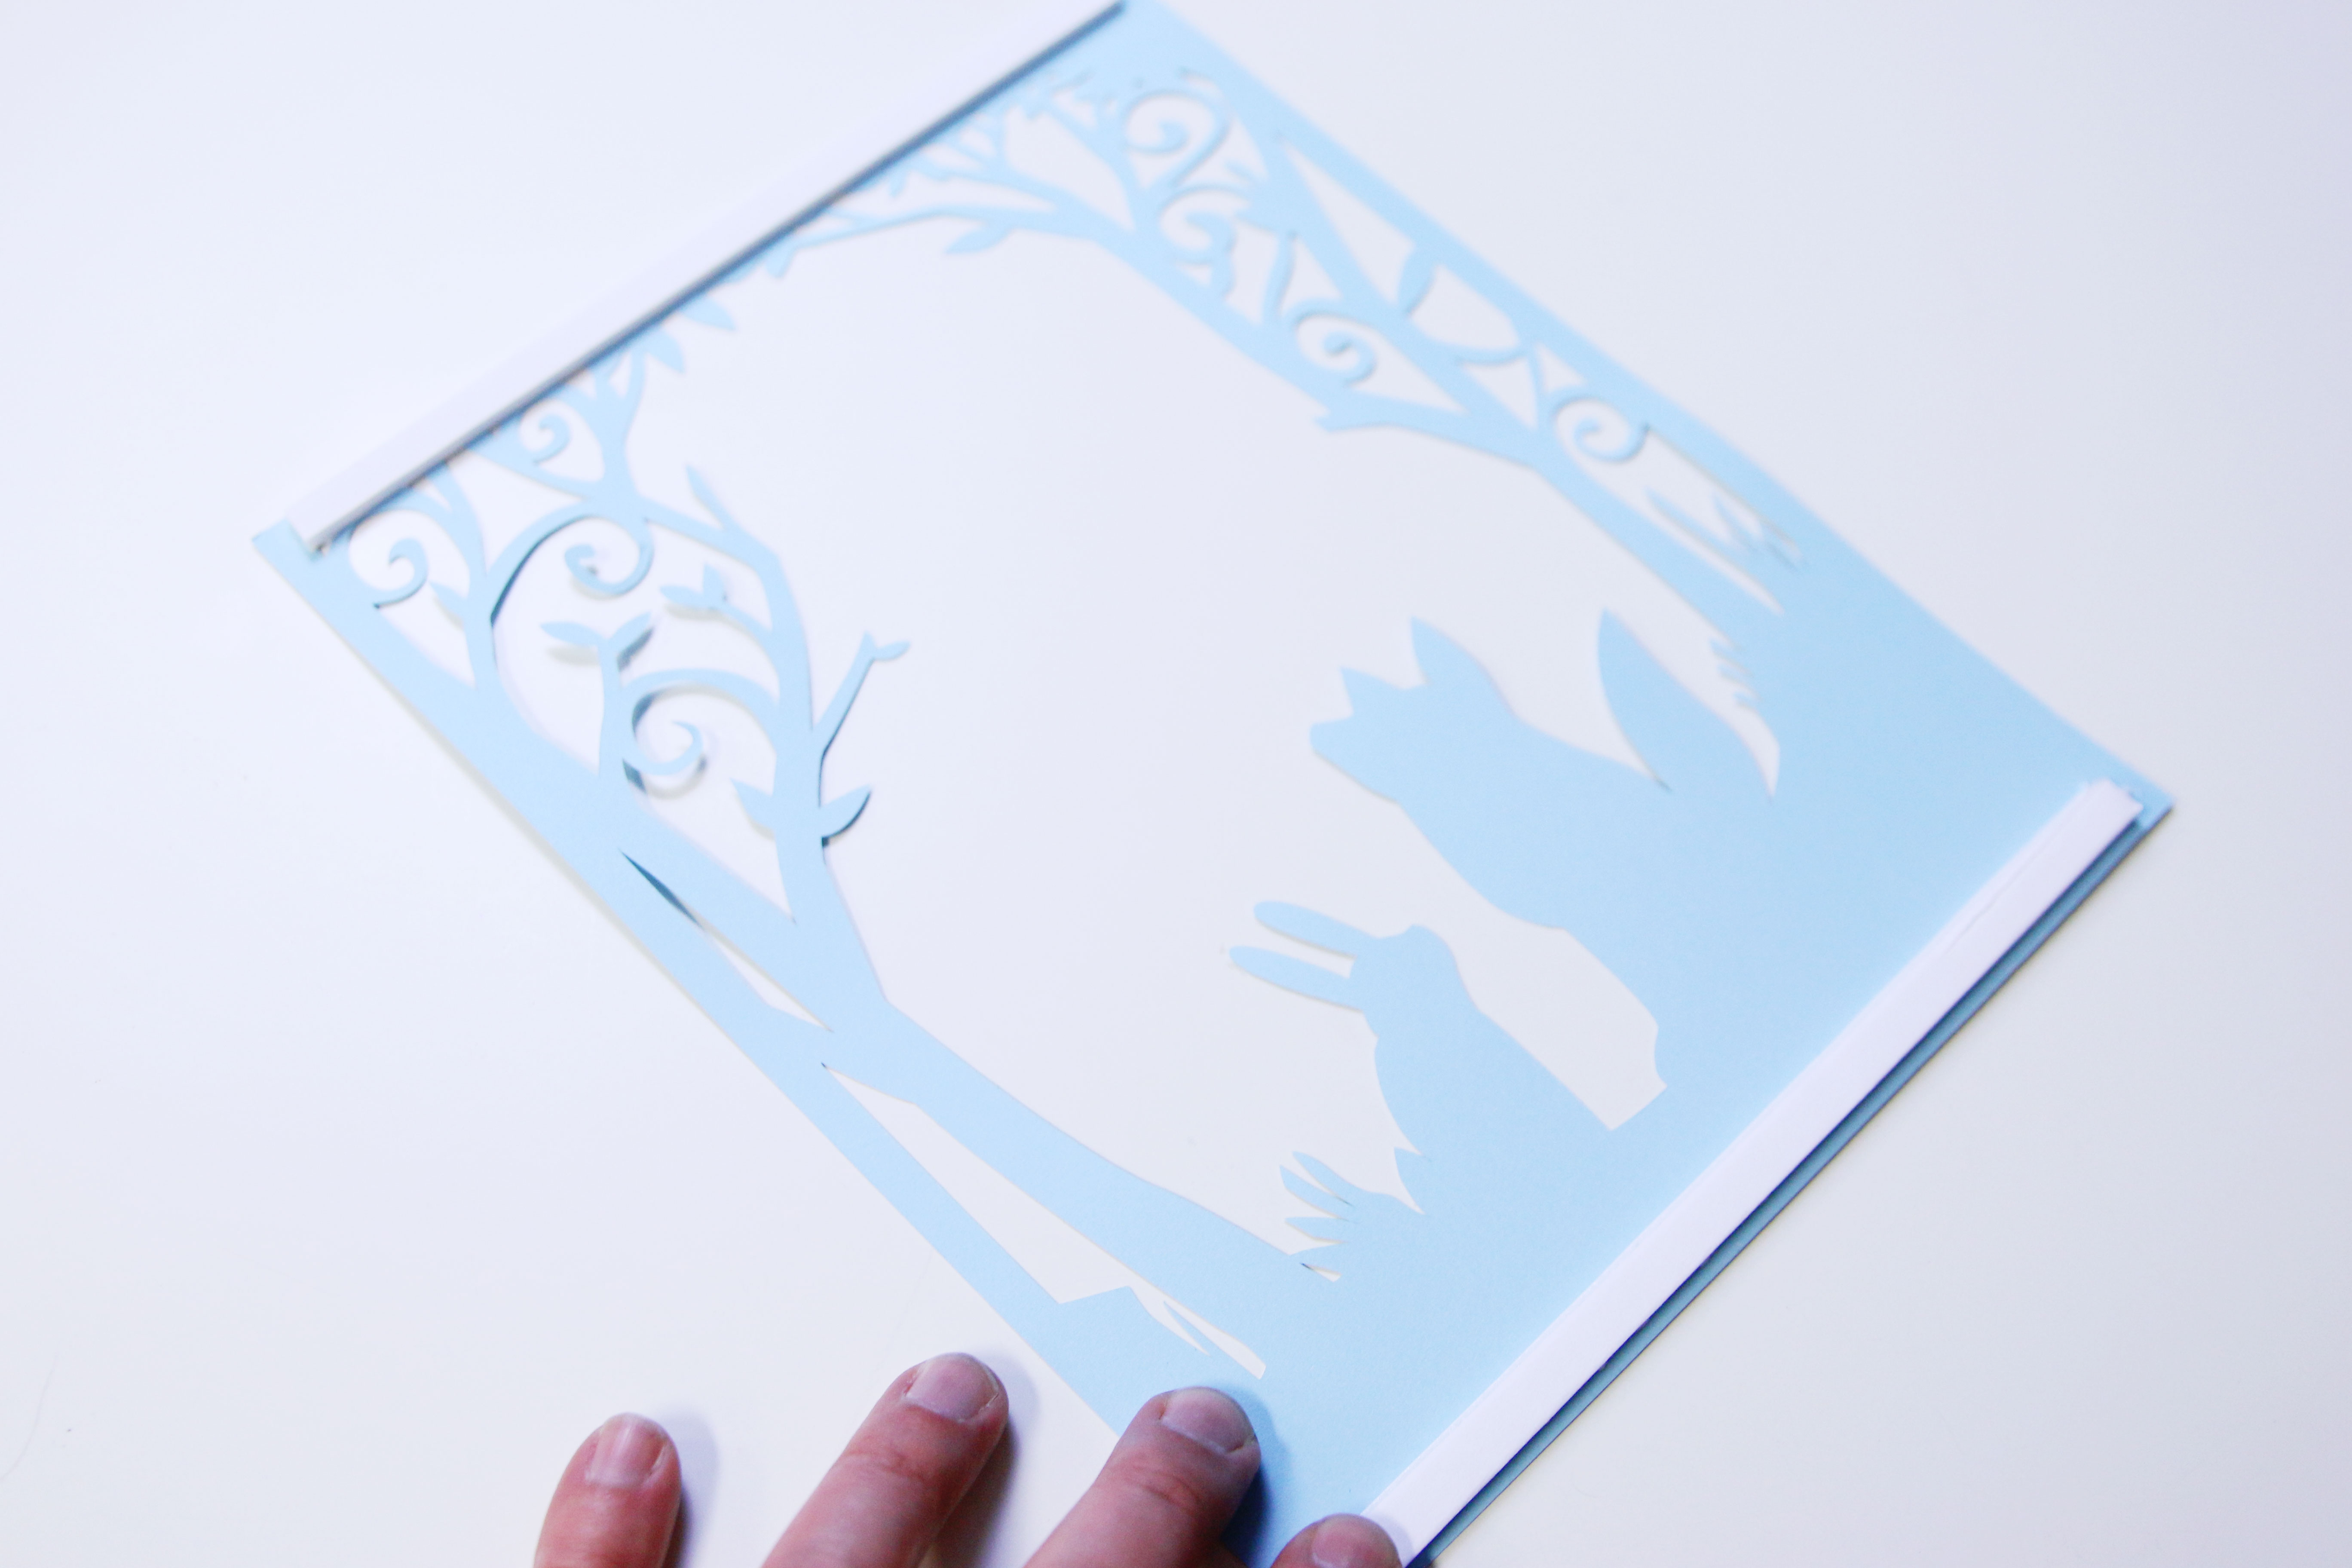
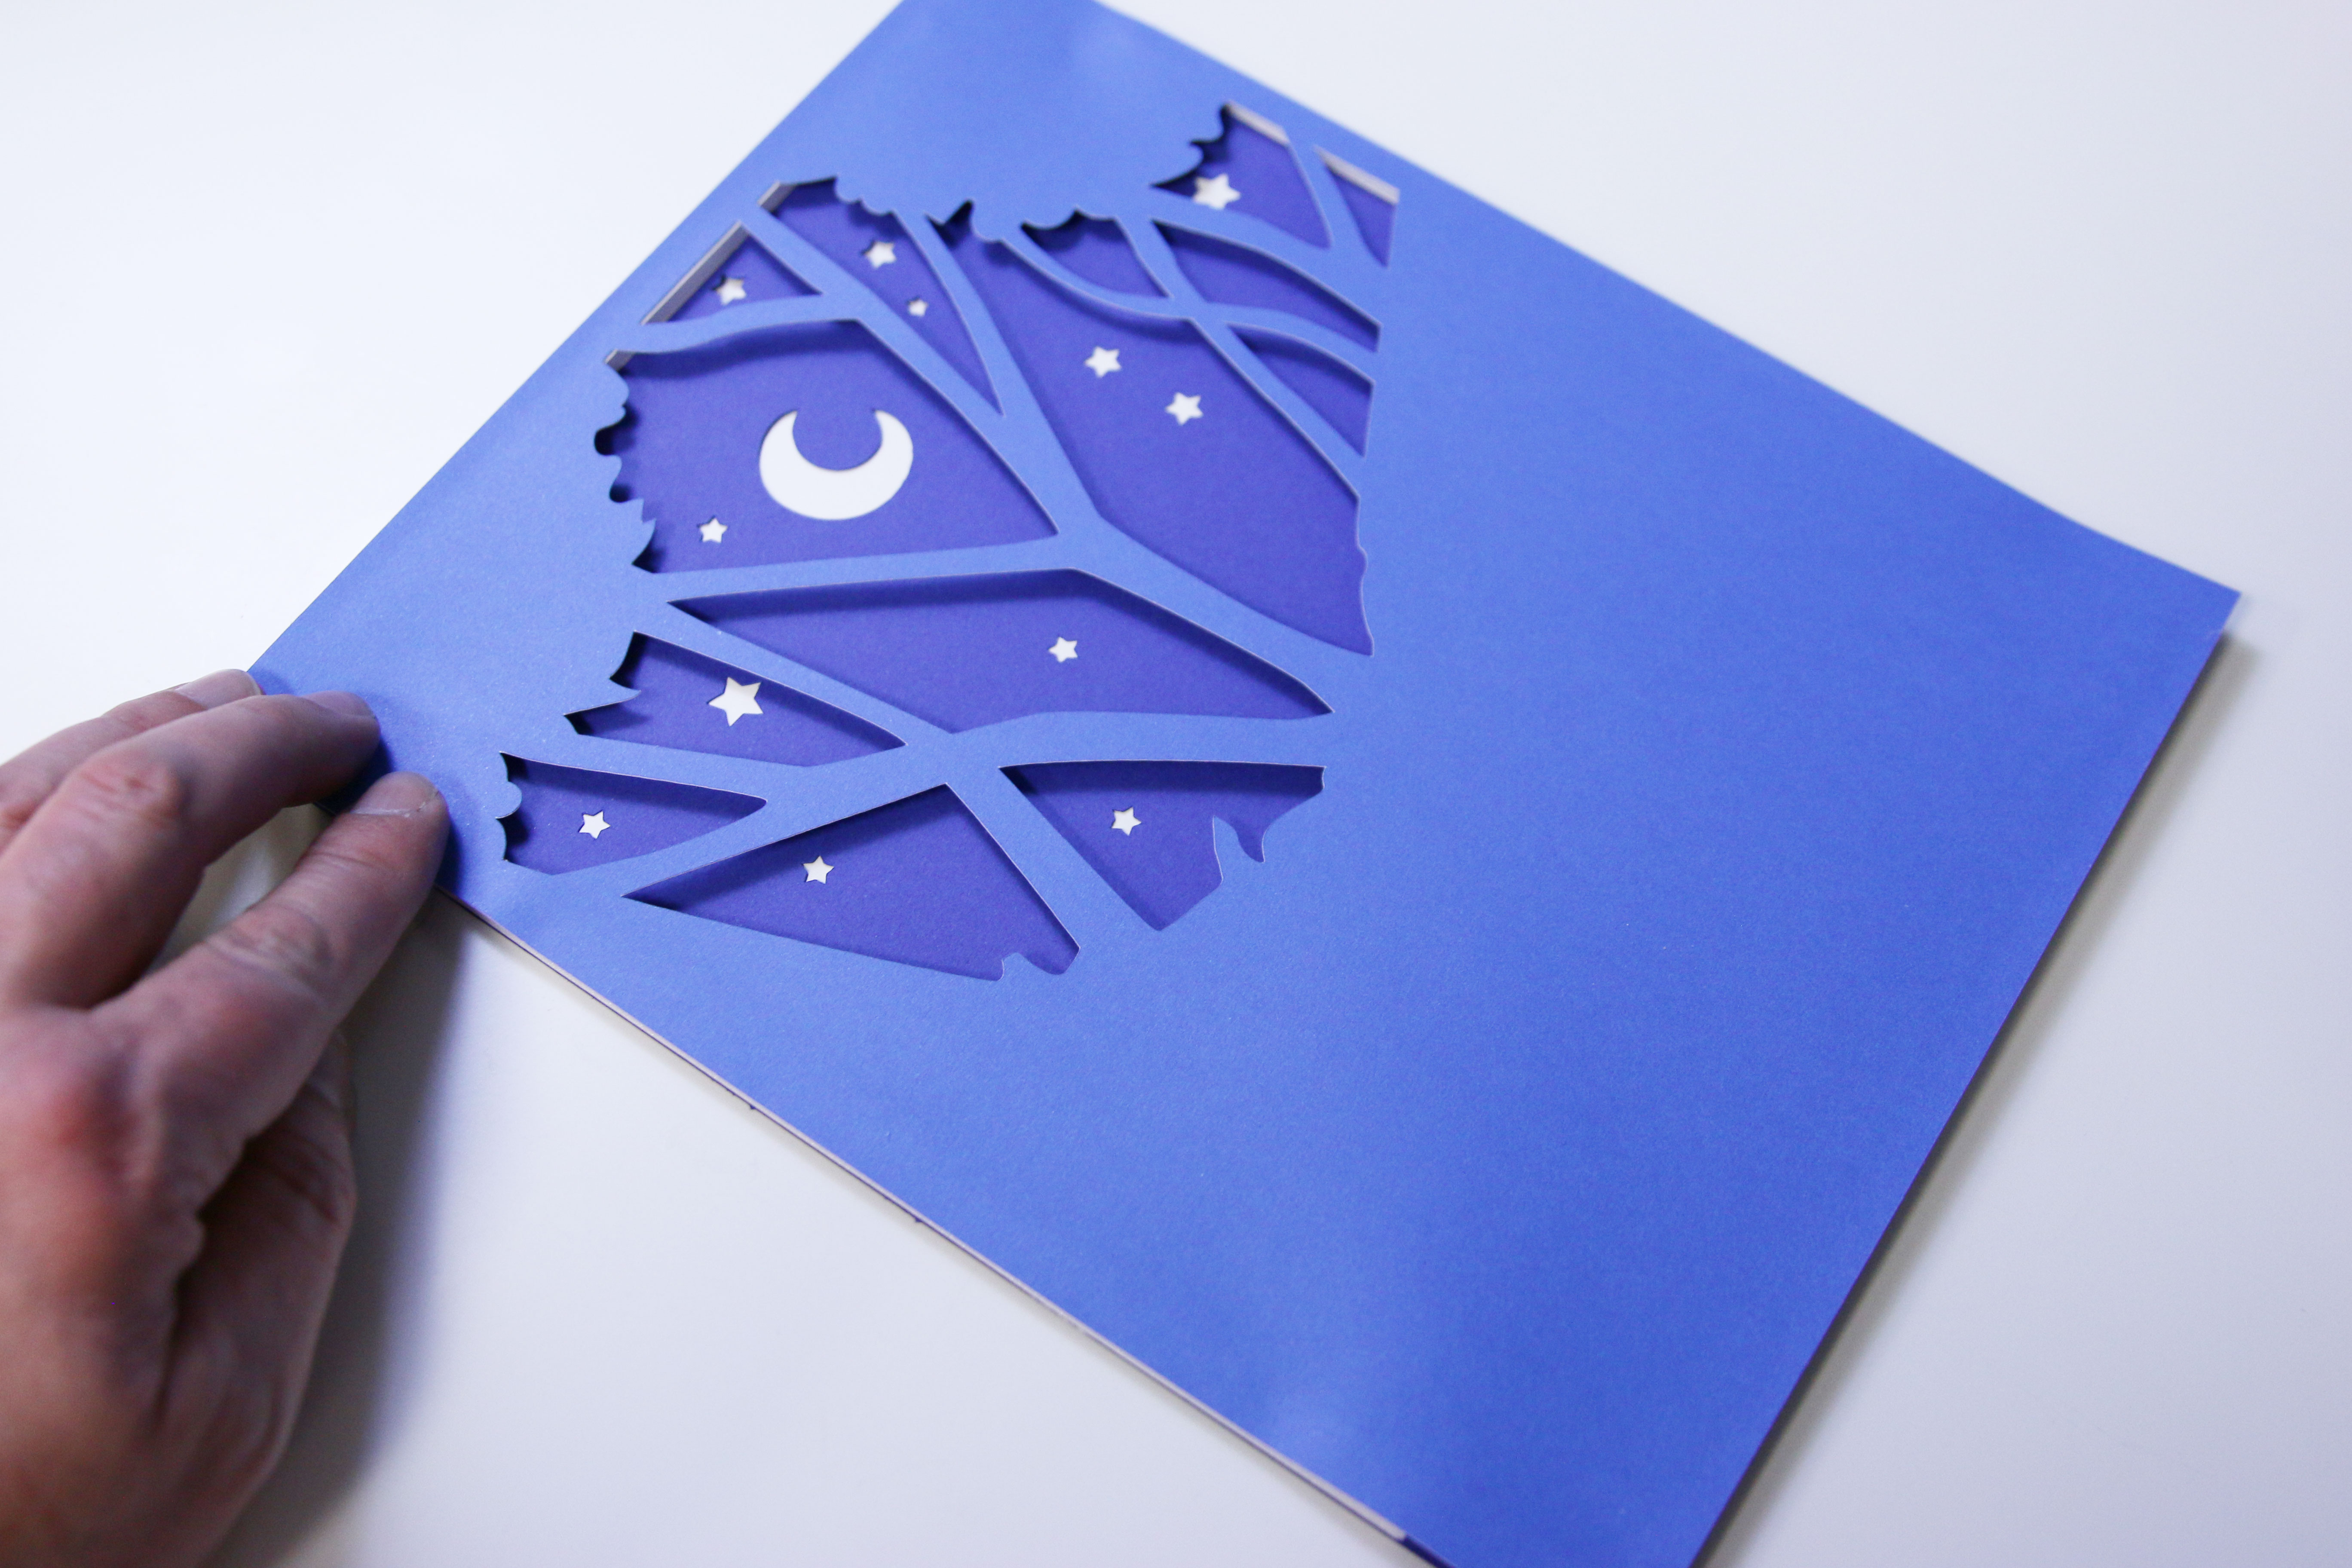
Smooth the first cardstock color onto the adhesive mat. We cut our layers using a light color cardstock for Layer A (Color 1 - file is marked with an “A”) and chose a darker color shade of cardstock as we went along for Layer B (Color 2) through Layer D (Color 4, this layer is the darkest). This gives the shadowbox a dimensional look.
3
Cut out the first color. Carefully remove the cut pieces and excess cardstock.
4
Repeat to cut out all four cardstock layers for the Evening Forest Shadowbox.
Crafting Instructions
1

Using a craft knife, cutting mat, and metal ruler (or metal edged ruler) cut 12 strips of foam board to 1/4” wide by 7 1/2” long. These strips will be used for spacers in between the layers of paper.
2
Lay Layer A (Color 1) flat with the back side facing up. Add glue along the edges of the paper and press the foam strips in place along the outer edges of the paper. Repeat this for Layer B (Color 2) and Layer C (Color 3).
3
Place Layer D (Color 4) flat with the right side facing up. Add glue along all outer edges of the paper. Align Layer C (Color 3) on top and press in place.
4
Add glue to the outer edges of Layer C (Color 3) and place Layer B (color 2) on top, and then add glue to Layer B (color 2) and add Layer A (Color 1) on top. If any sections of a layer bends back a bit, you can glue small pieces of foam board in between the section and the layer behind it. For example, we add a 1/4” by 1/4” piece of foam board in between the fox and the layer right behind it to help the spacing stay even.
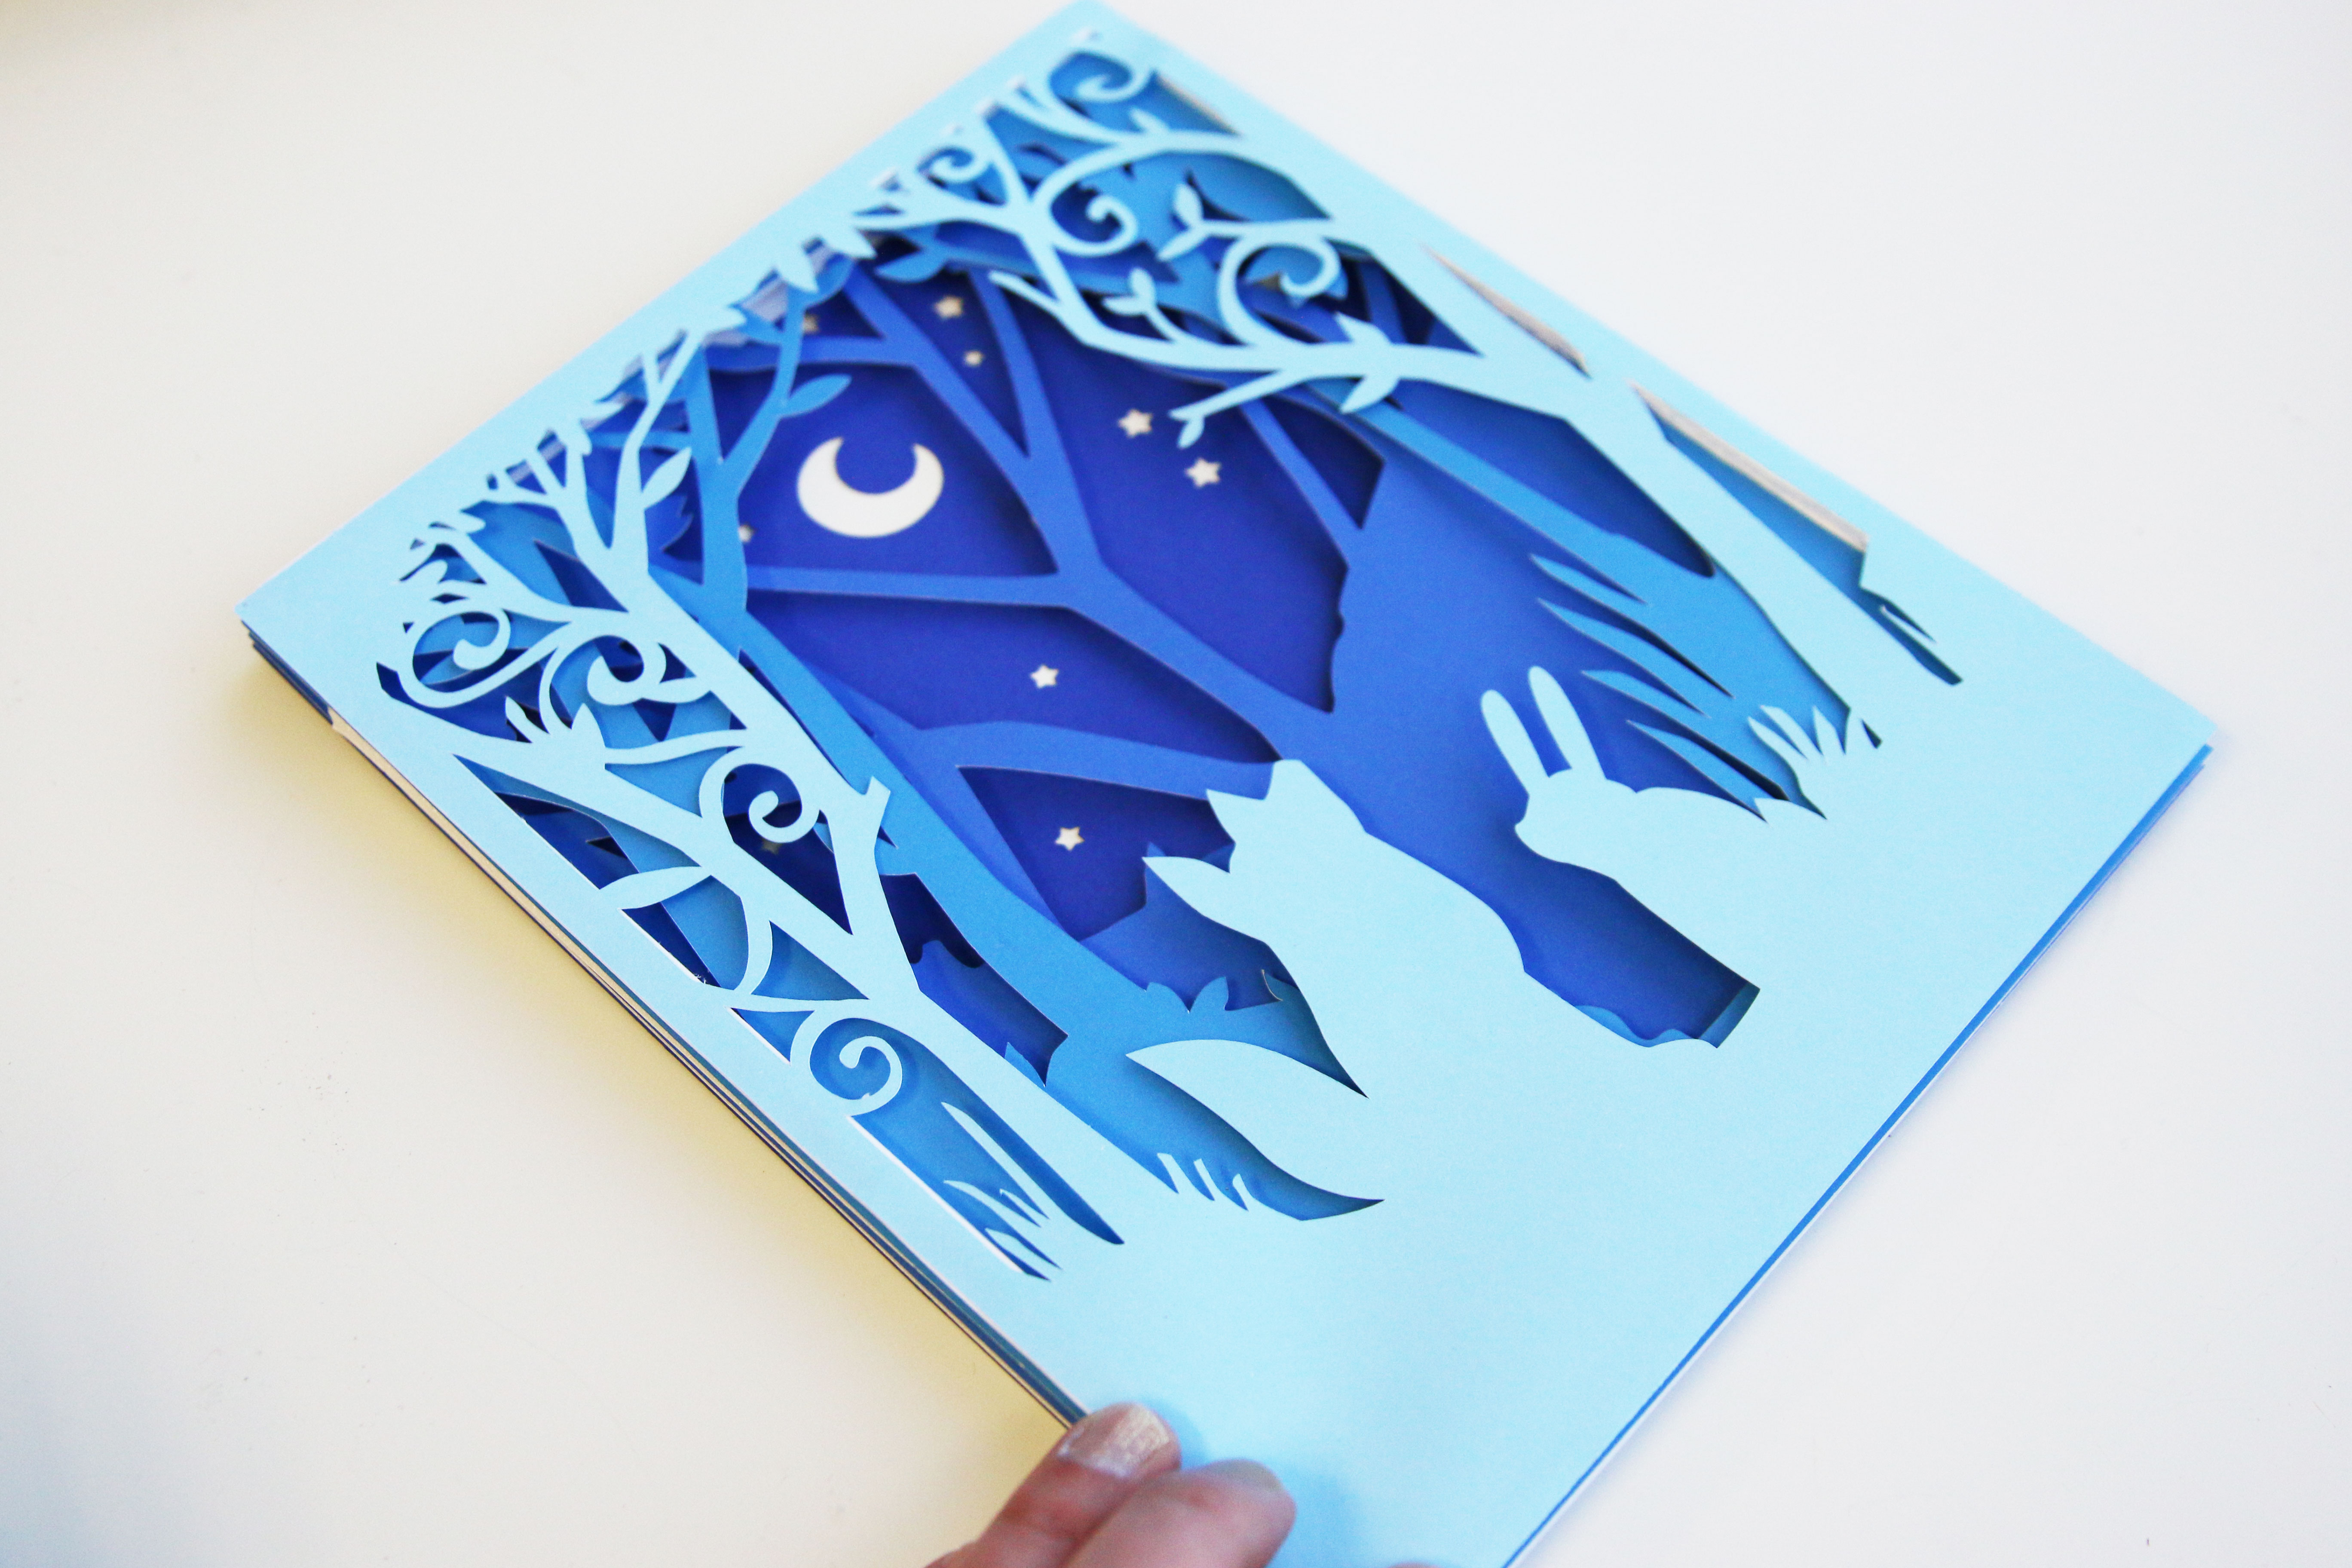
5
.jpg)
This completes the Evening Forest Shadowbox. Place a light behind the shadowbox for a glowing effect.


