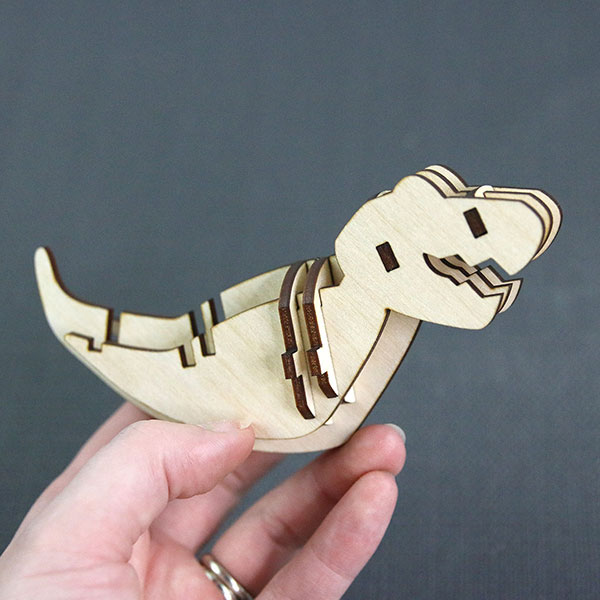
From kids' decor to novelty items to sell at craft fairs, this 3D slotted tyrannosaurus rex laser cutting design is both fearsome and fun! Follow along with project instructions below and walk through how to assemble this prehistoric figurine step-by-step.
Supplies
- 1/8" Wood or MDF
- Wood glue
Tools
- Glowforge or other laser cutting machine
- Digital calipers for measuring kerf
Designs Used
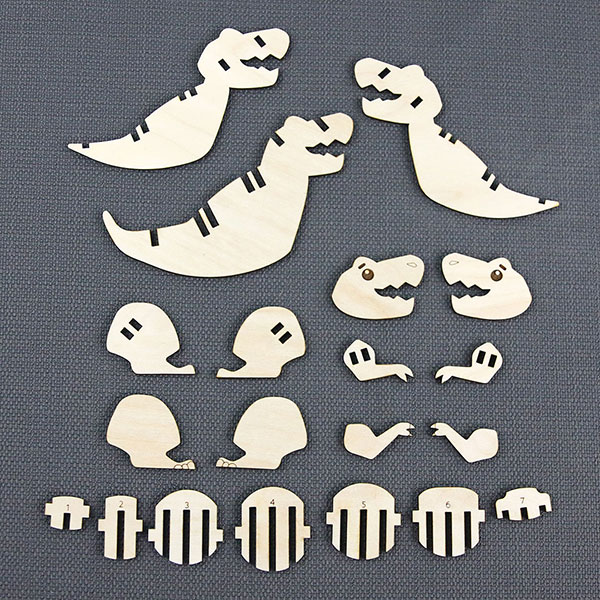
Before assembling your 3D T-rex laser cutting figurine, cut out all pieces for this design. We recommend laying them out on a flat surface, making sure that all pieces are accounted for. There should be twenty pieces in total.
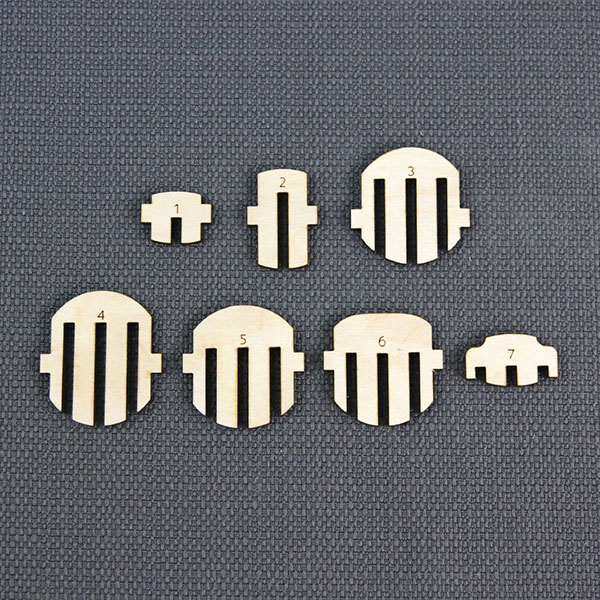
The center pieces of the dinosaur have been numbered 1 - 7 in the order that they will be needed for assembly.
To start, slide piece 1 and 2 over the center dinosaur piece, starting at the dinosaur's nose. The center body piece is also the widest and longest piece.
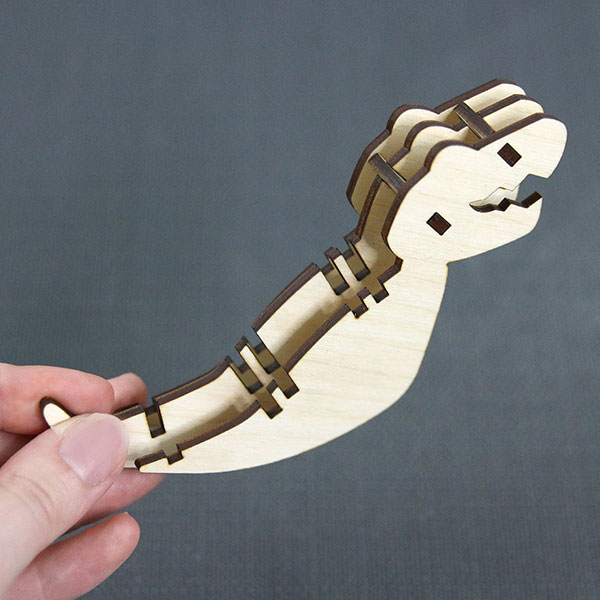
Next, slot the two outside body pieces onto the notches present on pieces 1 and 2.
Now, take pieces 3 and 4 and slot them into the next set of slots working toward the tail. Piece 4 should be placed after piece 3.
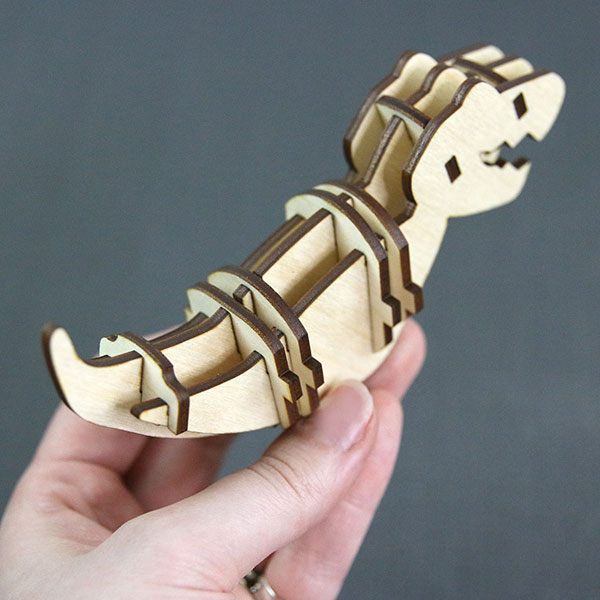
Continue adding pieces 5, 6 and 7 into their slots. Piece 7 should be the one closest to the tip of the tail.
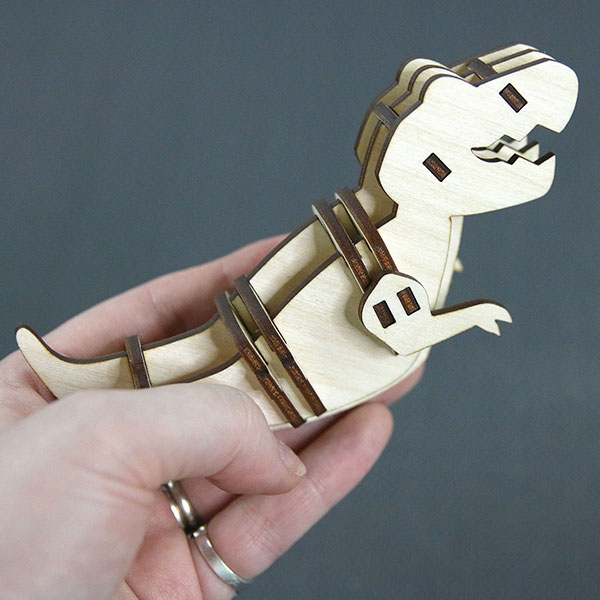
Next, slot the arms onto the notches of pieces 3 and 4. Do this on both sides of the dinosaur.
Slot the legs over the notches on pieces 5 and 6. Do this on both sides of the dinosaur.
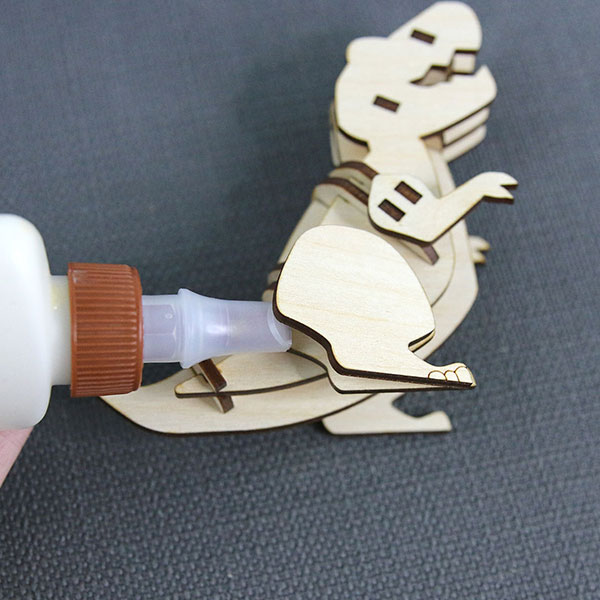
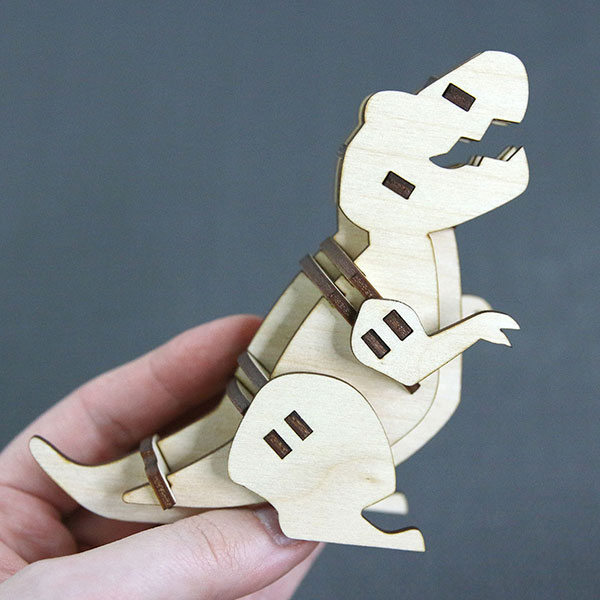
Once the pieces have been slotted, take the leg pieces with no notches or slots. Use wood glue to adhere them to the leg pieces that you just placed, being careful to match the leg piece edges on all sides. Do this for both sides of the dinosaur, while making sure that the scored details on the dinosaur's foot are facing the correct direction.
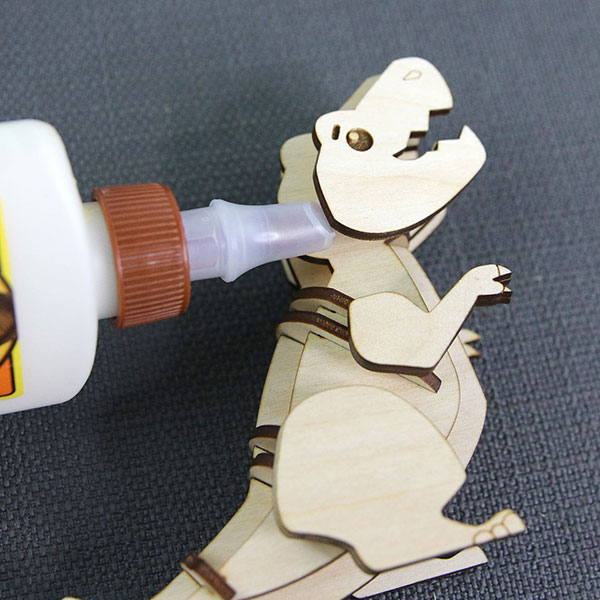
Finally, repeat the previous step, but do so for the arms and head.
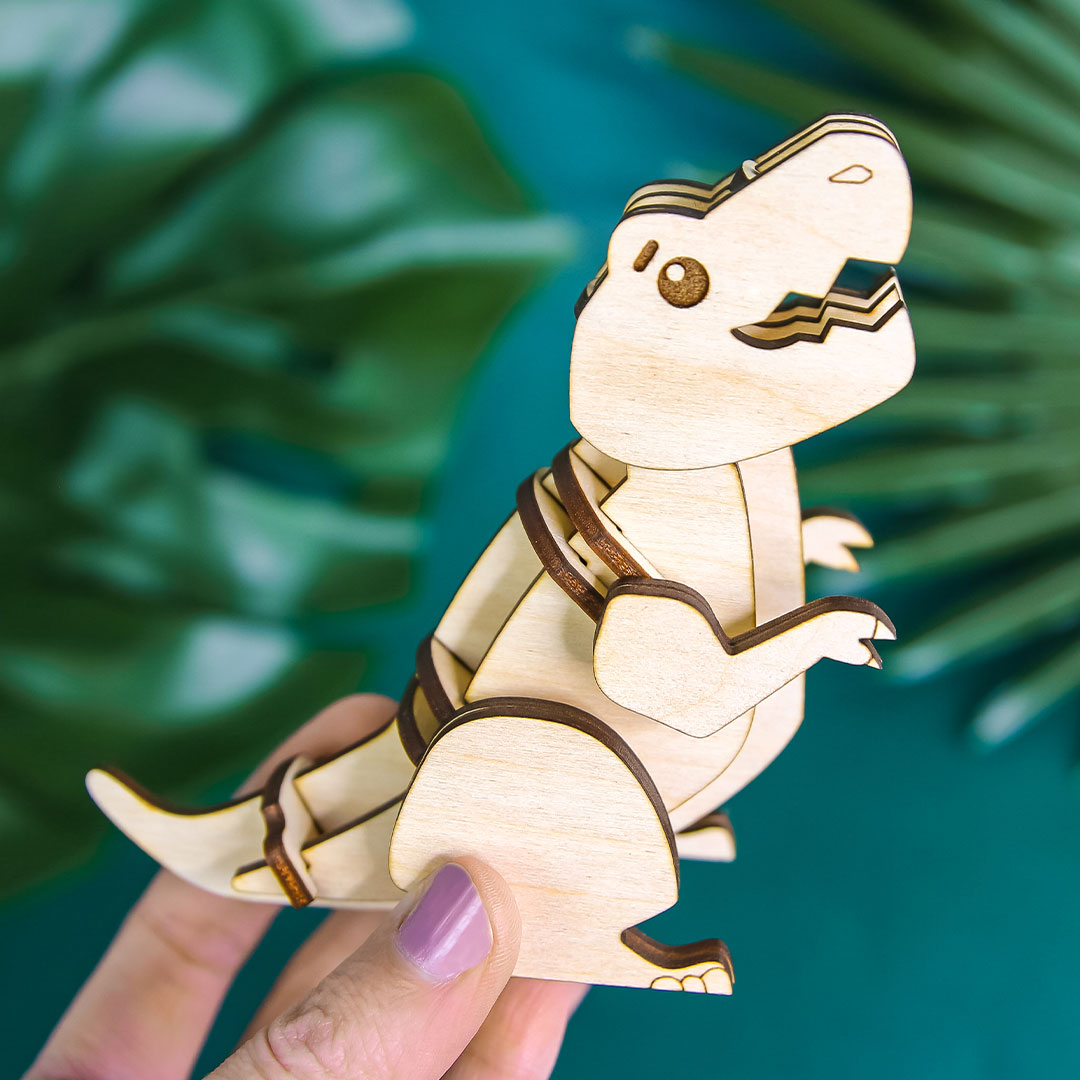
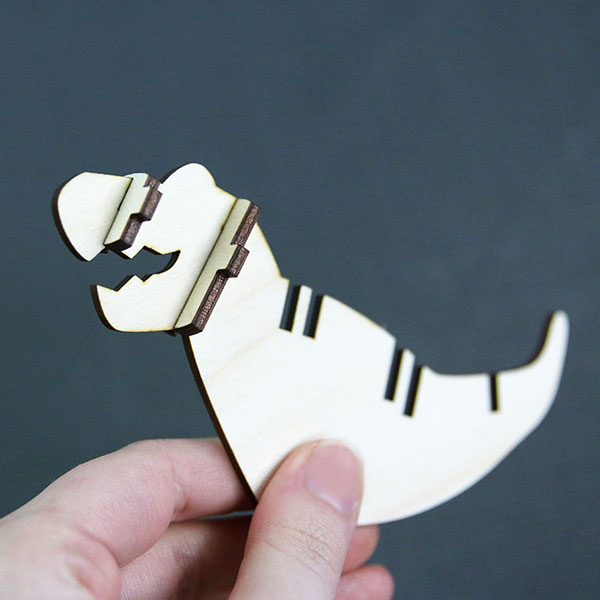
Once all pieces are assembled and dry, your 3D T-rex is ready to roar!


