Supplies
- 65 lb. cardstock
- Translucent vellum
- Crafter’s glue
Designs Used
Crafting Instructions
1
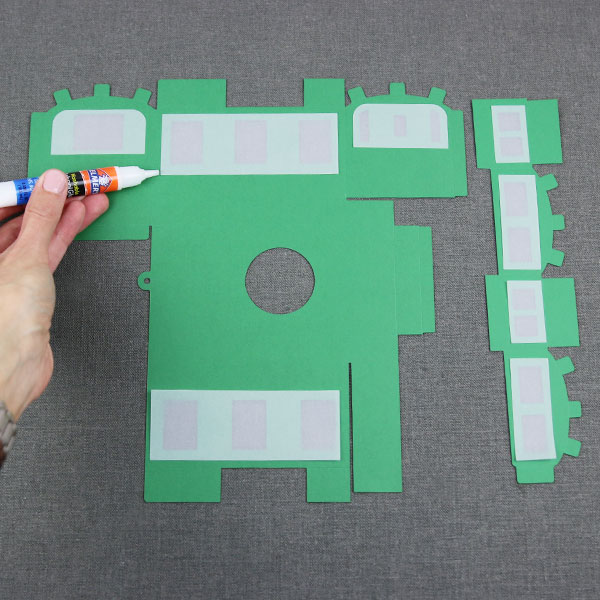
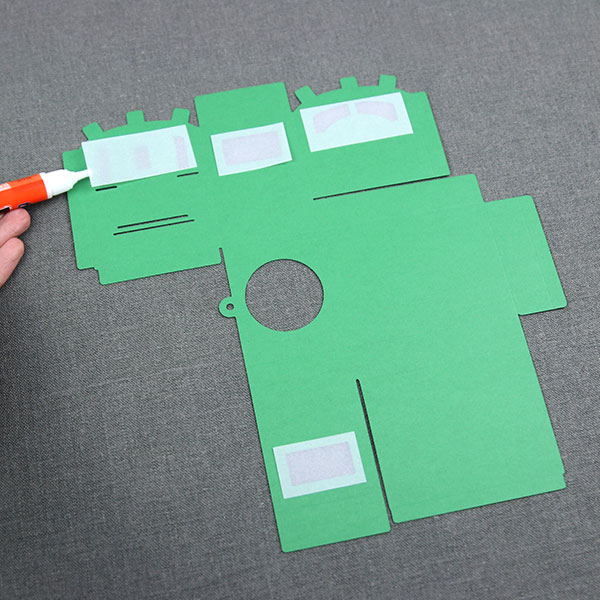
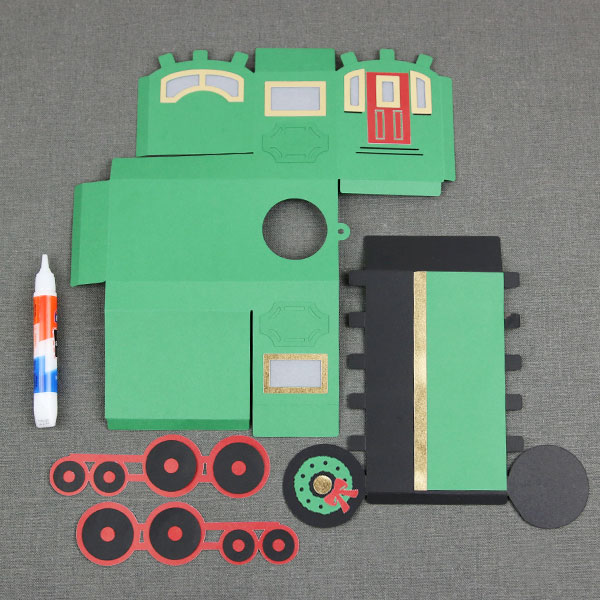
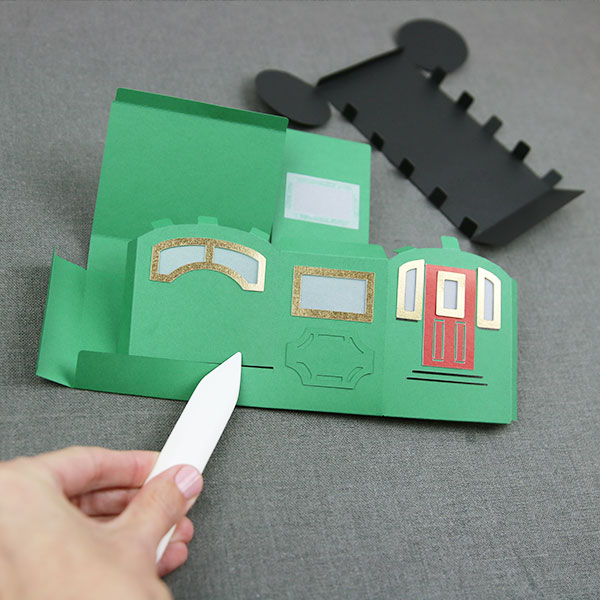
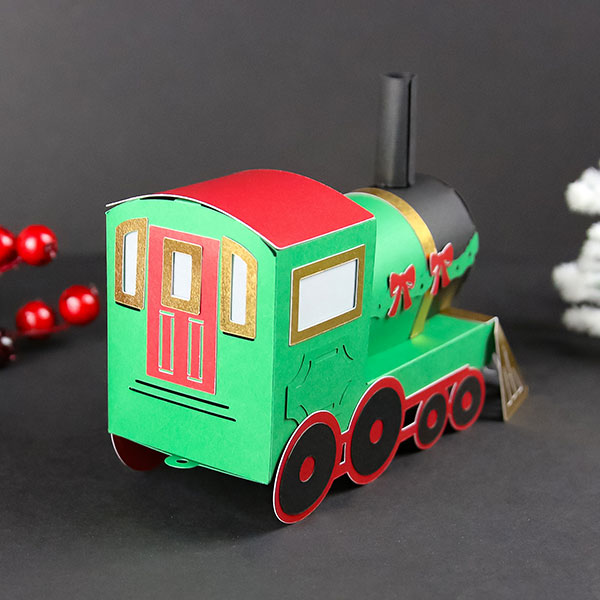
Using crafter’s glue, attach the vellum window inserts to the back of the main caboose body pieces (this will be the inside of the train) over the cut window openings.
2
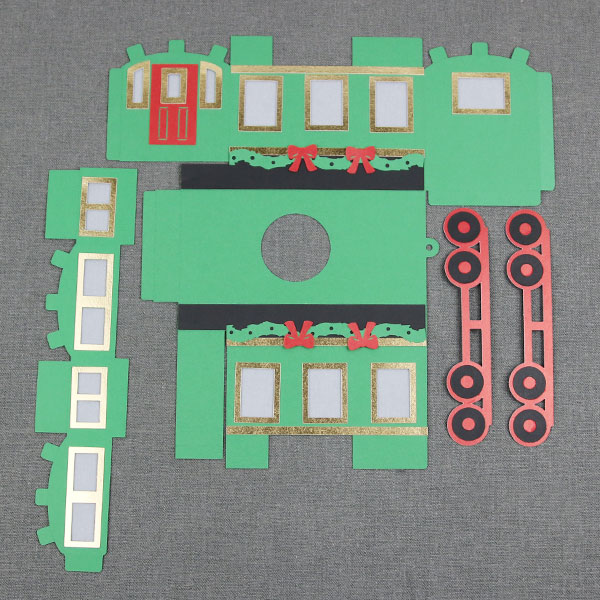
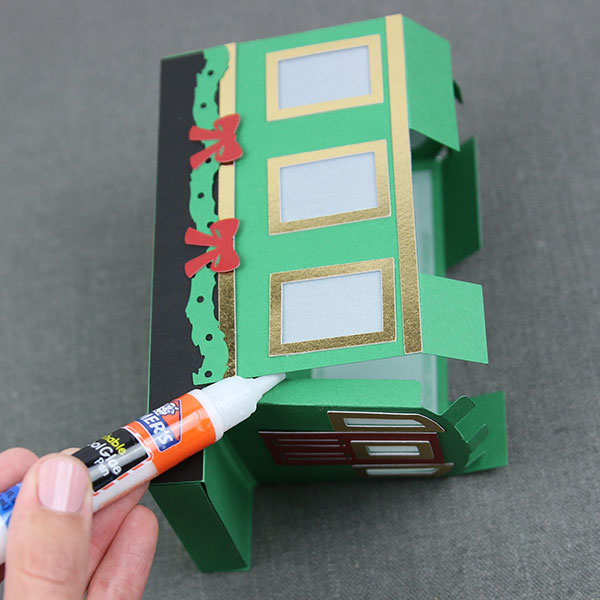
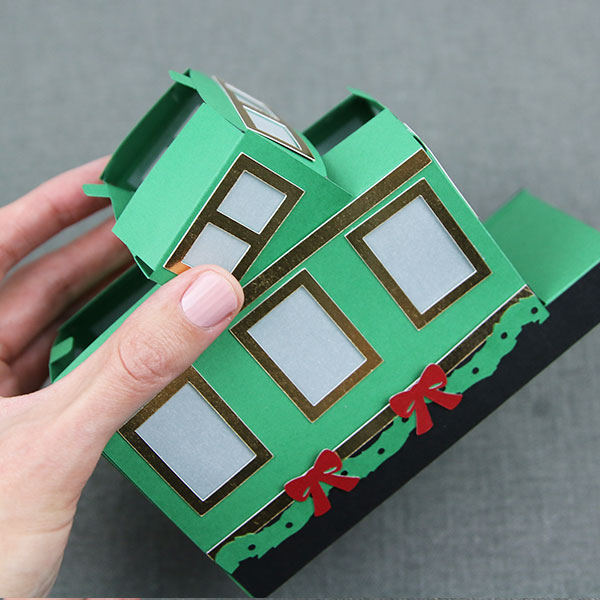
Next, glue the caboose details to the body while it is still flat. This includes the door, accent colors for the bottom half of the car, garlands and bows, window trim, and wheel accents.
3
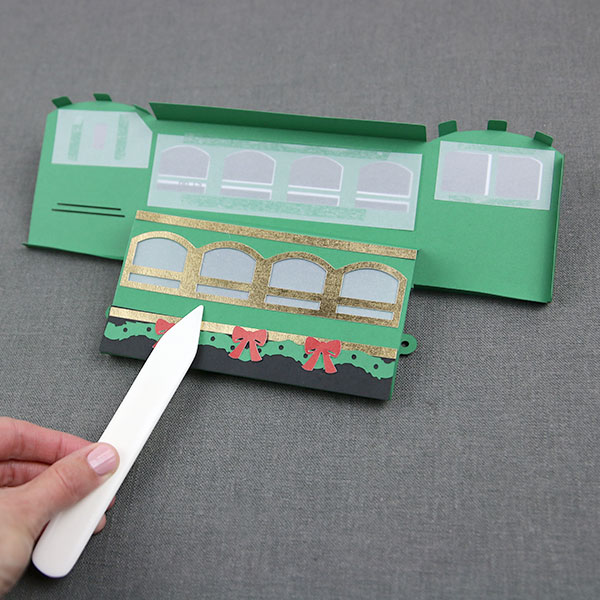
Fold the caboose and cupola (what will be the upper window piece) along the included scoring lines.
4
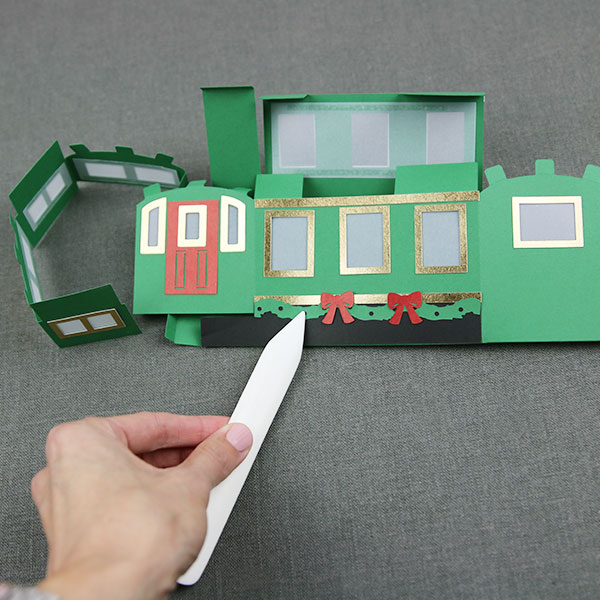
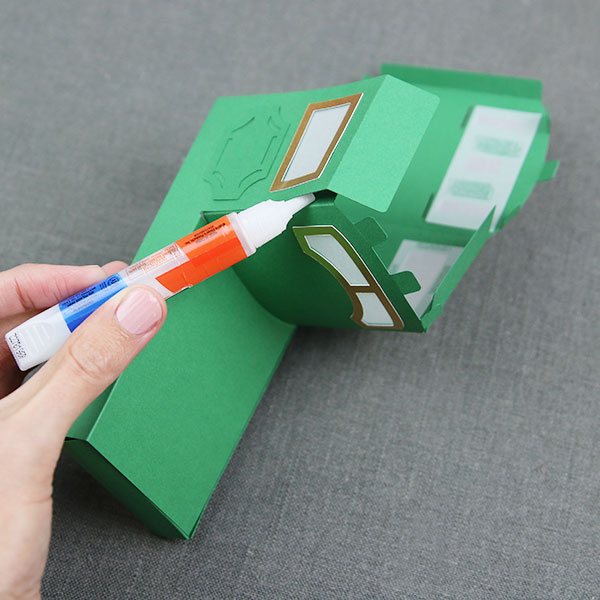
Glue all tabs to their corresponding sides. This will form the caboose body.
5
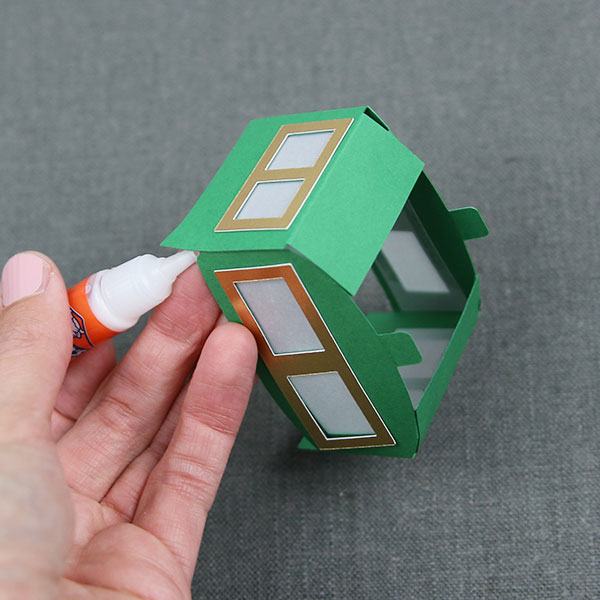
Just as you did with the caboose body, glue all tabs to their corresponding sides on the cupola.
6
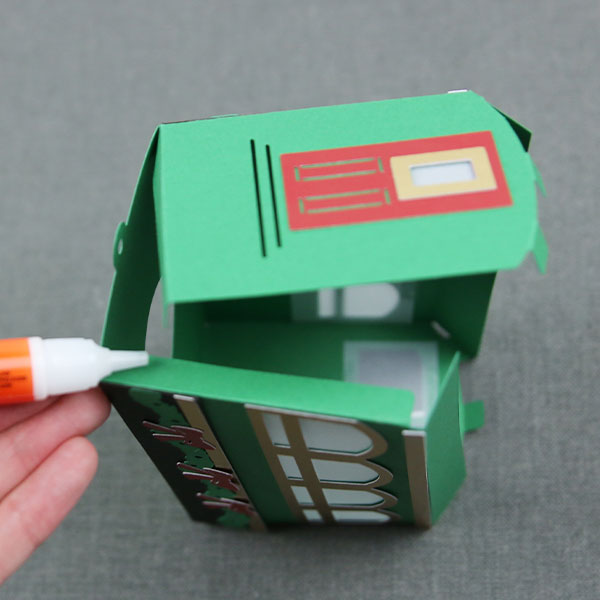
Then, add glue to the outter tabs of the cupola, and slide it into the gap at the center of the caboose. Take care that the bottom flaps are on the inside of the caboose.
7
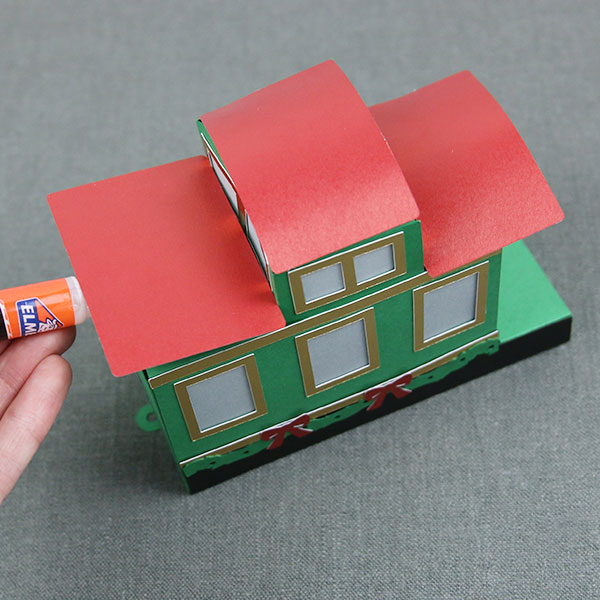
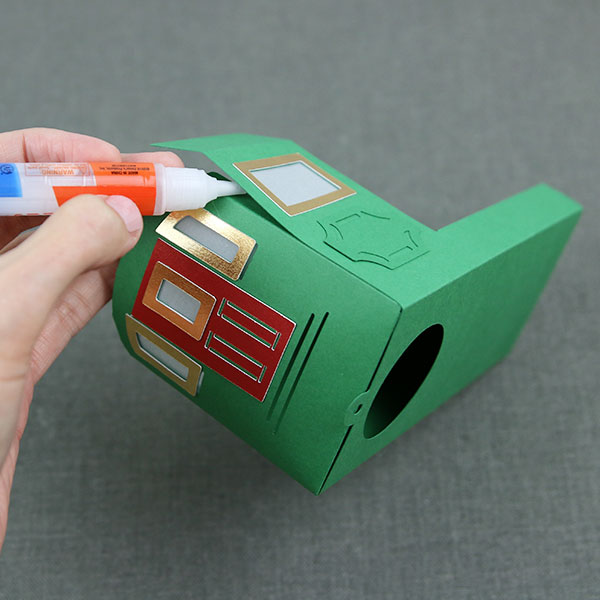
Use glue to attached the roof pieces to both the caboose body and the cupola. This may be easiest to do with a quick drying adhesive such as hot glue or double-sided tape.
8
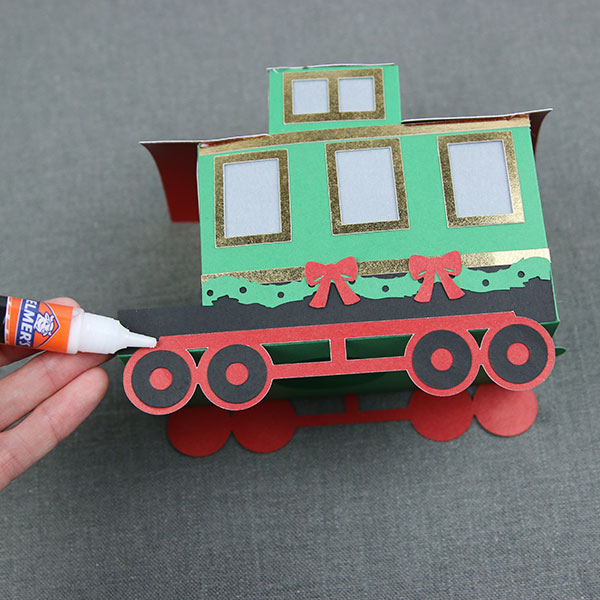
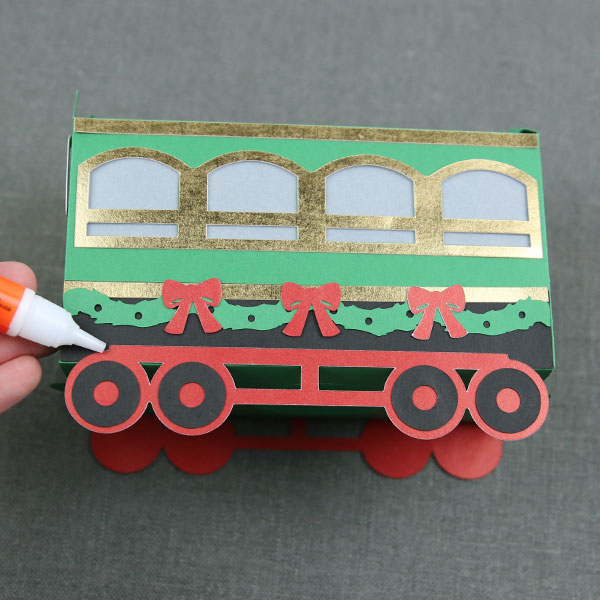
Next, glue the wheels to the caboose, lining up the top rail with the bottom of the car.
9
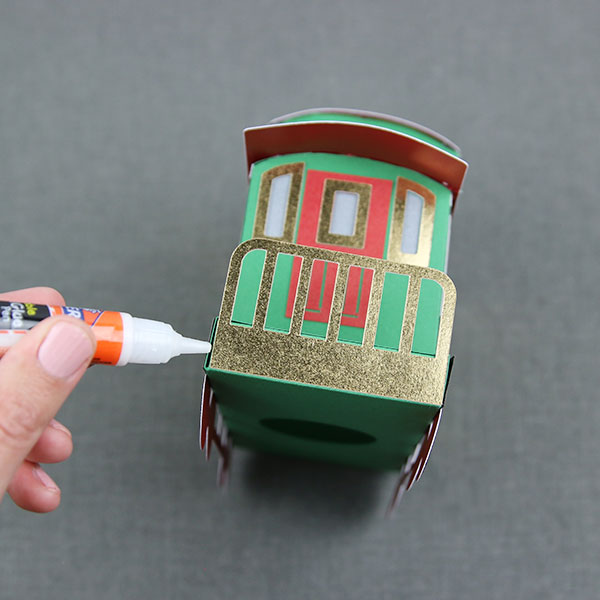
Finally, glue the handrail to the back of the caboose.
10
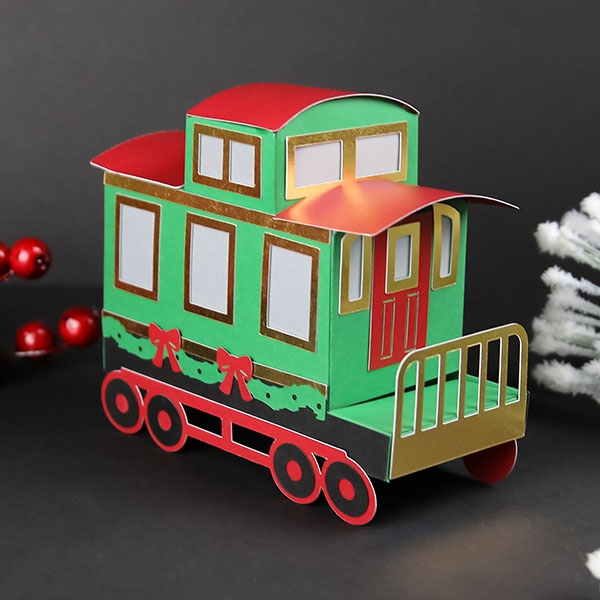
Your caboose is now complete! Now we will assemble the engine.
11
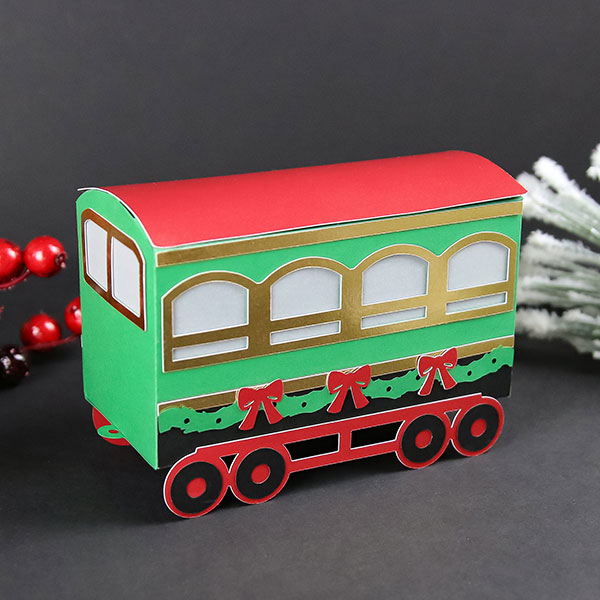
Just as you did with the caboose, glue the vellum window inserts to the back of the main engine body piece (this will be the inside of the train) over the cut window openings.
12
Next, glue the engine details to the body while it is still flat. This includes the door, window trim, accent colors on the barrel, tire accents and wreath.
13
Fold the engine and barrel pieces along the included scoring lines.
14
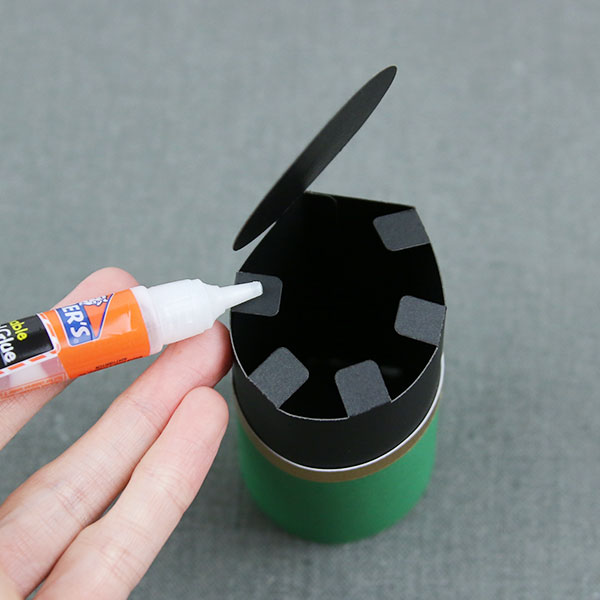
Then, glue the tabs to their corresponding sides and form the main body of the train engine.
15
Fold in the back piece of the engine and use crafter’s glue to attach.
16
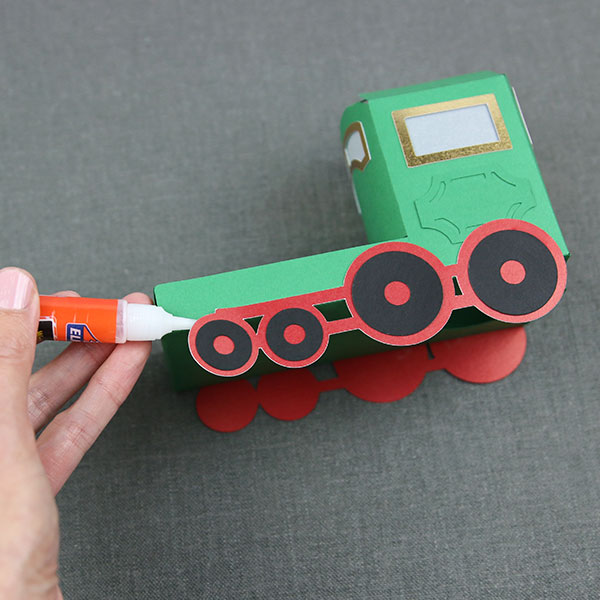
Next, glue the wheels to the engine, lining up the top rail with the bottom of the train.
17
Roll the barrel piece to form a cylinder, and glue the tab on the bottom of the barrel. Doing so will provide a flat base to attach to the engine body.
18
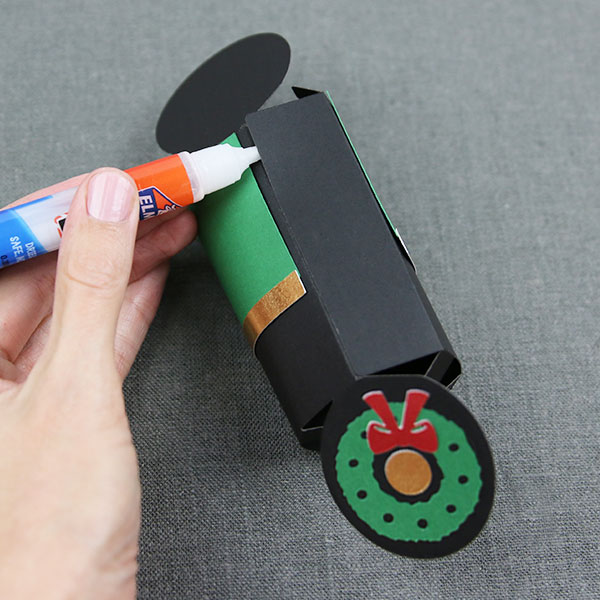
Then, add glue to the tabs at either end of the barrel and secure the round pieces to the tabs. This will help the barrel to hold its shape.
19
Attach the barrel to the train engine body. This may be easiest to do with a quick drying adhesive such as hot glue or double-sided tape.
20
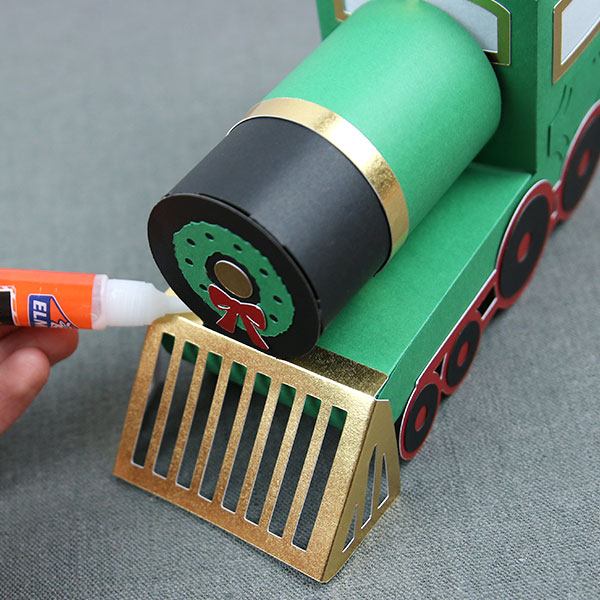
Next, glue the triangular shaped grate piece to the front of the train body.
21
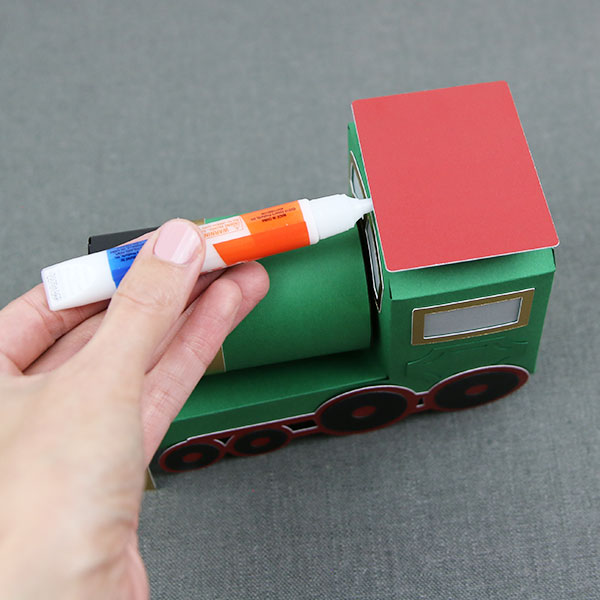
Glue the roof to the body of the train engine. This may be easiest to do with a quick drying adhesive such as hot glue or double-sided tape.
22
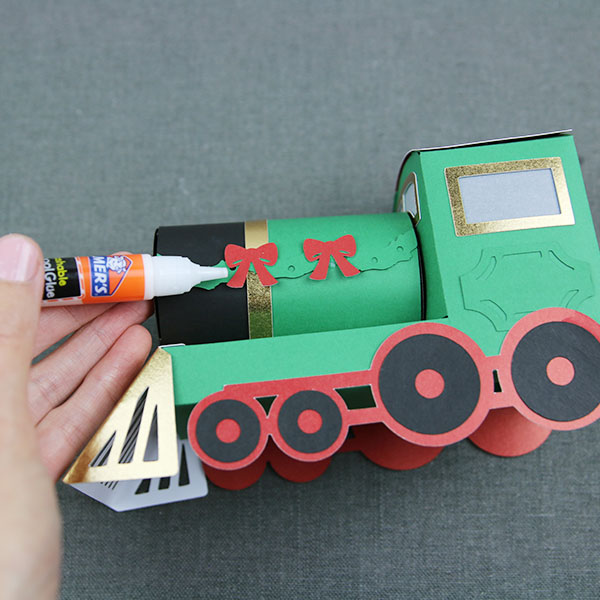
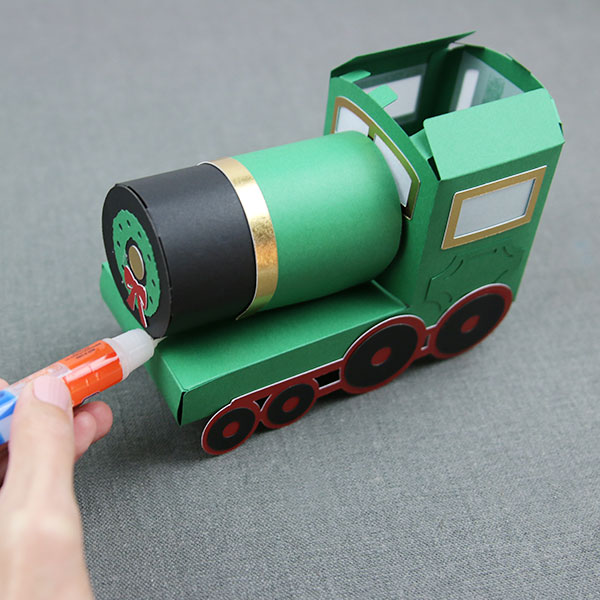
Glue the garland and bows to the engine barrel.
23
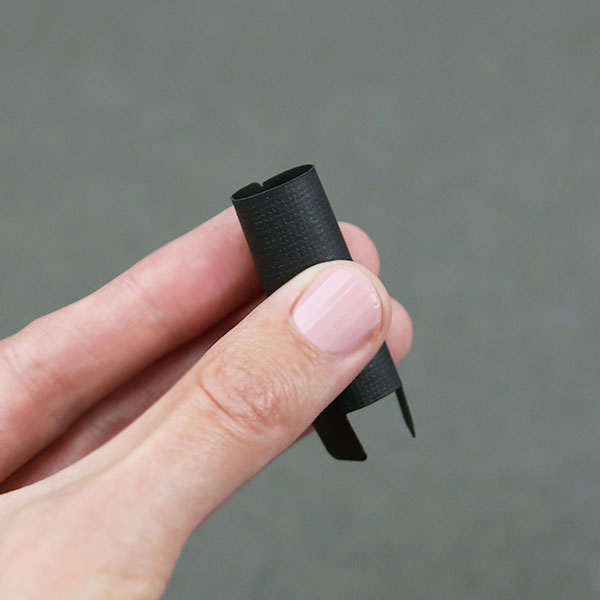
Roll the smoke stack with the tabs facing down and secure with glue.
24
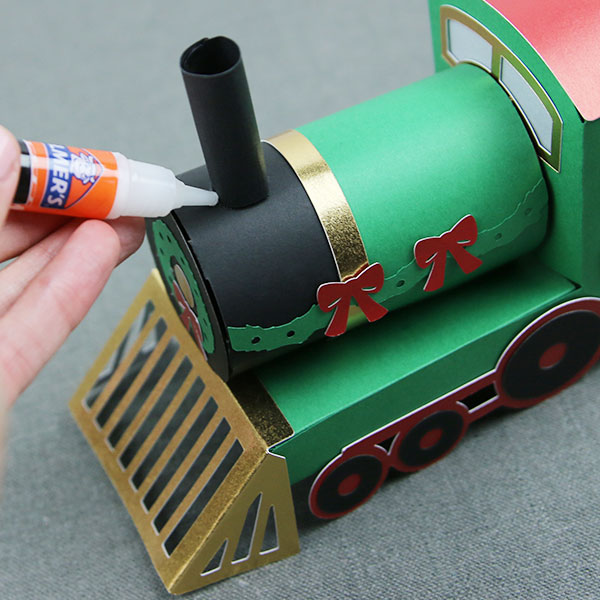
Finally, fold the tabs inward and glue the smoke stack to the top of the barrel of the engine.
25
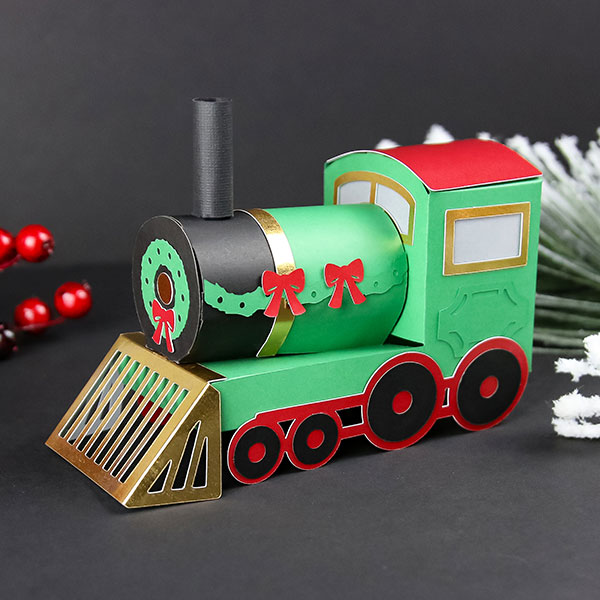
Your train engine is now complete!
26
Next we will construct the train car.
27
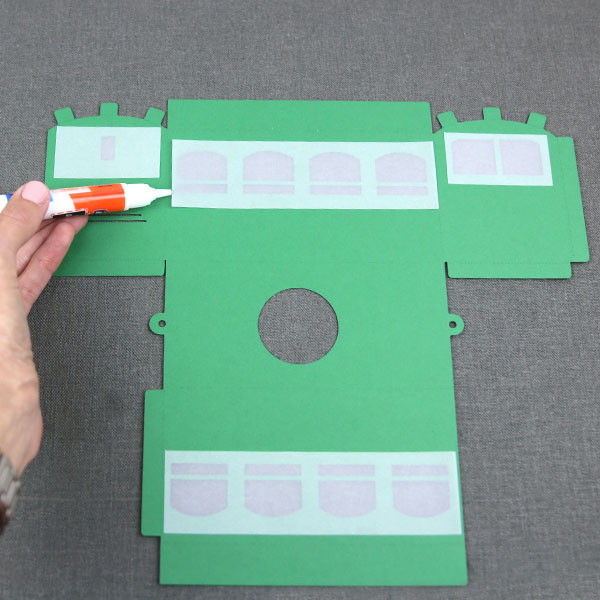
Just as you did for both the caboose and the engine, glue the vellum window inserts to the back side of the car piece over the window openings.
28
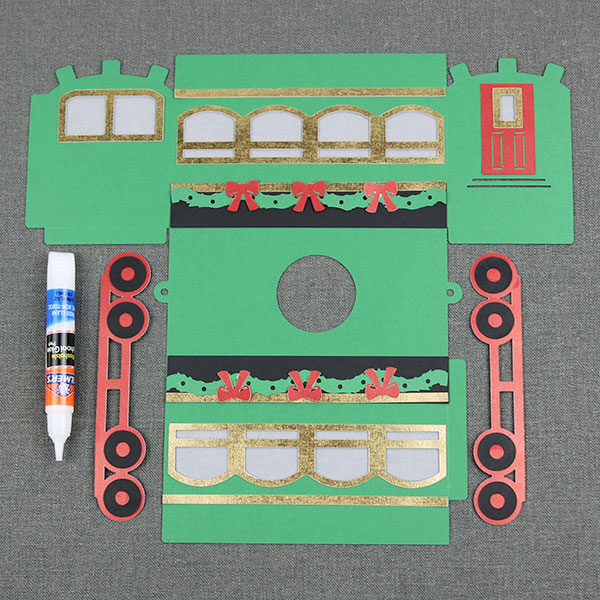
Glue the decorations and details to the car body while it is still flat. This includes the door, accent colors for the bottom of the car, garlands and bows, windows trim, and wheel accents.
29
Then, fold the car along the included scoring lines.
30
Glue all tabs to their corresponding sides and form the car body.
31
Next, glue the wheels to the passenger car, lining up the top rail with the bottom of the train.
32
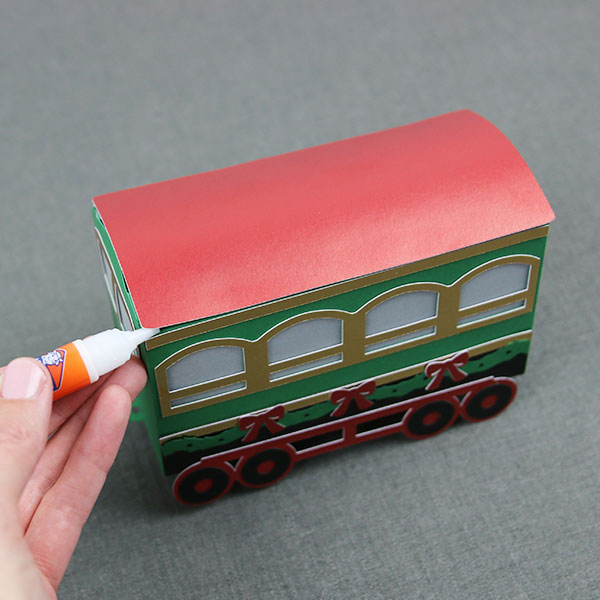
Finally, glue the roof of the train to the body of the train car. This may be easiest to do with a quick drying adhesive such as hot glue or double-sided tape.
33
Your train car is complete!
34
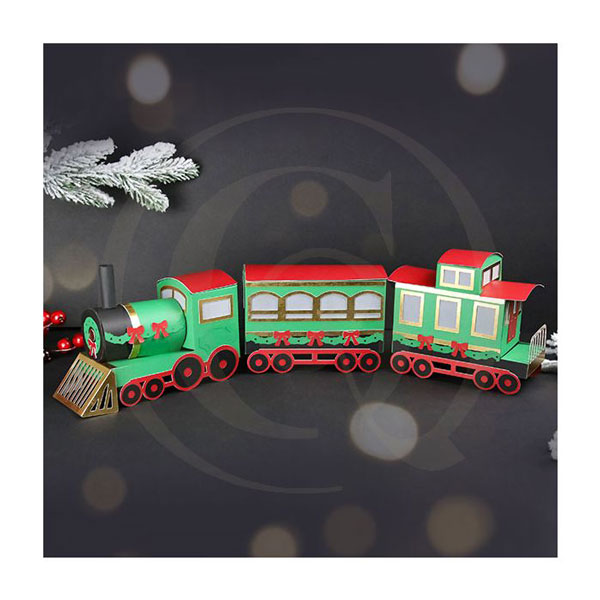
Now that you’ve made each piece of the train, you can connect the separate cars using string or jump rings. Make multiple passenger cars for a truly magical showpiece in your home.


