There are millions of creative ways to use laser cutting machines like Glowforge, and laser engraving fabric is one of them! We went through the process of testing different settings, fabrics, and materials, making it easy for you to become an expert at engraving fabric with a laser.
Designs Used
Laser engraving on fabric is a great way to bring a customized touch to blankets, towels, tote bags – even items of clothing! It’s a process in which you are burning a design into the top layer of the fabric, creating an embossed look, or revealing the underlying thread color.
How Does Laser Engraving On Fabric Work?
The key to laser engraving fabric is using a combination of high speed and low power settings. Because of this combination, fabric does not need to be masked when engraving.
The darkness and depth of the engraving can be changed by adjusting the speed and power settings in your laser interface. Because of how the speed and power work together, adjusting one setting up and another down can result in the same effect. For instance, 900 speed/1 power and 1000 speed/3 power may have similar results.
When laser engraving fabric, it is good to have magnets or another item to hold down your fabric. Doing so keeps the edges down and prevents shifting caused by the fan inside the laser cutter. We used a set of ceramic magnets to accomplish this.
Which Fabrics Can Be Laser Engraved?
Most natural and synthetic fabrics can be laser engraved. However, some work better than others. Before you begin engraving, you should consider:
- What material is your fabric?
- How thick is your fabric?
- What color is your fabric?
If you are planning on engraving an item that is premade or purchased like this fleece blanket, it may be a good idea to test your engraving settings by making a few swatches on similar fabric.
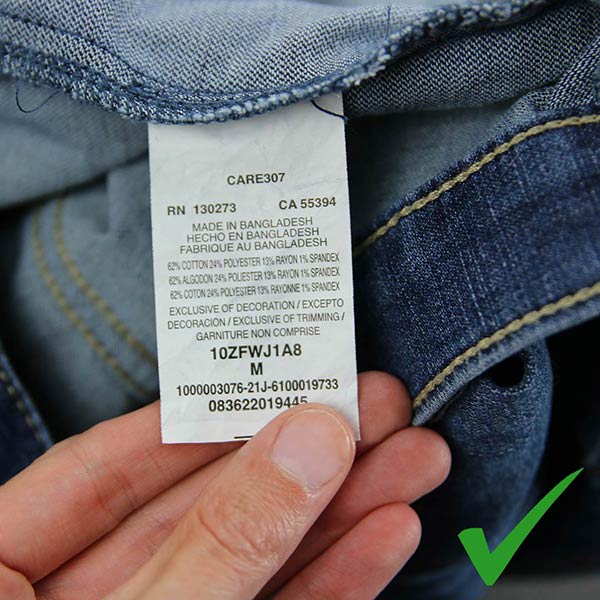
It is always important to check the fiber content of your fabric, and to know whether it has been treated with chemicals that make the fabric unsafe to use with a laser.
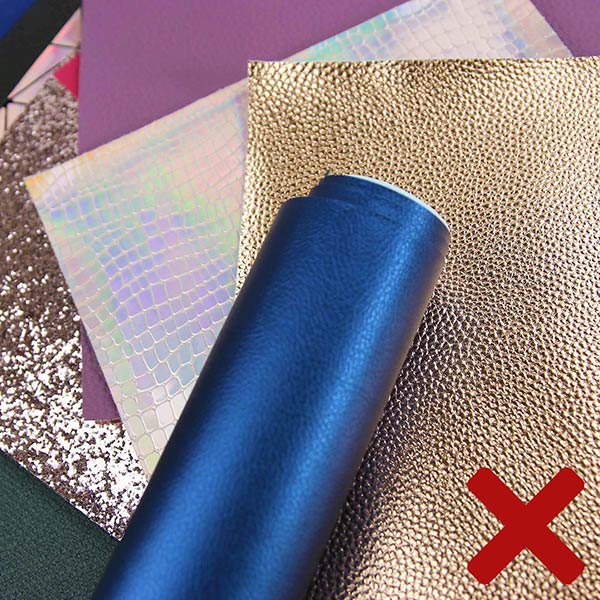
Fabrics such as faux leather contain Polyvinyl Chloride (PVC) and should never be cut with a laser. Doing so will produce toxic fumes and can corrode your laser cutting machine. In a similar manner, it is best to be cautious with flame-retardant fabrics as some chemicals used in the fire-proofing process will emit toxic fumes when vaporized by a laser.
The thickness of a fabric generally determines how deep the engraving can be before compromising the integrity of the fabric. Some thicker fabrics (such as plush, Minky, or corduroy) are ideal for creating an embossed effect by engraving deeper. Other fabrics (like satin lining material or quilter’s cotton) work best with a very shallow engraving so that the laser does not accidentally cut through the fabric.
If a fabric is dyed after being woven, the color revealed after engraving will be the lighter color of the undyed fiber. When engraving on a thinner material, darker colored fabrics work best as the contrast shows up well.
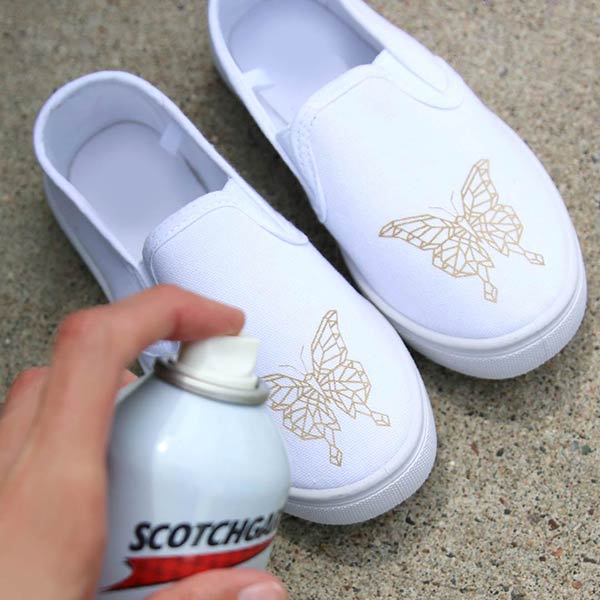
On very light-colored fabrics, if you use slower speed or higher power, the fibers will char slightly to leave a golden-brown color. This may create a desired look, but it is not recommended for use on items of clothing that get a lot of use as this effect will wash out with water. For items that won’t be washed, use a protectant spray for longer wear.
Fabrics We Tested
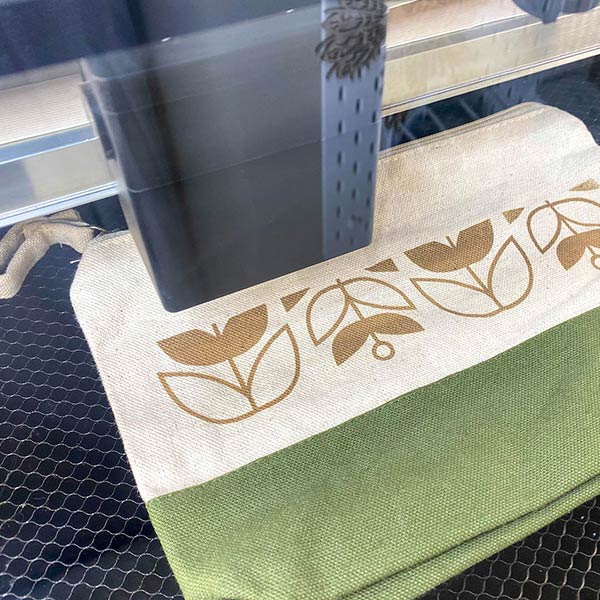
Canvas

SETTINGS:
Speed: 1000
Power: 10
LPI: 270
There’s no need to mask the fabric.
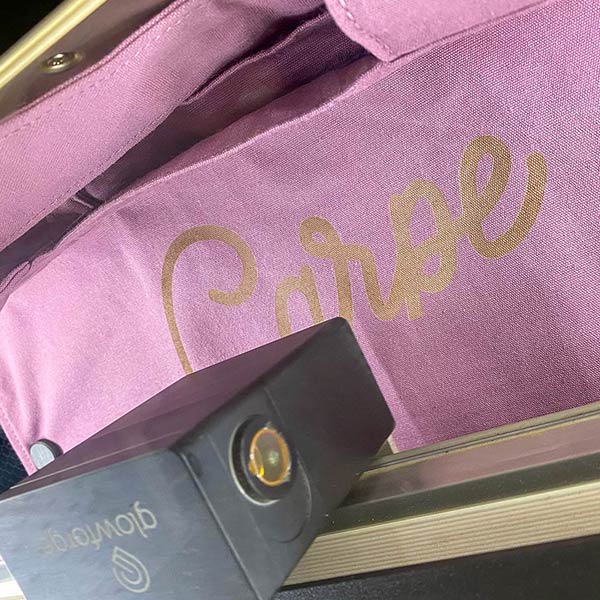
Nothing needs to be placed inside the pouch
Iron the canvas before engraving to ensure that it is flat.
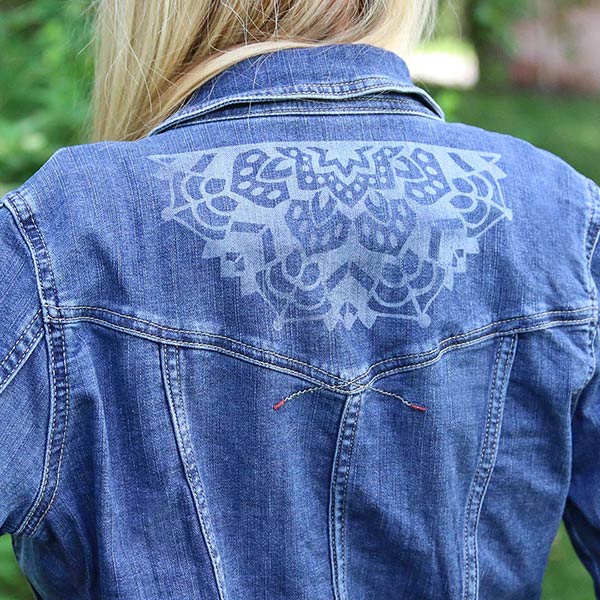
Denim
SETTINGS:
Speed: 1000
Power: 5
LPI: 225
Ther’s no need to mask the fabric.
Iron the denim before engraving to ensure that it is flat.
Darker denim, like the jacket pictured, works better than light.
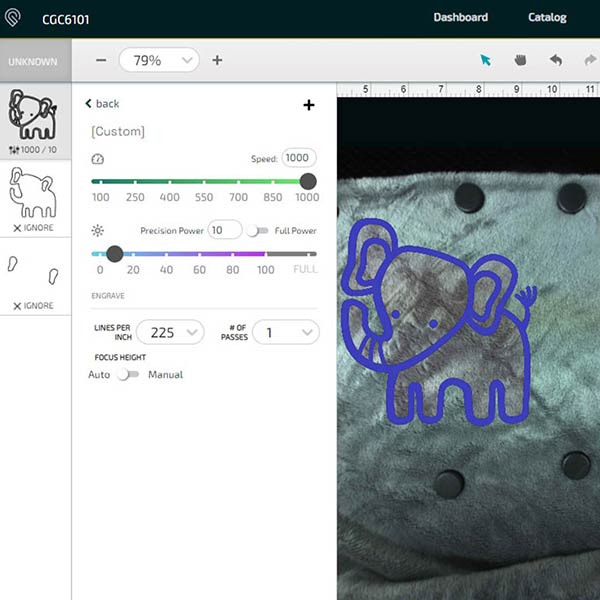
Polyester
SETTINGS:
Speed: 1000
Power: 5
LPI: 225
There’s no need to mask fabric.
Lay the fabric in the laser cutting bed as flat as possible, keeping anything that will obstruct the laser head toward the front of the machine.
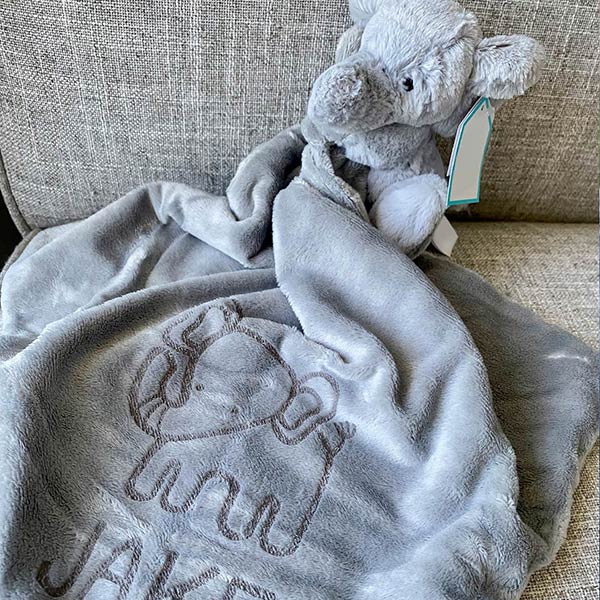
We used a pre-made Elephant Baby Soother for this project.
Corduroy
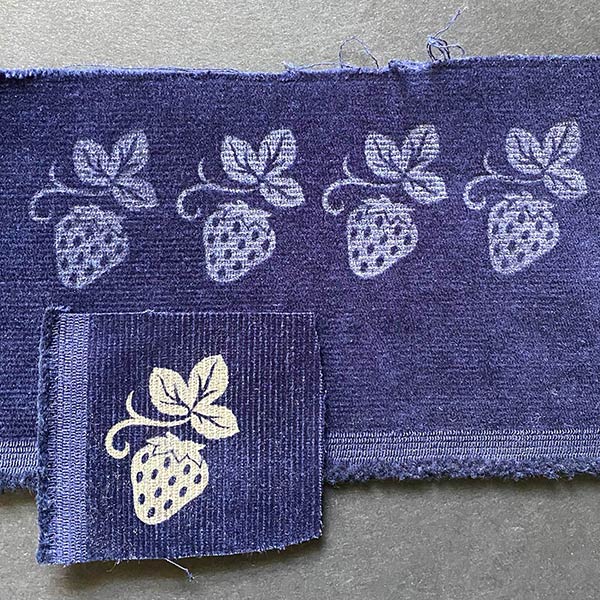
SETTINGS:
Speed: 1000
Power: 6
LPI: 225
There’s no need to mask the fabric.
Lay the fabric in the laser cutting bed as flat as possible.
This image shows the bottom sample before the fabric was washed and the top sample after it was washed.
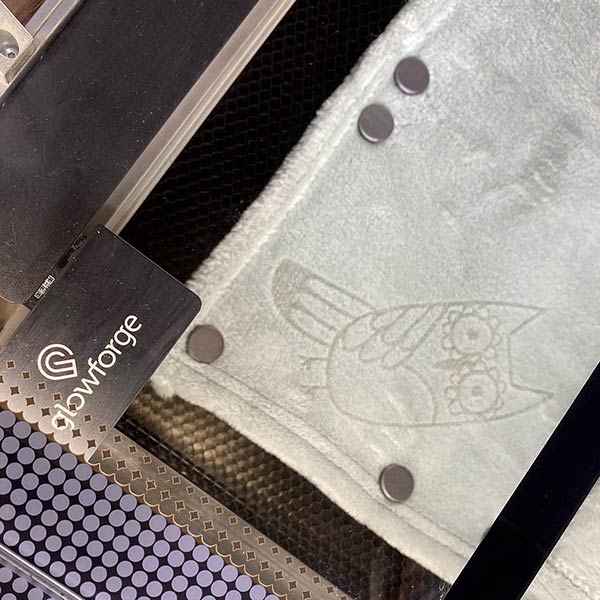
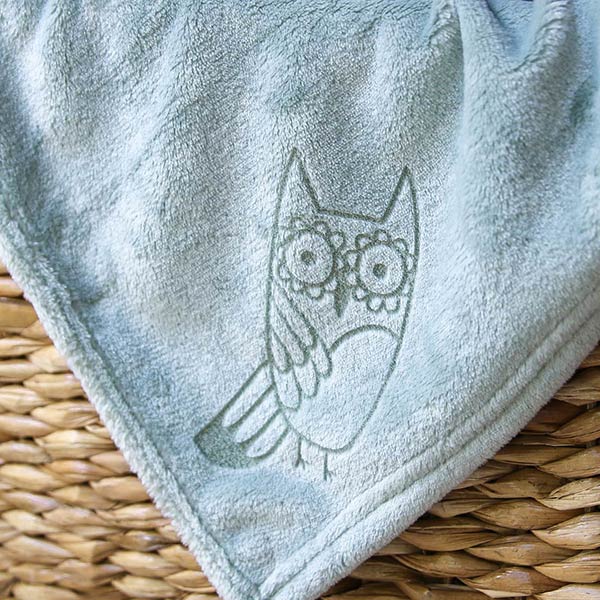
Fleece
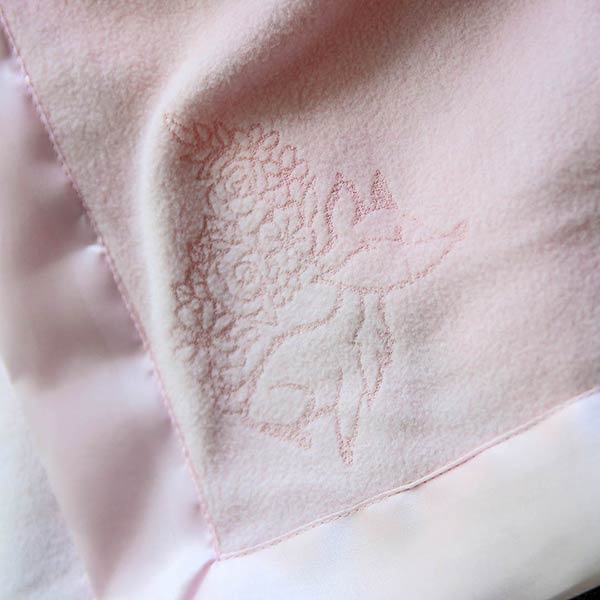
Speed: 1000
Power: 5
LPI: 225
There’s no need to mask the fabric.
Lay the fabric in the laser cutting bed as flat as possible.
We used this pink fleece baby blanket from Amazon.
Quilter's Cotton
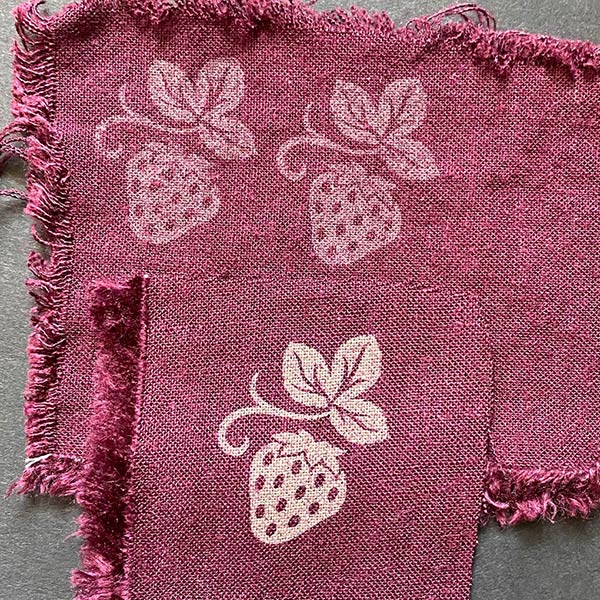
SETTINGS:
Speed: 1000
Power: 1 or 2
LPI: 225
There’s no need to mask the fabric.
Lay the fabric in the laser cutting bed as flat as possible.
This image shows the bottom sample before the fabric was washed and the top sample after it was washed.
Satin/Polyester Silk
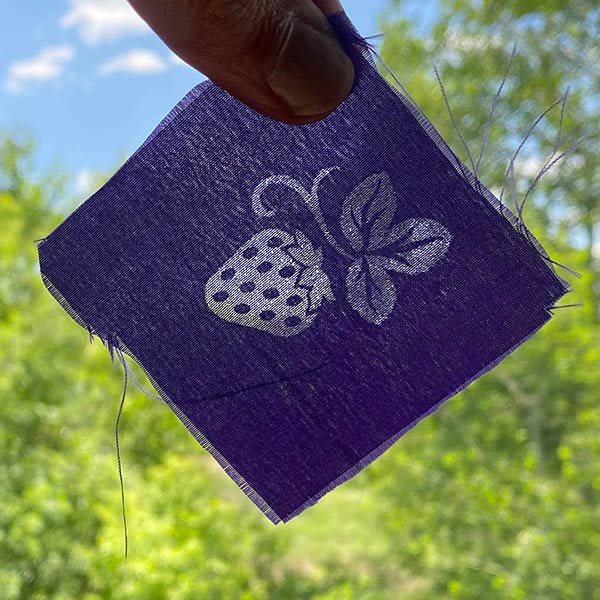
SETTINGS:
Speed: 1000
Power: 1
LPI: 225
There’s no need to mask the fabric
Lay the fabric in the laser cutting bed as flat as possible.
This image shows how laser engraving does compromise the integrity of the fabric, as the engraved areas are now sheer.
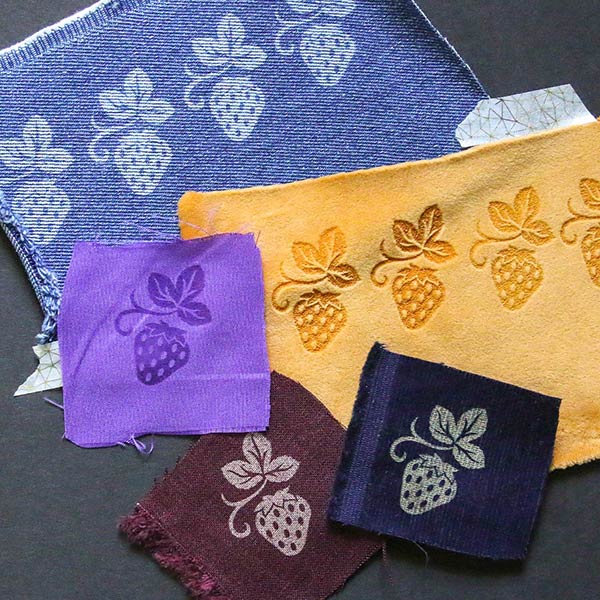
How to Make a Test Swatch
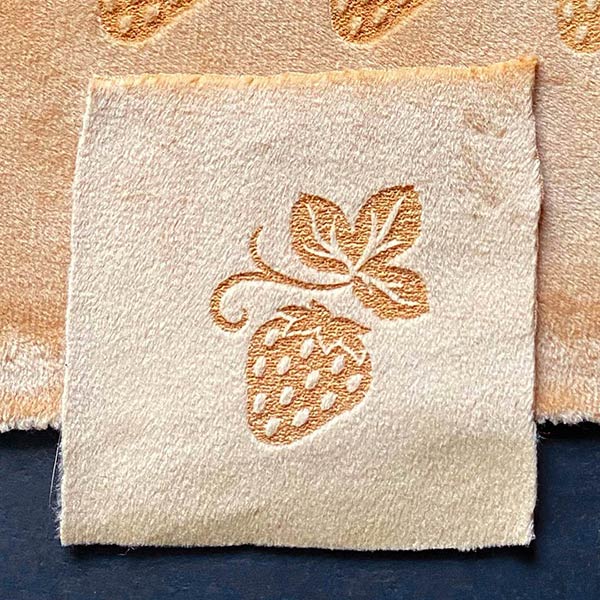
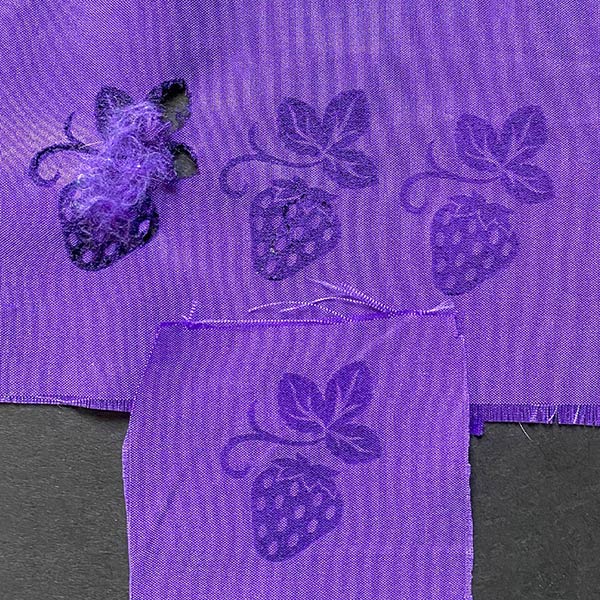
Make a small shape to test the engraving – a simple square or circle will suffice. For our swatches we used our Simply Strawberries Accent design (CGC2153), shrunk to about 1.5” tall so that we could test more fine detail.
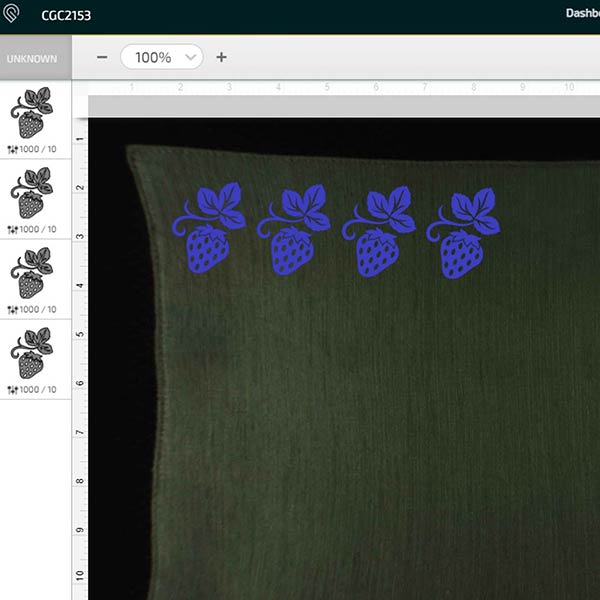
Copy and paste the design several times, close enough together that comparing the various settings will be easy. Depending on your laser cutter interface software, you may need to paste the design as a separate step or on a separate layer so that you can adjust the engraving settings individually rather than as a group
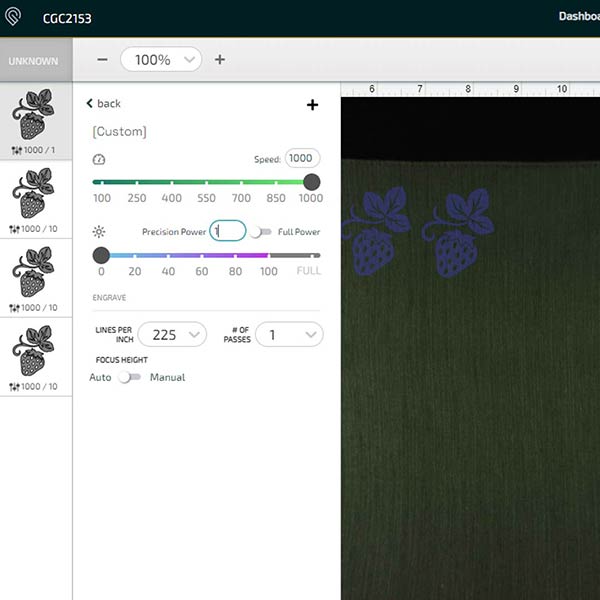
Make the first setting 1000 speed/1 power, then adjust the speed or power on the subsequent designs. If you desire a deeper or darker engrave, either adjust to a slower speed or a higher power setting.
Remember to take a screenshot or make note of which settings are for which swatch before you remove your fabric from the laser cutting bed.
If your engraved item is going to be on something like a blanket or item of clothing that will see a lot of use, it is always a good idea to put your test swatch through the laundry to see how the engraving looks after being washed.
Laser Engraving Fabric with a Glowforge Aura
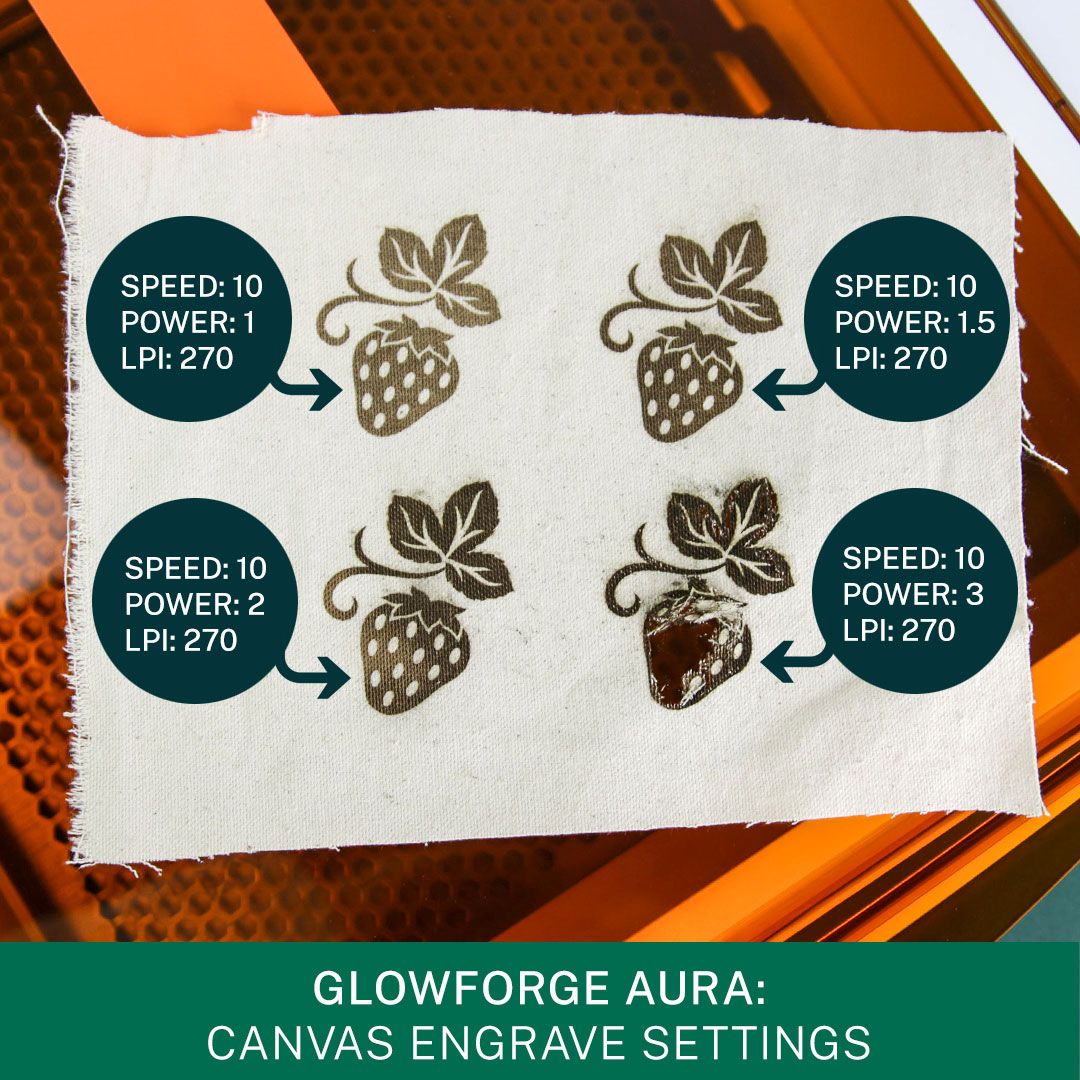
If you're laser engraving fabric with a Glowforge Aura, settings will vary when compared to the Glowforge Pro or similar devices. Just look at the difference small increases in power can make! The speed remained the same four all four tests as shown in our photo.
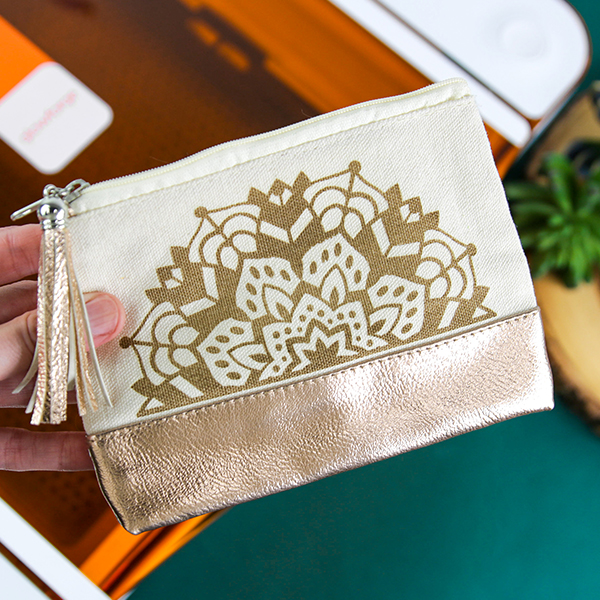
If laser engraving a fabric object with shiney surfaces, use masking tape or painters tape to help the laser focus on the area you will be engraving. When making our zipper pouch, we covered up the faux leather since it is more reflective of light. The tray within the Glowforge Aura also had to be removed.
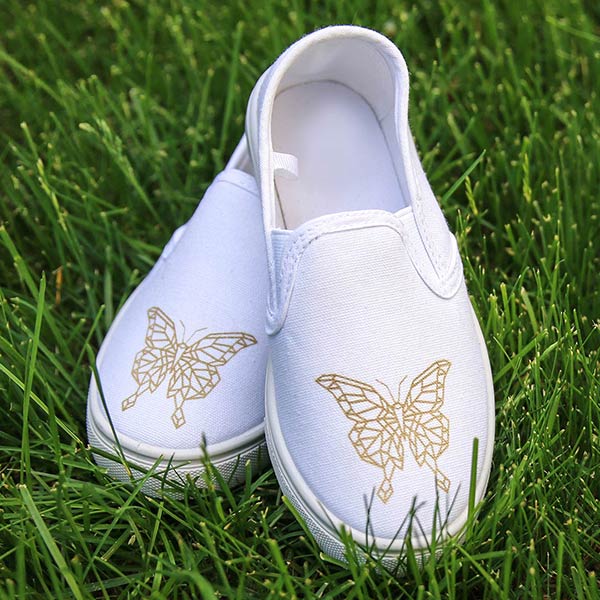
Now it's your turn to test the different ways of engraving fabric with your laser cutting machine. Make jackets and shoes, bags and wallets - anything that you can imagine. Do it all with hundreds of high quality SVG/DXF designs that are crafted with care and ready to use. Explore the collection and make each design your own.


