What Is Kerf?
Kerf is a term used to describe the amount of material removed by the beam of a laser as it cuts. Generally this measurement is around .005.” However, this number may vary depending on materials used, the speed of the laser, and the thickness of the materials.
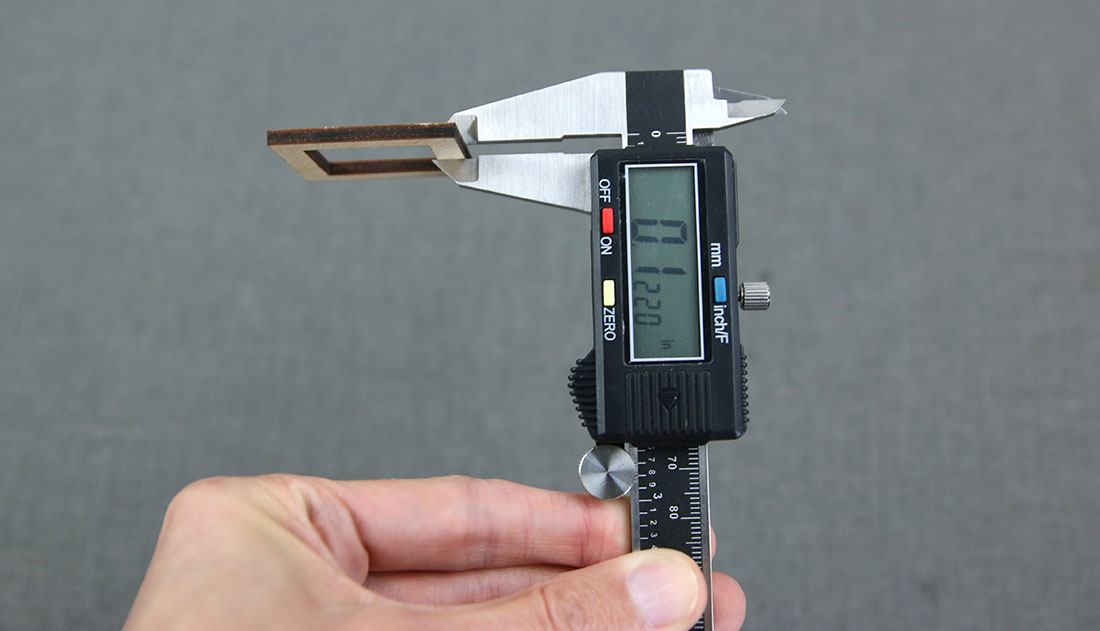
With any 3D laser cutting design, it is recommended that you always measure the thickness of your material with digital calipers before you cut any pieces for your design, to see whether any adjustments are needed to make slots fit with the material.
This is especially important when working with organic materials such as wood, or if your material is measured in millimeters instead of inches. The thickness of such materials can vary from batch to batch.
How To Determine The Kerf Of Your Material
The kerf of your material can be found using four simple steps:
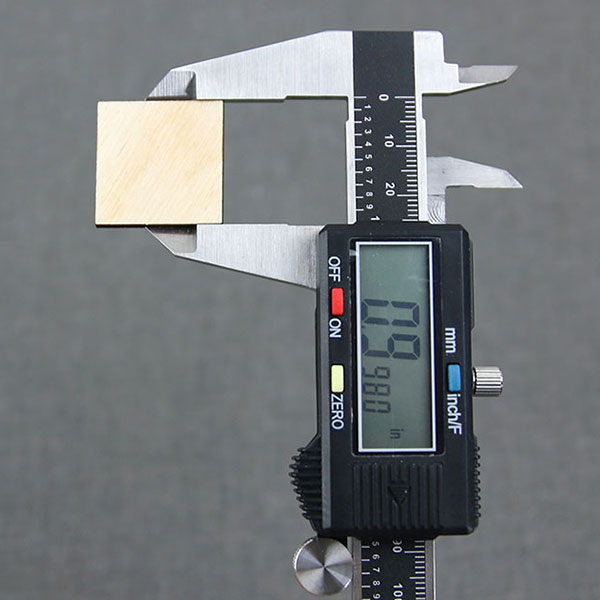
1. Cut a 1" x 1" square.
2. Using your digital calipers, measure the cut square and write down the resulting number.
3. Subtract your number from 1. This will tell you how much material was removed from both sides of the square.
4. Divide this number by 2 to calculate the kerf measurement.
Reasons for Kerf Adjustments
1. Some 3D laser cutting designs are designed for a specific material thickness, often .125” (1/8”). If your material is substantially thicker or thinner, you may need to adjust slots to fit and assemble your materials.
2. If you are using a material that has a different kerf value than the material used in the design, you may need to adjust the kerf offset to fit your material. The kerf value is the amount of material removed by the laser -- for example, the same laser beam may remove different amounts of acrylic vs. wood.
How to Adjust Kerf
Files can be adjusted using any software that can edit vector image files. This example uses Inkscape, a free vector editing software program. Other programs commonly used to adjust kerf are Silhouette Design Studio, Adobe Illustrator, CorelDRAW, and Affinity Designer.
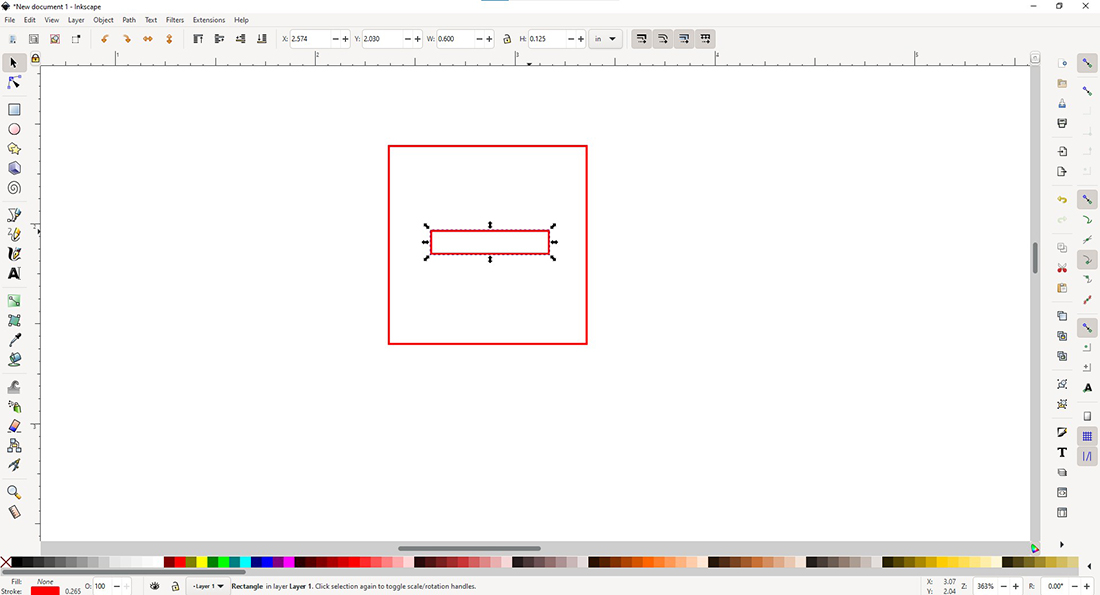
1. In your design program of choice, select the slot that you will be resizing. If the whole piece is selected, ungroup or release the compound path so that you can work on only the area that needs to be adjusted.
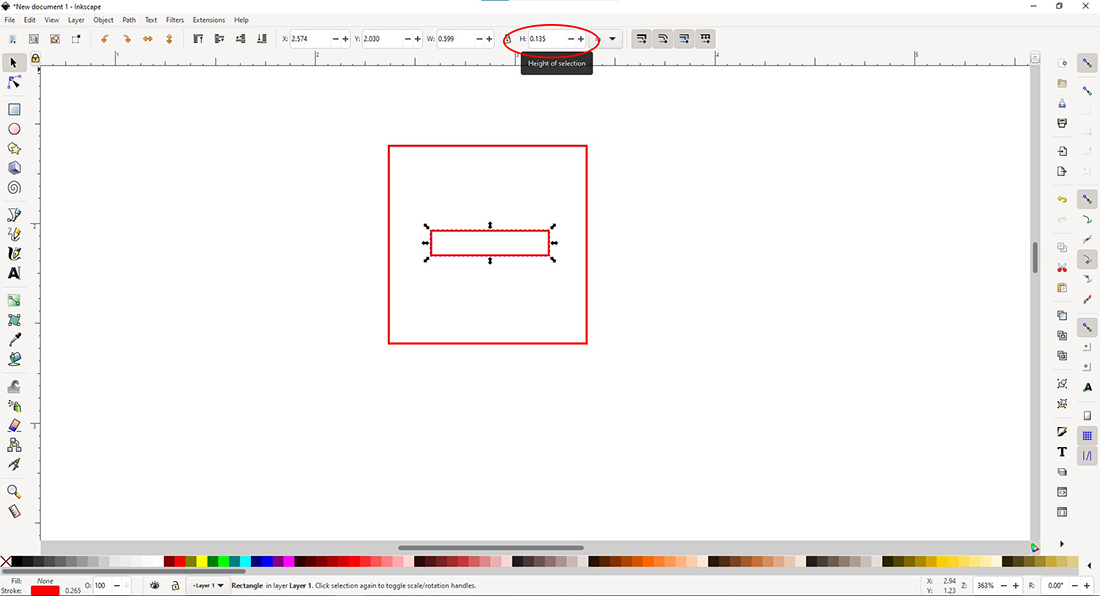
2. Click the box that lists the height of the slot and enter the thickness of your material.
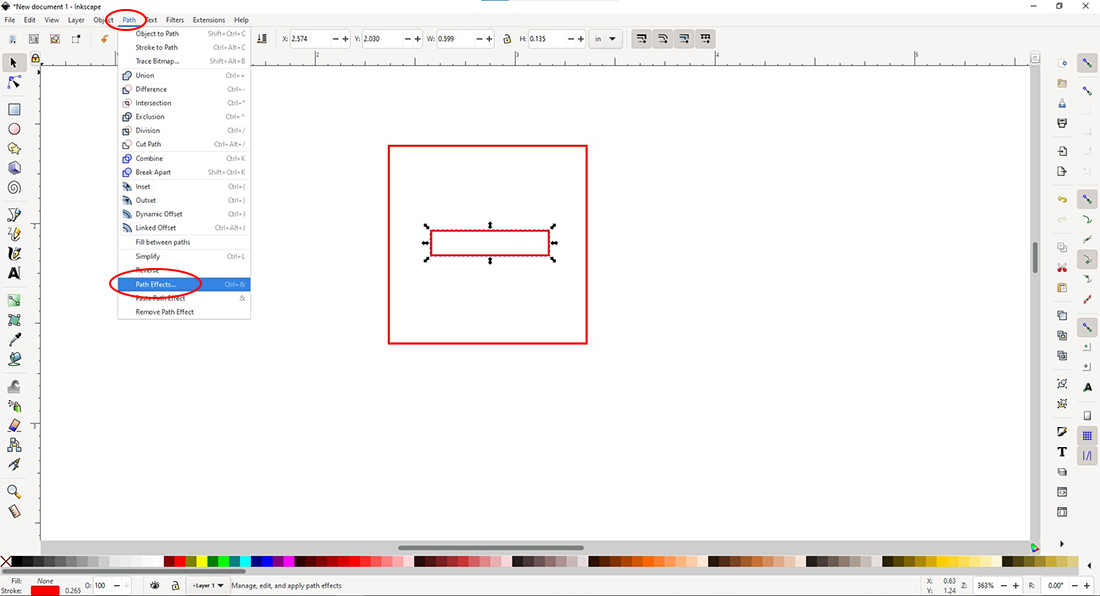
3. Now that you have sized the slot to properly fit the width of your material, you need to adjust the kerf. The easiest way to do this is by using the offset function in your vector software. Depending on your software, this may be found under “paths” or “path effects.”
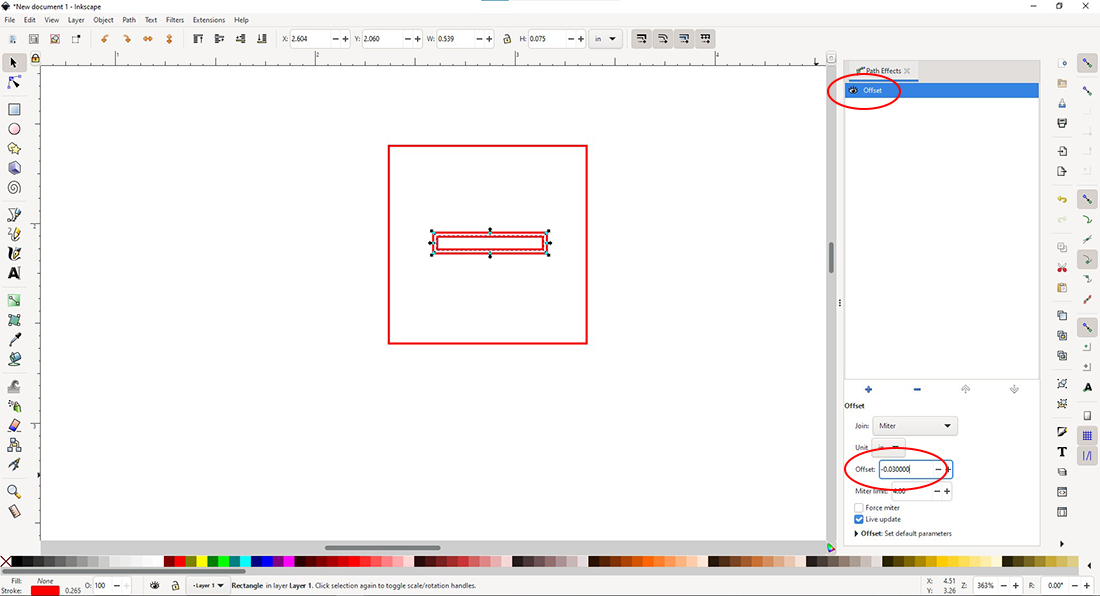
4. Enter the kerf value that you calculated earlier for your material into the offset box. When offsetting a path, a negative number will make the new path smaller than the original, and a positive number will make the new path appear larger. As you are compensating for the material that will be removed by the laser, you will want to use a negative number.
5. If your software still shows the original line, select and delete it, leaving only your kerf adjusted line.
6. Repeat steps 1-5 on any other slots that may require adjustment in the design.


